Monday 30 June 2014

Oatmeal Buttermilk Muffins

I hardly use buttermilk in my bakes. Flipped through the cookbook and delighted to use oatmeal since I still have half the pack ... plus buttermilk to bake some muffins.


Recipe adapted from Cakes and Bakes 500 Martha Day, with slight modification made in blue.
Oatmeal Buttermilk Muffins
Makes 12
Ingredients
75g rolled oats
225g buttermilk
115g butter at room temperature
75g soft dark brown sugar (I used 55g)
1egg at room temperature
115g all purpose flour
1teaspoon baking powder
1/4 teaspoon baking soda
1/4 teaspoon salt
25g raisins

Method :
1) In a bowl, combine the oats and buttermilk, and leave to soak for 1 hour.
(Since I'm using instant rolled oats, soaked them for about 10 mins )

2) Grease 12 muffin cups or use paper cases.

3) Preheat the oven to 200 degC. (180°C for my oven)
With an electric mixer, cream the butter and sugar until light and fluffy. Beat in the egg.

4) In another bowl, sift together the flour, baking powder, baking soda and salt. Stir into the butter mixture, alternating with the oat mixture. Fold in the  raisins. Take care not to over mix.
(Added a few blueberries into 3 muffin cups specially for me ... ^-^)

5) Fill the prepared cups two-thirds full. Bake until a skewer inserted in the centre comes out clean, 20-25 mins. Transfer to a rack to cool.

Yummy ! Couldn't wait to have one of these freshly baked oatmeal buttermilk muffins ... the texture is so soft and moist and the crust is slightly crispy ^-^!   "Chop" ! those with blueberries are mine !!!

Quick baked muffins for breakfast

Photobucket

I'm submitting this post to the 'Little Thumbs Up' event and the theme for June is 'Butter' organized by 
Zoe of  'Bake for Happy Kids',  Doreen of  'My Little Favourite DIY' and hosted by
Jozelyn of   'Spice up my Kitchen'.

And
I am linking this post to Cook-Your-Book#13 organized by Joyce (Kitchen Flavours).


Friday 27 June 2014

Clover Leaf Rolls


At last ... baked some "real bread"... hee hee LOL ^-^ ! I've seen many bread recipes and some special techniques shared in the blogosphere  : straight dough, gelatinized dough, overnight dough, tangzhong method, pull apart bread ... etc.etc. I'm quite confused actually. And seeing some of those complicated steps ... lagi confused! >?<

I don't have a bread making machine and I do know that baking bread is "very time consuming" from kneading the dough ... to proofing takes between 2 to 4 hours depending on the type of breads/buns that you are baking. Although I could attend to other matters and leave dough aside for proofing,  still I don’t get to eat my products until after some 4 hours or so.

Frankly, I prefer baking cakes or pies to bread. But I would like to try out some nice simple buns recipes. This cookbook has all kinds of delicious bread and bun recipes ... Sesame Seed Bread, Rosemary Bread, Focaccia, Potato Bread, Poppy Seed Rolls, Breadsticks etc. etc. Wow! How I wished that I'm Hermione and I could perform magic just 'abracadabra' Ta da ! ALL appeared on the dining table within seconds !! Ha ha wishful thinking isn't it ^w^ !

Okay must learn to walk before I could run or 'fly'... back to reality and back to basic .... I zoomed into this kinda 'basic and not too difficult' recipe of baking rolls... Clover Leaf Rolls.

Recipe adapted from Cakes & Bakes 500 Cookbook by Martha Day, original recipe yields 24 but I reduced the quantity by half to make 12.
Clover Leaf Rolls (Makes 12)
150ml milk
1 tablespoon caster sugar
25g butter at room temperature
1 teaspoon active dried yeast
1/2 egg
1 teaspoon salt
250g bread flour
Melted butter to glaze

Method
1) Heat the milk to lukewarm in a small pan, pour into a large bowl and stir in the sugar, butter and yeast. Leave for 15 minutes to dissolve and for the yeast to become frothy.

2) Stir the egg and salt into the yeast mixture.  Gradually stir in 220g of the flour, and then add just enough extra flour to obtain a rough dough.
(I used a pair of chopsticks to mix/fold in the dough ... like kungfu ... twist & turn around ^-^)

3) Knead the dough on a lightly floured surface until smooth.  This will take about 10 minutes.

4) Place the dough in a greased bowl, cover with clear film and leave it in a warm place until doubled in size, about 1.5 hours.

5) Grease 1 12-cup bun tray (I used  muffin pan). Knock back (punch down) the dough, and divide to 36 equal size balls.

6) Place three balls, in one layer in each bun cup. Cover the tray loosely with a clean dish towel and leave to rise in a warm place, until doubled in size, about 1.5 hours.

7) Meanwhile,  preheat the oven to 200°C. (Next time I will adjust to 180°C for my oven as the buns were burnt slightly ...) Brush the rolls with melted butter glaze.

Ta da ! Freshly baked.
8) Bake the rolls for about 20 minutes,  or until they are lightly browned.  Carefully turn out on to a wire rack and allow to cool slightly before serving.

Taste ok texture soft
Kneading the dough was a good arm workout for me .... so enjoying the momentum ... dust dust flour & knead knead knead. But experienced some arm muscle ache the next day >~< ....

Glad that we enjoyed these freshly baked warm soft rolls ... with a cup of hot coffee or juice. Think it's great to served with some soup too ^-^!

Have a nice weekend !

This post is linked to the event Little Thumbs Up (June 2014 Event: Butter) organised by Zoe (Bake for Happy Kids) and Mui Mui (My Little Favourite DIY) and hosted by Jozelyn Ng (Spice Up My Kitchen)


And
I am linking this post to Cook-Your-Book#13 organized by Joyce (Kitchen Flavours).

Wednesday 25 June 2014

Chicken Salad Slider

The weather has been "scorching" hot lately ... I'm in no mood to bake or cook even a simple decent weeknight dinner in the kitchen.

With some breads and hot dog buns 'standing in squad' on the dining table .... thinking of just to settle with some light sandwiches for our dinner.

Recalled this chicken salad slider .... a recipe of Paula Deen's which I've bookmarked. Since I've got most of the ingredients in the fridge... celery,  mayonnaise,  chopped almonds and some leftover steamed chicken from the previous day ... A quick fix of this cold chicken salad slider ^-^!
Recipe adapted from Paula Deen


CHICKEN SALAD SLIDER (servings: 12 sandwiches)
2 tablespoons fresh lemon juice
1/2 cup mayonnaise
1 teaspoon salt
1 teaspoon pepper
3 1/2 cups finely diced cooked chicken
1 cup finely diced celery
1/3 cup slivered almonds (chopped almonds)
12 mini slider rolls (wholemeal hot dog buns)
Before tossing with mayonnaise
Method:
In a small bowl, combine the lemon juice, mayonnaise and salt.
Toss with the chicken, celery, and almonds in a medium bowl.
Serve on mini slider rolls.


I've reduced the quantity by half and served on 2 wholemeal hot dog buns. Crunchy celery and almonds with tangy cold mayonnaise chicken ... yummy refreshing light dinner just for the two of us (my princess & I) ^-^!

This post is linked to Cook like a Star (Paula Deen and Deen brothers theme) organised by me, Bake for Happy KidsJoyce from Kitchen Flavours and Diana from Domestic Goddess Wannabe


Sunday 22 June 2014

Chicken Divan

I'm not a 'cheese person'. That’s why I hardly make non-bake cheese cake. But my big kids like cheese, especially cheese fries, pizza, pasta, cheese cake etc.
Whenever I cook spaghetti or pasta, sometimes my boy would paced in & out of the kitchen and dropped hint ... "put more Parmesan cheese".

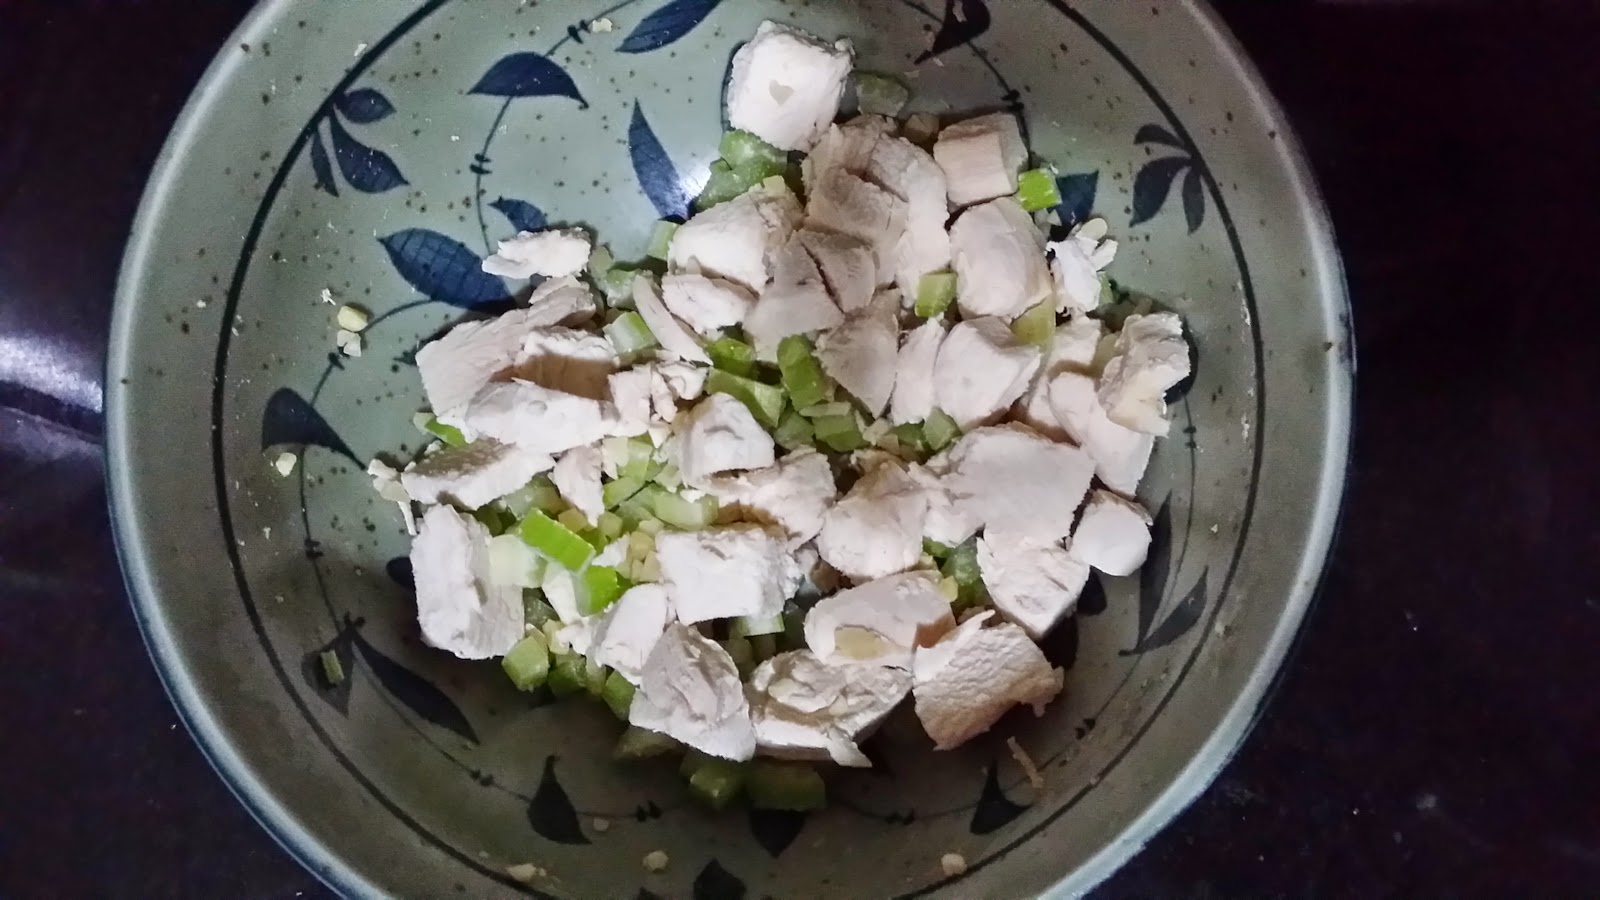
As this month's Cook Like A Star features celebrity chef Paula Deen, I have bookmarked 2 to 3 of her recipes to try out to participate in the event. So, I settled with this rather creamy and cheesy dish Chicken Divan as I knew they would be very pleased and delighted to have that for dinner. I reserved some cooked chicken to make a bowl of chicken salad.


I halved the original recipe adapted from Paula Deen and slightly reduced further for some ingredients adjusted to serve 3 - 4 pax with modification made in blue


CHICKEN DIVAN
2   (10-ounce) packages frozen broccoli, chopped. (I used fresh chopped broccoli 140g)  
6 cup shredded chicken, cooked (350g)
2 (10 3/4 -ounce) cans condensed cream of mushroom soup (1 can)
1 cup mayonnaise (7 tablespoons)
1 cup sour cream (7 tablespoons)
1 cup grated sharp cheddar cheese (grated cheddar cheese 60g)
1 tablespoon fresh lemon juice
1 teaspoon curry powder (omitted)
1/2 cup dry white wine (omitted)
1/2 cup freshly grated Parmesan cheese (45g)
1/2 cup soft bread crumbs (3 slices of toasted bread crushed into small chunky pieces)
2 tablespoon butter, melted (1 tablespoon)
salt and pepper, to taste

Directions
Preheat oven to 177°C
Remove the outer wrappers from the boxes of broccoli.
Open one end of each box. Microwave on full power for 2 minutes, until thawed.
Drain the broccoli and put into a 11X7 casserole dish that has been prepared with a non stick cooking spray.
Top with shredded chicken.
In a medium bowl, combine the soup, mayonnaise, sour cream, cheddar cheese, lemon juice, salt and pepper to taste.
Whisk together to make a sauce.  Pour the sauce over the broccoli and chicken.  Mix well with a spatula.

Pat down evenly and smooth with a spatula. In a small mixing bowl, stir together the Parmesan cheese, bread crumbs and butter and sprinkle over the top.
Bake for about 30-45 minutes.

Served with chicken salad tossed in Butterhead and cherry tomatoes
When the hot dish was placed on the dining table, I could smell strong aroma of cheese & toasted bread crumbs,  mushroom and garlic ... ? Garlic? But I didn't add any garlic. Opps ! Realised the I've poured a can of "cream of mushroom" ... with roasted garlic printed on the 2nd line of the label. But overall it tasted creamy delicious.
Crispy crust and creamy cheesy ... Looks good
My boy commented " This is very cheesy and creamy but nice ! I like this baked dish ... better than oily deep fried chickens... nice!".
My girl was hesitated for a 3RD helping .. she looked at the dish and looked her empty plate again ... couldn't resist the "temptation" ^-^! Enjoy!

This post is linked to Cook like a Star (Paula Deen and Deen brothers theme) organised by me, Bake for Happy KidsJoyce from Kitchen Flavours and Diana from Domestic Goddess Wannabe


And
Photobucket

I'm linking another BUTTER post to the 'Little Thumbs Up' event and the theme for June is 'Butter' organized by 
Zoe of  'Bake for Happy Kids',  Doreen of  'My Little Favourite DIY' and hosted by
Jozelyn of   'Spice up my Kitchen'.

Saturday 21 June 2014

Apple Crumble

When I saw Ann's post of this easy, healthy and delicious apple crumble, I love it. Thanks to Ann for sharing this.

For past few months,  my girl has been hinting "mom, pls don't put too much butter in your bakes ... I wanna cut down my weight ... few pounds". Or "mom, can make some low-fat fruity light snacks?".
Mom : "but you're not fat ... it's good to eat well anyway, that's why I used skimmed milk, low fat spread for most desserts ... I hardly bake rich butter cake or rich chocolate cakes or your favourite brownies lately ... "

 I made this crumble for our breakfast and glad that she liked it together with a glass of skimmed milk for a healthy breakfast meal to start the day.

Adapted from anncoojournal
Apple Crumble
4 Green apples (I used normal red apples cos my girl doesn't like green apples)
3 tbsp Sugar
1 tsp Cinnamon powder
1/4tsp Salt
2 tbsp Light Muscovado sugar or brown sugar
4 tbsp Oatmeal
1/3 cup Flour
30g Butter, cut to cubes (I used low-fat spread)

Method:
Peel, core and slice apple to wedges. (I cut into small cubes).

Mix sugar, cinnamon powder and salt on to apples and mix well with your hand. Pour apples into foil cups. (I used 4 ramekins).

Rub light muscovado sugar, oatmeal, flour and butter together to crumble with your finger tips and place on top of apples.

Bake at preheated oven at 170C for 20 minutes or until golden brown.

For other variations of fruits as shared by Cheryl of Bakingtaitai on her Easy ABC Fruits crumble.

Well,  let's have some delicious fuss free easy fruity crumble ! ^-^


Photobucket

I'm linking another BUTTER post to the 'Little Thumbs Up' event and the theme for June is 'Butter' organized by 
Zoe of  'Bake for Happy Kids',  Doreen of  'My Little Favourite DIY' and hosted by
Jozelyn of   'Spice up my Kitchen'.


Thursday 19 June 2014

Pearl Balls - Dim Sum

Dim Sum refers to a wide variety of light Chinese snacks usually enjoyed with tea.
I'm always very 'greedy' when having dim sum brunch at the restaurant or tea house (茶楼),  I tend to 'over ordered' and 'over eaten' cause wanna try a bit of everything... be it steamed,  deep fried or baked types. That's why I prefer to enjoy dim sum at the restaurant (especially dim sum buffet) vs homemade as I would not be able to make such huge varieties.  But still, I would occasionally dish out 1 or 2 types of homemade dim sum for my family on some weekends.

I haven't made dim sum for quite sometime. Made some steamed Lo Mai Kai 糯米鸡 was last December.

As my dim sum cookbook was 'lost & found' hee hee LOL ! ... decided to try some dim sum recipes that I haven't attempted from this cookbook ...  small meaty Pearl Balls 珍珠丸子 for our afternoon tea.


Pearl Balls 珍珠丸子
Adapted from the cookbook of Judy Lew
Ingredients: makes 18
Meat mixture
450g lean ground pork
1 Chinese sausage, minced
1/4 Cup : chopped bamboo shoots, Chinese mushroom soaked, rinsed and chopped.
1 tablespoon rice wine (I used brandy)
1 tablespoon soy sauce
1 teaspoon salt
2 tablespoons cornstarch
1 tablespoon sesame oil
(I marinated meat mixture and let it stand for 30 mins)

5 water chestnuts cut into quarters
1 Cup glutinous rice (soaked in water for 1 hour and drained)

Method
1) Combine meat mixture. Surround each piece of water chestnut with meat mixture to form a 4cm ball.


2) Roll each meat ball in glutinous rice.
3) Place in a steamer and steam for 25 minutes.

I have omitted the bamboo shoots and replaced with some finely minced water chestnut.

Served with some hot Chinese tea ... these small meaty balls are really tasty ... not overly filling for our tea snack.


I am linking this post to Cook-Your-Book#13 organized by Joyce (Kitchen Flavours).

Tuesday 17 June 2014

Cherry Lemon Pound Cake

Cherry Lemon Pound Cake

According to Joy of Baking "The name 'pound' was given to this cake because the original recipes contained one pound of butter, one pound of sugar, one pound of eggs, and one pound of flour. While the pound cakes we make today often have different proportions from the original, they are still wonderfully rich, moist, and buttery with a lovely golden brown crust."

Some recipes of a pound cake that I've seen is a more dense, heavier cake and because of its richness in butter, I seldom bake pound or butter cakes.

But when I saw the Orange Blueberry Pound Cake by
Fion@xuanhommama I fell in love with it ... a moist yet not too buttery cake to me. The size of this loaf is just nice for me too. Noticed that the method is slightly different (from my last bake of a pound cake more than a year ago) ... the salt is mixed with eggs while mostly to sift with flour (even for most muffins & cakes recipes I've attempted as salt and flour are considered as dry ingredients). But I guessed that it doesn't really matter, so long it turned out to be a nice yummy cake.

I used the recipe adapted from Fion@xuanhommama (thanks for sharing). Aiyoh ...hee hee... It was quite challenging for me to read books or baking recipes in Chinese.  Speaking conversational Mandarin is okay for me but when comes to reading or writing Chinese ... >o<... 我满头大汗 ... Still, glad that I've managed it ^-^!

Since my big kids don't really fancy blueberries, and I don't have bananas,  I used some fresh cherries (pitted & cut halves) instead and baked this .... Cherry Lemon Pound Cake.


My boy commented "cake tasted nice! Don't put cherries will be better...." >o<! (Faint ah.)
My girl took a piece and said "oh again the Lemon Blueberry Bread without blueberries is it ?" Gosh! LOL!

I like this moist light buttery pound cake with zesty lemon fragrant :D

Photobucket

I'm linking another BUTTER post to the 'Little Thumbs Up' event and the theme for June is 'Butter' organized by 
Zoe of  'Bake for Happy Kids',  Doreen of  'My Little Favourite DIY' and hosted by
Jozelyn of   'Spice up my Kitchen'.

Pizza Muffins

Pizza Muffins ... have you tried these? When I shared with my big kids that I'll be making some pizza muffins for afternoon snacks ... using muffin pan to bake them ... they were like ... "huh?! ...so it's pizza or muffin?  how does it taste ?".
"I don't know ... you should tell me later when you eat these !" hee hee ... sounded fierce ?!? but actually that was in a "sweet but sharp tone" ... LOL

I saw this recipe two months ago in April baked by Happyhomebaking that she adapted from  Donna Hay . But I didn’t have time to try it out then.

Recently while viewing some recipes posted in the "Cook Like A Star" some past events, chance upon the name Donna Hay ... Reminded me of the pizza muffins.
A quick search in the kitchen ... with some ham, cheese, canned pineapple, pasta sauce readily available, made these savoury pizza muffins.

Made 2 in square ramekins
Pizza Muffins on cooling rack
Pizza Muffin (recipe adapted from Donna Hay with slight changes made in blue)
Ingredients:
450g self-raising flour, sifted
1 teaspoon baking powder
180g grated cheddar
150g ham, chopped
150g chopped pineapple, drained
160ml vegetable oil
2 tablespoons tomato paste (I used pasta sauce)
2 eggs
250ml milk

Method:
1) Preheat oven to 180°C

2) Place the flour, baking powder, 1 cup (120g) cheese, ham and pineapple in a bowl and mix to combine.

3) Place the oil, tomato paste, egg and milk in a bowl and whisk to combine.

4) Add the egg mixture to the flour mixture and mix until just combined. (I used a spatula)

5) Spoon into 12 x ½ cup-capacity (125ml) muffin tins and sprinkle with remaining cheese.


6) Bake for 30 minutes or until cooked when tested with a skewer. Makes 12.

I reduced the quantity slightly for 8 muffins as I was not really sure if my big kids would like it. Line 6 with muffin case and 2 square ramekins.

Freshly baked! ...the aroma of these muffins ... smells like nachos ... smells of pizza too... kinda cheesy texture with savoury taste.

My boy was surprised that it tasted like pizza. "Can make these pizza muffins again ? Nice ... good to add some pepperoni ...". Okay !

I gave a few pizza muffins to one of my good old "baking kakis" 老朋好友 whom stayed nearby. Happened to know that she was so busy on weekends ... too busy to even prepare food / cook for dinner. Busy on the road ... chauffeur her kids for some activities. ZOOM ...! Pick up the muffins and off she went to the next "pick up point". Glad that her kids had some quick bite and liked these savoury muffins too ^-^ Enjoy !


Friday 13 June 2014

Stir-fried sweet & sour chicken (with apricot jam)


Few weeks ago, I was browsing these magazines in the Library cafe while waiting to meet a colleague came from overseas headquarters. It was a Saturday afternoon and we had arranged for coffee before heading to the office for a special workshop. Saw this recipe that caught my attention ... using apricot jam in the cooking. I've never used apricot jam (or any other jam) in cooking although I've used it in baking cakes and cookies or as spread in swiss rolls.
My usual cooking of a sweet & sour dish would be first pan fried or deep fried the seasoned meat coated with some flour,  set aside. Stir fried some vegetable like capsicums, carrot with some onions / garlics and make the sweet & sour sauce using tomato ketcup or plum sauce, add some sugar and lime juice then pour back the meat, quick tossing till meat immersed/coated the sauce with flavour.

Decided to try this since it's quick and easy:

Stir-fried sweet & sour chicken
Adapted from Everyday Food magazine with slight modification made in blue

Serves 4, total time : 20 mins
Ingredients:
3 tablespoons vegetable oil, divided
1.5 pounds (680g) boneless skinless chicken thighs, cut into 1-inch pieces. (I used 400g chicken breast, season with 1/2 teaspoon salt for about 30 minutes)
Salt
1 three-inch piece fresh ginger, peeled and cut into matchsticks.
5 cloves garlic, thinly sliced
1/2 small serrano chile, seeded if desired and thinly sliced (omitted)
1/2 cup (115g) apricot jam (I used 80g cos that's all left in the jar)
1/4 pineapple, cut into 1/2 inch cubes (1.5 cups) (I used canned pineapple)
2 bunches scallions (spring onions), trimmed and cut into 2-inch pieces (replaced with some Japanese cucumber)
2-3 tablespoons white vinegar

Method:
1) Heat a large cast-iron skillet over high 1 minute (I suppose a frying pan or wok can be used), then add 1 tablespoon oil and swirl to coat. Add chicken, season with salt, and cook 1 minute. Stir in ginger, garlic, and chile and cook until chicken is almost cooked through, about 3 minutes.

2) Stir in jam and pineapple, then add scallions. Cook until chicken is cooked through and scallions are bright green and tender, about 3 minutes. Season with vinegar and salt.
Serve with rice.

As my big kids don't eat spring onions, so I substituted with Japanese cucumber since I've got some in the fridge. Interestingly, this dish is delicious ... Although no sugar added, guess that the sweet tangy apricot jam 'infused' pineapple & vinegar striked a balance of the sweet & sourish taste.  They liked it and not surprised that they asked for another bowl of rice. Really tasty!

BTW, did I missed out some steps ? .... as I read through the recipe again,  I was wondering what happened to the balance 2 tablespoons of vegetable oil .... anyway I poured all 3 tablespoons of oil into pan.^-^


I am linking this post to Cook-Your-Book#13 organized by Joyce (Kitchen Flavours).

Tuesday 10 June 2014

Peach Cobbler

The dessert cookbook that I owned has few recipes on Cobbler under the section of 'Hot Low-Fat Puddings & Desserts'. Decided to try out a small portion for our dessert since the preparation and steps are rather simple and easy.

According to Information

A cobbler is a baked fruit-based dessert that is a cousin to the crumble and the crisp. Unlike a crumble, which is topped with a dry crumbly streusel topping before baking, the crumble is covered in a batter that often involves eggs and milk.
Americans and Brits both make a habit of cobbler, but American cobblers -- frequently made from fresh apples, peaches, blackberries or cherries -- are more commonly eaten for dessert, with a topping that rises and forms a kind of giant dumpling. In the U.K., a cobbler is typically a savory dish like a lamb casserole, covered with a biscuit or scone topping that is spooned on into individual toppings across the top.


Peach Cobbler  (recipe adapted from the cookbook -Martha Day serves 6 but I half the recipe)
Serves 3
700g peaches, peeled and sliced
20g / 1.5 tablespoons sugar
1 tablespoon peach brandy (omitted)
1 tablespoon fresh lemon juice
1 teaspoon cornflour

For the topping
57g plain flour
1 teaspoon baking powder
1/4 teaspoon salt
10g ground almonds
30g sugar (reserved 10g to sprinkle on dough top)
1 tablespoon low-fat butter/spread
35ml skimmed milk
1/4 teaspoon almond essence
Some prepared ingredients
Method:
1) Preheat the oven to 220°C (190°C). In a bowl, toss the peaches with sugar,  peach brandy,  lemon juice and cornflour.  Spoon the peach mixture into a 2-quart baking dish.

2) Using a fine sieve, sift flour,  baking powder and salt into a mixing bowl. Add the ground almond and 20g of the sugar. With 2 knives, cut the spread until the mixture resembles coarse crumbs.

3) Add the milk and almond essence.  Stir until the mixture is combined.

4) Drop spoonful of the almond mixture on to the top peaches and sprinkle with the sugar.


5) Bake for 30-35 minutes until piping hot. The cobbler topping should be light browned.  {PS: I saw some other cobbler toppings are baked to golden brown}
Served hot, with ice cream, if you like.

This small portion is just the right serving for our after dinner treat. The mounds of golden brown biscuits that are crisp on the outside and soft and flaky on the inside. Together with a little natural sweetness of the soft peaches ... delicious!
Before I knew it ... I was requested to make Apple Cobbler ... ^o^.

Photobucket

I'm linking this post to the 'Little Thumbs Up' event and the theme for June is 'Butter' organized by Zoe of  'Bake for Happy Kids',  Doreen of  'My Little Favourite DIY' and hosted by Jozelyn of   'Spice up my Kitchen'.

And
I am also linking this post to Cook-Your-Book#13 organized by Joyce (Kitchen Flavours).

Sunday 8 June 2014

Vietnamese Fresh Spring Rolls

I like to pick up a copy of these free magazines in Cold Storage. Sometimes I would just flip through the pages for some meal ideas, recipes. And sometimes,  of course just keep ... keep... keep the magazine  ... bookmark certain pages but no action LOL..

Saw this light and easy Vietnamese spring rolls and decided to wrap some as appetizer or my light meal.
Once the sheet of rice paper is dipped quickly with water, it will be translucent, soft and delicate to handle. I broke it slightly ... must be gentle to it when pulling and folding. Overall ,the spring rolls tasted refreshing. I suppose it's healthier vs any fried spring rolls that's rather oily. You may add as many fresh ingredients as you like ... eg. carrot, lettuce, bean sprout etc. to the roll. 

Vietnamese Fresh Spring Rolls
Recipe adapted from Bell Tay
Ingredients serves 4, stated in picture.

Method :
1) Soak rice vermicelli in water at room temperature for about 20 mins then blanch with boiling water for about 1 min and strain. Divide into four portions. 

2) Wet 1 sheet of rice paper in a shallow dish filled with room temperature water. Remove and lay flat on a plate. 

3) Lay in a row across the centre of the rice paper,  in this order : a piece of butterhead lettuce,  a couple of cucumber strips, a portion of rice vermicelli and 1 prawn (I replaced with some shredded cooked chicken meat).

4) Fold left and right sides of rice paper in over filling, then fold the bottom edge (nearest to you) over the filling. Roll away from you, ending at the opposite edge.

5) Wrap the other 3 rolls, following steps 2-4. Serve with hoisin sauce on the side. 

I've forgotten to add a bottle of the hoisin sauce to the shopping cart and do not have the ingredients to make the traditional sauce.  I just pour some sweet black sauce for dipping.  

Well, another great idea for my light luncheon in office as I could put all the prepared ingredients in the pantry fridge. When it's time to eat, simply wet the rice paper with water and roll roll roll ^-^ Enjoy !

I am linking this post to Cook-Your-Book#13 organized by Joyce (Kitchen Flavours).

Saturday 7 June 2014

Curry Triangles

It has been ages (probably more than 10 years) since my last snacks or dim sum making using this cookbook with recipes on baked, fried or steamed snacks and some other meals. I don't have a conventional oven in the kitchen then. So I could only make some fried/steamed dim sum occasionally like Siu Mai (烧卖), Shrimp Dumpling (虾餃), BBQ Pork Buns (叉烧包), Fried Taro Turnovers (芋角) etc. for afternoon breaks or family gatherings where I could contribute some snacks.

Past few years I've been too "engrossed" with baking of cakes and pies during my free time .... searching or using recipes on websites, browsing cookbooks in the library etc. etc. Gosh ! I have totally forgotten its existence until I "accidentally" found it amongst the pile of books on the book shelve. 

Decided to bake something using recipe from this cookbook .... Curry Triangles to bring some over to my sister's place for our coffee/tea gathering. 


Curry Triangles (adapted from the cookbook of Judy Lew, some slight modification made in blue)
Ingredients: makes 22
Pastry
187g all purpose flour
1 tablespoon sugar (I used caster sugar)
1/2 teaspoon salt
113g cold butter
1 egg yolk
2 tablespoons cold water
 Glaze : 1 egg yolk & 1 teaspoon soy sauce

Filling (A)
225g boneless chicken breast, minced
1 tablespoon sesame oil
1 tablespoon soy sauce
1 tablespoon rice wine (I used brandy)
1 tablespoon cornstarch
1 teaspoon sugar
1 teaspoon finely minced peeled fresh ginger
1 garlic clove, minced.
Toss and marinate chicken with ingredients (A) and let stand for 2 hours.

For frying the filling:
1 tablespoon oil
Some minced onions (about 1 tablespoon)
2 teaspoons curry powder
2 tablespoons oyster sauce (vegetarian mushroom oyster sauce)
1/2 teaspoon sugar
1 tablespoon rice wine (omitted)
1 tablespoon cornstarch dissolved in 5 tablespoons of chicken stock (water)

Method:
1) Heat wok or pan over medium heat, add oil. Stir-fry chicken and onions until chicken is opaque.

2) Add remaining ingredients,  bring to a boil and thicken with dissolved cornstarch mixture. My total cooking time about 8 mins.
Set aside. (Can be prepared ahead).

3) Prepare the Pastry
Combine flour,  sugar and salt in a big bowl. Cut the butter into small pieces and blend into the flour mixture with a pastry blender or two knives. The mixture should look like coarse crumbs.


4) Combine egg yolk and cold water.  Beat together with a fork just until combined.

5) Add egg mixture to flour mixture and stir with a fork to moisten. Flour mixture should just come together.  Add a little more water if mixture is too dry.

6) Cover and chill mixture for 15 minutes.  Turn dough out onto a light floured surface. Gently knead just to smooth out.

7) On a floured surface, roll dough into 1cm thick sheet and cut out 10cm rounds. (I used a 8cm cutter).
Use flour to keep fingers from sticking during handling of the dough. Place *1 tablespoon filling in the center of round. (*amount may vary depending on the size of your rounds)
8) Bring up / fold up the edges to form a triangle.  Can also be made into a crescent by folding round in half and crimp edges to seal. Place on a baking sheet, brush with glaze. Bake at 190°C (180°C) until golden brown (25 - 30 mins).


Maybe I didn't roll the dough thin enough,  I could only make 18 Curry Triangles puffs. But overall, the pastry crust is buttery fluffy, not too thick. My boy took a piece and he commented "nice & tasty, the curry is not too hot & spicy,  just nice !" ^-^
Okay, packed some to share with my sisters.

Photobucket

I'm linking another BUTTER post to the 'Little Thumbs Up' event and the theme for June is 'Butter' organized by 
Zoe of  'Bake for Happy Kids',  Doreen of  'My Little Favourite DIY' and hosted by
Jozelyn of   'Spice up my Kitchen'.

And
I am also linking this post to Cook-Your-Book#13 organized by Joyce (Kitchen Flavours).