Friday, 12 June 2015

Lavender Cookies

I suddenly had craving for some home-baked cookies recently .... hee .. hee ... Saw this recipe in the cookbook which I've bookmarked sometime ago ... besides .. I've got lots of dried lavender flowers to try out in baking !


Easy to bake these yummy fragrant lavender cookies with just few steps to follow. They are best pair-off with a cup of hot beverage but I like it with a glass of cold chocolate milk ... yes, in such warm and humid weather lately.

Recipe adapted from the cookbook "Cakes and Bakes 500" by Martha Day, below my slight modification and notes made in blue.

Lavender Cookies
Makes about 30
Ingredients :
150g unsalted butter, softened
115g caster sugar  (I reduced to 80g)
1 egg, lightly beaten
15ml/1 tablespoon dried lavender flowers
175g self-raising flour
Some fresh leaves and flowers to decorate

Method :
Preheat the oven to 180ºC, position the rack in the center. The temperature of the oven may vary, do adjust accordingly.

Grease two baking sheets.

Cream the butter and sugar together with electric mixer. Stir in the egg. Next, mix in the dried lavender flowers and the flour.
Drop spoonful of mixture on the baking sheets.

Bake for 15 - 20 minutes or until the cookies are golden.

Remove the cookies from the baking sheet and cool on a wire rack before storing them in airtight container.

If you wish, serve with some fresh leaves and flowers to decorate.

Enjoy ^-^!


Sharing this post with Cook Your Books #24 
Hosted by Joyce of Kitchen Flavours

Cook-Your-Books


Wednesday, 10 June 2015

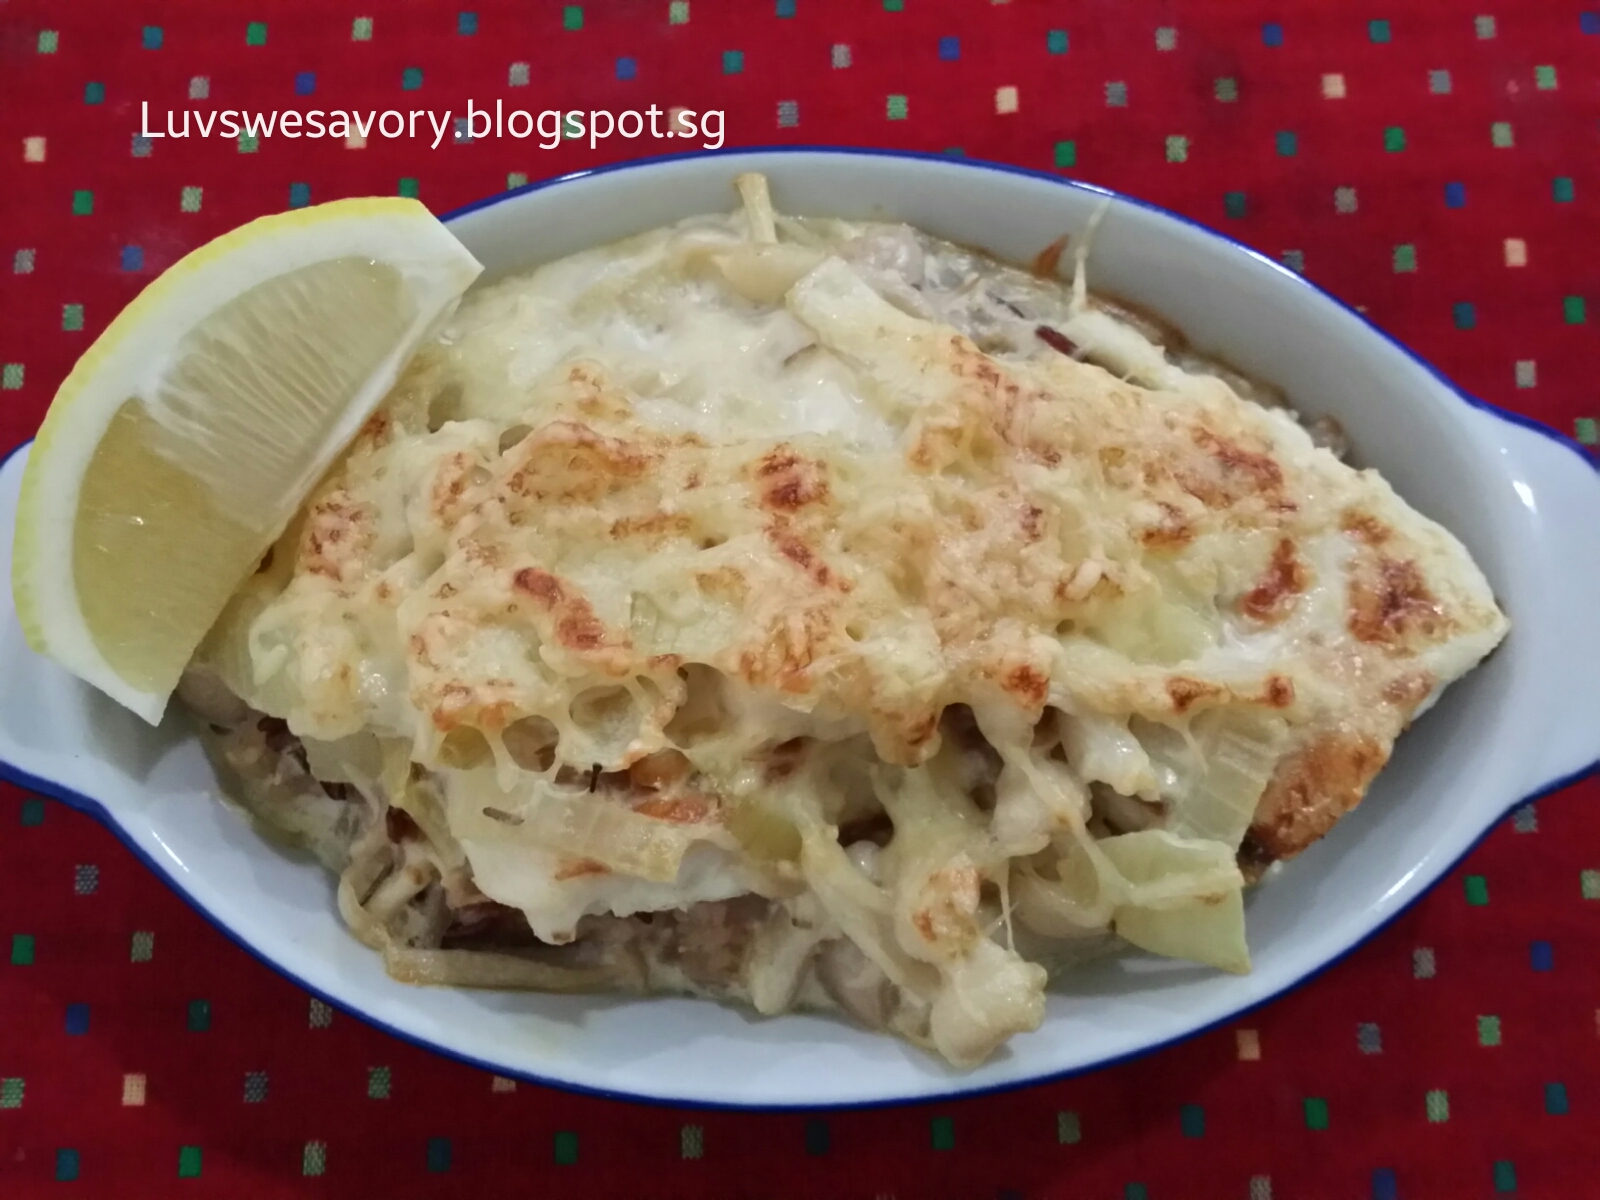
Easy Baked Fish with Rice

Cheesy baked rice is one of my big kids' favourite. I cook these often with variations using chicken, mushrooms or fish fillet etc. To make the baked rice more flavourful and creamy texture, I added some cream of mushroom soup to it. Pretty easy to prepare and it's done in about half an hour.


Baked Fish with Rice
Ingredients:
(makes 3 servings)
To make the sauce :
300g Fish fillet, cut into big chunks and seasoned with pinch of salt for about 10 ~ 15 minutes
Half big onion, diced
3 tablespoons Olive oil
200ml Cooking Cream
200ml water
2 tablespoons cream of mushroom soup (from a can of Campbell soup)
some Parmesan cheese
Salt & ground pepper to taste
Garnish with wedges of lemon.

To cook the rice :
1.5 cup mixed brown rice
*per rice cooker measurement cup
100g Shimeji mushroom (1 pack)
2 tablespoons cream of mushroom soup


Method:
1) Mix together the washed rice grains, cream of mushroom, Shimeji mushroom and some water and cook accordingly using the automatic electric rice cooker.

Once the rice is cooked, make the sauce.


2) Heat a frying pan with medium flame. Add 2 tablespoons of olive oil and pan fried the fish fillets, about 2 - 3 minutes on each sides till lightly browned. Dish onto a plate and set aside.

3) Saute diced onions with 1 tablespoon of olive oil in a frying pan until translucent and lightly browned.


3) Pour in the cooking cream and cream of mushroom. Stir occasionally, add the water. Dash of salt and ground pepper and bring to a boil.

4) For each serving, scoop some cooked rice into an oven-proof dish. Top with the cooked fish fillets.

5) Pour the sauce onto each dish and sprinkle top with some Parmesan cheese.

6) Bake in preheated oven at 180°C for about 10 ~15 mins or until the cheese turned golden brown.

Note: Do adjust the taste and the amount of sauce to your preference.

Dinner is ready :D

To serve, garnish with some wedges of lemon.


I like to squeeze the lemon juice on my baked fish with rice ... my way of enjoying fish with tangy taste ^-^!

Happy cooking :D

♡~~♡~~♡


Linking this post to Little Thumbs Up Event : June 2015 Theme Cream
Organized by 
Zoe from Bake for Happy Kids and Doreen from my little favourite DIY

and hosted by Diana from The Domestic Goddess Wannabe


Tuesday, 9 June 2015

Swiss Roll

It has been a while since I last made swiss roll cakes for my family.

When I baked the chiffon cakes recently, I remembered some chiffon swiss roll recipes that yielded fluffy soft texture which I've made about 2 years ago.


I always have mixed feelings when I make swiss rolls. Sometimes if the rolling turned out well with no cracks, I was happy and don't wish to frost any cream on it. But I would also like to beautify it with cream and toppings etc. But of course if there's crack in the roll ... hee.. hee .. just camouflage with frosting !

Here's sharing this fluffy soft and moist roll cake adapted from Cookpad

Recipe source : Cookpad, below my slightly modified version using some methods I'm comfortable with in making swiss rolls.

Swiss Roll
Ingredients (makes a 25cm x 25cm roll cake)
For the egg batter :
4 egg yolks
70 grams Top flour
25 grams Caster sugar
30 grams Vegetable oil
30 grams Water

For the Meringue :
4 egg white
25 grams caster sugar
1/4 teaspoon cream of tartar

For the filling :
250ml Whipping cream
20 grams caster sugar
1 teaspoon vanilla extract

Method :
1) Sift the flour and set aside. You will need a baking sheet/tray 25cm x 25cm size, line with parchment paper.
Preheat the oven to 180°C.

2) Separate the eggs into yolks and whites.
(the size of an egg is 60g with shell)

3) In a clean mixing bowl, whisk the cold egg whites and cream of tartar till foamy using the electric mixer. Gradually add in caster sugar in 3 separate additions and beat till stiff peak, formed into a firm meringue. Transfer to a big bowl and chill in the fridge.

4) In the same mixing bowl, cream together egg yolks and caster sugar until pale and thick using the electric mixer (about 3 - 4 minutes).  Add vegetable oil and water and continue beating till it incorporated.

5) Add the sifted top flour and mix until just combined.

6) Gently fold 1/3 of the meringue into the batter with a spatula. Fold the remaining meringue into the batter in 2 batches until it looks evenly mixed (no streaks of meringue).

7) Pour the batter into baking sheet. Gently tap the baking sheet a few times on table top to release the trapped bubbles in the batter. Bake in the oven for about 12 minutes or the top is evenly light browned, and a toothpick inserted into the centre comes out clean.
(I used the middle rack. The temperature of the oven may vary, do check, do not over bake the cake as it will be too dry and may crack easily when rolled)

8) Remove the baking sheet from the oven, immediately drop the baking sheet at a height onto a table top. This action helps to keep the springy texture of the sponge when it is left to cool.

9) Remove the sponge from the tray by lifting the parchment paper and place it on the cooling rack. Cover the surface with a clean damp cloth for about 3 minutes to retain its soft and moist for easy rolling.


10) Remove the cloth and turn/flip the 'skin' side over onto another clean sheet of parchment paper. Peel off and remove the other sheet of parchment paper.

Happy ... no crack :D
Wrap with parchment paper and chill in fridge for few hours.

11) Spread the whipped cream on the sponge. Spread more cream on the edge closest to you. Roll up gently by lifting it up with the parchment paper. Place the rolled cake seam side down. Wrap with parchment paper and chill in the refrigerator for few hours. Unwrap the parchment paper, spread the roll with whipped cream and decorate as desire. I used some chocolate rice and strawberries.


To make the whipped cream:
(Note: I've prepared the whipped cream in advance of baking and chill it in the fridge till ready to spread the sponge roll).

Freeze the cleaned mixing bowl for about 10 minutes.  Take it out from the freezer, immediately put all together the cold whip cream, vanilla extract and caster sugar in the cold mixing bowl. Use the electric mixer to whisk till stiff peaks form.


Each slice tasted so fluffy soft and my big kids loved it too ^-^ Enjoy !
Happy baking & have a great week ahead!


I'm joining Best Recipes for Everyone Event June 2015 Theme: Secret of Chiffon & Roll Cakes. 
Organized and hosted by Fion of XuanHom’s Mom Kitchen Diary

And


Linking this post to Little Thumbs Up Event : June 2015 Theme Cream
Organized by 
Zoe from Bake for Happy Kids and Doreen from my little favourite DIY
 and hosted by Diana from The Domestic Goddess Wannabe

Sunday, 7 June 2015

Cream Puff

Sometimes I wonder what is the difference between Cream Puff and Profiterole as they are hollow rounds of choux pastry with sweet fillings and looked almost “identical”.

Excerpts of below from Joy of Baking  :-
Cream Puff  (here)  - The hollow round of choux pastry is split in half, filled with loads of sweet whipped cream, and then dusted with a thick coating of powdered sugar

Sweet Profiteroles (here)  (pronounced pruh-FIHT-uh-rohl) are small, crisp, hollow rounds of choux pastry that are split in half and filled with sweet whipped cream, ice cream, or pastry cream. The classic version arranges the profiteroles in a pyramid shape with warm chocolate sauce poured over the top.


So, am I still confused ? ! ... hee ... hee..


As shared in the recipe from Joy of Baking :
“The pastry is first baked at a high temperature and then the oven temperature is lowered. The high temperature is needed so the dough will rise quickly (leaving a hollow center) and to set the structure of the shells. The temperature is then reduced to allow the outsides of the shells to become firm and crisp, while at the same time allowing the insides of the shells to dry out.”

Well, the last time I've made some Cream Puffs was almost 2 years ago. It was a failure as the pastry did not puff up nicely (rather flat) and the insides of the shells did not dry out completely.  Perhaps I did not bake them at a high temperature and to lower the temperature per instructions given as I was afraid that they might be burnt in high temperature ....

Here, making my attempt again using the recipe and baking methods adapted from Joy of Baking Cream Puff

Slight modifications to the quantity of the ingredients and my notes in blue below :-

Cream Puff
Makes 12 cream puffs (I yielded 10 cream puffs instead)

Choux Pastry:
Ingredients:
1/2 cup (65 grams) all purpose flour
1/2 teaspoon granulated white sugar
1/4 teaspoon salt
1/4 cup (4 tablespoons) (57 grams) unsalted butter, cut into pieces
1/2 cup (120 ml) water
2 large eggs, lightly beaten (Note: The eggs that I used is 60g each with shell)

Glaze:
1 large egg (beaten)

Whipped Cream:
1 cup (240 ml) heavy whipping cream (double cream) (35-40% butterfat) (I used whipping cream)
1/2 teaspoon pure vanilla extract
1 1/2 tablespoons granulated white sugar, or to taste (I used 1 tablespoon caster sugar)

Method :
Preheat oven to 400 degrees F (200 degrees C) and place rack in center of oven. Line a baking sheet with parchment paper or lightly butter or spray the pan with a non stick vegetable spray.

Sift all the dry ingredients in a bowl: flour, sugar and salt. Whisk together.

Place the butter and water in a heavy saucepan over medium high heat and bring to a boil. (Make sure that the butter melts before the water boils to reduce the amount of evaporation.) Remove from heat. Stir with a wooden spoon and add all the flour mixture and stir until combined.

Return saucepan to the heat and stir constantly until the dough comes away from the sides of the pan and forms a thick smooth ball (about 1-2 minutes).

Transfer the dough to your electric mixer, or use a hand mixer, and beat on low speed to release the steam from the dough (about a minute). Once the dough is lukewarm, start adding the lightly beaten eggs (dough will separate and then come together) and continue to mix until you have a smooth thick paste (dough will fall from a spoon in a thick ribbon).

Spoon or pipe 12 small mounds of dough onto the baking sheet, spacing about 2 inches (5 cm) apart.
(I used a spoon)


With a pastry brush, gently brush the tops of the dough with a lightly beaten egg.

Bake for 15 minutes 400 degrees F (200 degrees C) and then reduce the oven temperature to 350 degrees F (180 degrees C). Continue to bake for a further 30 to 35 minutes or until the shells are a nice amber color and when split, are almost dry inside. Turn the oven off, poke a couple of holes in each puff and, with the oven door slightly ajar, let the shells completely cool (and dry out).
I used a toothpick to poke a few holes in each puff.

To make the Whipped Cream:
In a large mixing bowl place the whipping cream, vanilla extract, and sugar and stir to combine. Cover and chill the bowl and place in the refrigerator for at least 15 minutes. When chilled, whip the cream just until stiff peaks form.
I usually freeze the cleaned mixing bowl for about 10 minutes.  Take it out from the freezer, immediately put all together the cold whip cream and caster sugar in the cold mixing bowl. Use the electronic mixer to whisk till stiff peaks form.

To Assemble: Split the pastry shells in half and fill (or pipe) with whipped cream. Place the top half of the pastry shell on the whipped cream and dust with powdered (confectioners or icing) sugar. Leftover Cream Puffs can be stored in the refrigerator.


I was screaming !
Yes ! the pastry is nicely puffed,
Yes ! the crust is crisp and the insides is completely dry.
Hee .. hee .. can't wait to "slap" them with some whipped cream ... sorry I'm too 'kan cheong' (excited) ... I can't wait to fill them with the cold whipped cream.

Ta da ! These cream puffs look "gigantic" tall ... hee.. hee! Yummy ... enjoying our weekend afternoon break with some delicious cream puffs.  Keeping a few for our dessert too ^-^! ♡ these so much (^○^)


Happy baking ^-^ !

♡♡☆♡♡☆♡♡☆♡♡


Linking this post to Little Thumbs Up Event : June 2015 Theme Cream
Organized by 
Zoe from Bake for Happy Kids and Doreen from my little favourite DIY
 and hosted by Diana from The Domestic Goddess Wannabe

Thursday, 4 June 2015

Pandan Chocolate Chiffon Cake

Previously, I had baked a pandan chiffon cake here adapted from Diana The Domestic Goddess Wannabe

As my big kids loved the pandan chiffon cake and the Topo Map Love cake,  I tried to incorporate them in 1 chiffon cake ... so glad that it turned out nice ^-^


Recipe source : Diana The Domestic Goddess Wannabe

Here's my slightly modified version as I've tweaked the recipe a little to make a portion with chocolate flavour and created 2 cocoa lines for this chiffon cake. I've also heeded the advice from my baking 师父 (master) to whip the meringue first to save the hassle of washing and cleaning dry my electric stand mixer 2 times.

Pandan Chocolate Chiffon Cake
(21cm tube pan)
Ingredients
For the batter:
80g Top Flour
6 egg yolks
20g caster sugar
40ml vegetable oil
70ml coconut milk
30ml homemade concentrated pandan extract + some juice

1 tablespoon unsweetened cocoa powder (sift) for making chocolate batter
3 tablespoons unsweetened cocoa powder for the 2 lines

For the meringue:
6 egg whites
80g caster sugar
1/2 teaspoon cream of tartar

Method :
1) Separate the eggs into yolks and whites.(the size of my egg is 60g each with shell)

2) In a clean mixing bowl, whisk the cold egg whites and cream of tartar till foamy using the electric mixer. Gradually add in caster sugar in 3 separate additions and beat till stiff peak, formed into a firm meringue. Transfer to a big bowl and chill in the fridge.

3) In the same mixing bowl, cream together egg yolks and caster sugar until pale and thick using the electric mixer (about 3 - 4 minutes).  Add vegetable oil and continue beating. Once the oil has been incorporated, add coconut milk and pandan paste and mix well.

4) Next, add the sifted top flour and mix until just combined.

Scoop about 1/3 of the batter and sift in 1 tablespoon cocoa powder, mix well.


5) Divide the meringue into 2 portions: about 1/3 for cocoa mixture and the remaining for pandan mixture.

Gently fold meringue into the cocoa mixture with a spatula until it looks evenly mixed (no streaks of meringue).

Gently fold 1/2 of the meringue into the pandan mixture with a spatula. Fold the remaining meringue into the pandan mixture until it looks evenly mixed (no streaks of meringue).

6) Pour 1 layer of pandan mixture in an un-greased chiffon tube pan. Level it with a spatula. Evenly dust a thin layer of cocoa powder over the batter (about 1.5 tablespoons). Repeat the same for 2nd layer of pandan mixture. Lastly, pour in the cocoa batter, level it with spatula.

7) Gently tap the pan on the table top a few times to release trapped air bubbles.

8) Bake at the preheated oven 180°C for 15 minutes. Then lower the temperature down to 160°C, continue to bake for 45 minutes or until the cake surface turns golden brown, and a skewer inserted into the centre comes out clean.

I covered a piece of loose foil over the pan in the last 15 mins of baking to avoid cake top being burnt too much.

I'm always "Yes !" and smiling whenever I see "no crack" on the
surface of my chiffon cake :D
9) When the pan was removed from the oven, I used the suggested technique to drop the pan at a height of 20~30cm onto a table top. This action helps to keep the springy texture of the cake when it is left to cool.

10) Immediately invert the pan to cool completely before unmoulding the cake from the pan.


We love this so much ... fluffy soft with sweet fragrance of pandan and coconut complement to the bitter-sweet chocolate flavour :D

Enjoy ! Happy baking !


I'm joining Best Recipes for Everyone June 2015 Event Theme: Secret of Chiffon & Roll Cakes. 
Organized and hosted by Fion of XuanHom’s Mom Kitchen Diary


Tuesday, 2 June 2015

Rose Tea Hokkaido Chiffon Cupcakes

In last year's Bake-Along event theme chiffon cake, I'd also re-attempted Hokkaido Chiffon Cupcake . Early this year, I used the rose black tea leaves that my girl gave me to bake a Rose Tea Chiffon Cake.

Few weeks ago, I tried it out as Rose Tea Hokkaido Chiffon Cupcakes, recipe modified from the
Hokkaido Chiffon Cupcake adapted from Sonia of Nasi Lemak Lover, below my slightly modified version.


Rose Tea Hokkaido Chiffon Cupcakes
Yields 9 cupcakes
For the batter
3 egg yolks, at room temperature
20g caster sugar
40g canola oil
*40g hot water / 1 teaspoon rose back tea leaves
75 cake flour, sifted

For the meringue
3 egg whites (cold egg whites)
1/8 teaspoon cream of tartar
40g caster sugar

For the filling
100g Whipping cream
20g caster sugar
1 teaspoon instant custard powder
1/2 teaspoon of finely chopped dried rose buds (optional)

Method :
Pre-heat oven to 170°C. Place rack in center of oven.
Arrange paper liners on baking tray.

For the batter
1. Make the rose black tea leaves with about *50g of hot water and set aside to cool to room temperature. Strain 40g of the rose tea and set aside. Drain/discard the tea leaves.

2. In a mixing bowl, beat together egg yolk and caster sugar till pale in colour.

3. Add in canola oil and rose tea, mix well.

4. Add the cake flour into the mixture and fold with spatula, mix until just combined. Set this aside.

For the meringue
1. In a clean mixing bowl, whisk the cold egg whites until foamy. Add cream of tartar and continue whisking. Gradually add caster sugar, and continue beat till soft peak form.

2. Gently fold 1/3 of the meringue into batter with a spatula. Fold the remaining meringue into the mixture in 2 batches until it looks evenly mixed (no streaks of meringue).

3. Scoop batter into pre-arranged paper liners to about ¾ full.

4. Bake at 170°C for 20-23 mins. Remove from the oven and allow to cool completely.
Note: The temperature of the oven may vary, do adjust accordingly.

For the filling
Beat whipping cream with sugar till firm and stiff using the electric mixer.
Add the custard powder and the finely chopped rose buds and mix well.

Fill a piping bag and pipe the whipped cream into the cupcakes.
Decorate the tops of the cupcakes with your preferred fruits.
Refrigerate for a couple of hours before serving.
Freshly baked ... looks good with smooth top ...
well, they shrank slightly while cooling on rack.


Enjoy ... a relaxing and lazy weekend afternoon with some rose fragrant Rose Tea Hokkaido Chiffon Cupcakes ^-^ ! 


I'm joining Best Recipes for Everyone June 2015 Event Theme: Secret of Chiffon & Roll Cakes. 
Organized and hosted by Fion of XuanHom’s Mom Kitchen Diary

And


Little Thumbs Up June 2015 Cream – organised by Zoe from Bake for Happy Kids and Doreen from My Little Favourite DIY, and hosted by Diana The Domestic Goddess Wannabe


Monday, 1 June 2015

Lavender Loaf

Recently I bought a small tin of very fragrant dried lavender flowers. Use them to make some tea with other tea leaves. Concurrently, I'm also looking for some recipes that use dried lavender in bakes. Borrowed some cookbooks from the library and here's sharing this Lavender Loaf, recipe adapted from the cookbook :
Classic Artisan Baking by Julian Day


My slight modification made with notes in blue below.

Lavender Loaf
Size: 500g loaf pan
I'm using a medium size loaf pan: 21.5 × 11.5 x 5.5cm.

Ingredients
130g salted butter, softened
130g caster sugar  (I reduced to 80g)
2 eggs
Grated zest of 1 lemon
35g ground almond
100g All-purpose flour
40g self-raising flour
3 teaspoons dried lavender flowers

Method:
Grease and line the loaf pan with baking paper

Preheat the oven to 170ºC.
Sift the flours and set aside.

In a mixing bowl, cream the butter and sugar together with the electric mixer until pale and fluffy (about 4 minutes on medium speed).

Add the eggs one at a time beating between each addition then stir in the lemon zest, followed by ground almond and flour and beat to a smooth batter (about 2 minutes on medium speed).

Lastly, add the dried lavender flowers and stir well to combine. Pour the mixture into the tin, level the top evenly with spatula and bake for 40 minutes or until firm and golden brown. Test with a cake tester or skewer inserted into the middle of the loaf should come out clean.


Remove from the oven and leave to cool in the pan for 30 minutes before turning out onto a wire rack to cool completely.

This cake is best eaten on the day of baking, but will keep for up to 4 days in an airtight container.

Baked this loaf for our afternoon break so we couldn't wait to have a slice even though it's still slightly warm.

My son commented that it tasted abit dry. I find it's texture is crumbly and slightly dry. But it tasted better the next day as we had kept some for our brekkie. It's slightly moist. Love the fragrance of lavender and a hint of lemon too that stays till the next day.


Happy baking ! ^-^ Have a great week ahead!

Link-up this post to Cook Your Books #24 
Hosted by Joyce of Kitchen Flavours

Cook-Your-Books