Wednesday, 11 September 2019

Mini Custard Mooncake Yr2019

It's been a few years since my last attempt of homemade mooncakes to celebrate the Mid-Autumn Festival.  A few of my good friends were interested to make the walnut moontarts and some snowskin mooncakes with lotus paste, pandan paste and the homemade custard filling.  So I arranged them over to my place and we spent the whole fun-filled afternoon in making mooncakes.  Glad we could pack the delicious homemade mooncakes as gift for our family and friends.

I saw the sharing of custard mooncake by Victoria Bakes.  The crust pastry recipe is slightly different from the mini baked custard mooncakes I baked some years ago.  So since I've have some leftover homemade custard filling, tried out the pastry recipe adapted from Victoria Bakes.  I made a slight change to replace whipping cream with thickened cream.


Love the sweet fragrance! My kitchen was filled with sweet coconut and buttery aroma!

Recipe for custard filling can refer to my baked mini custard mooncakes.

Mades 10 mini mooncakes, about 50g each
Pastry dough ingredients:
(A)
100g cake flour - sifted
20g potato starch
20g caster sugar
15g coconut cream powder
35g thickened cream
15g condense milk

(B)
40g butter, softened

(C)
1 egg yolk mix with 1 tablespoon water for egg wash

Method:
1) In a large bowl, combine and whisk all the ingredients in group (A).

2) Add ingredient (B) and cut the butter till coarse and crumbly using a spatula.

3) Using your hand, mix mixture together and combine them to form a dough. Stop mixing once dough is combined.

4) Divide the dough into 10 equal portions.
My pastry dough is 23g each   /  Custard filling is 25g each
Shape each into balls.

5) Position the rack in top level and preheat oven to 200°C.
The temperature of the oven may vary, do adjust the temperature and timing to suit your oven.

6) Line a baking sheet or tray with parchment paper. (I did not grease it)

To assemble the mooncake :
1) Using a lightly floured hand, flatten a portion of pastry dough into a flat and round circle. Place a custard ball in the middle of the flatten dough. Enclose the custard filling inside the pastry, seal up and gently roll it into a smooth ball.

2) Lightly dust the mooncake ball with flour.  Place each ball into a lightly floured mooncake mould and press it gently until all the edges of the mould are well-filled with the pastry. Dislodged and repeat the process.

3) Place the mooncakes onto the prepared baking sheet.

4) Bake in pre-heated oven for about 5 minutes.  Remove the baking sheet from the oven.  Brush the mooncakes with egg wash.  Adjust the oven temperature to 150°C and continue baking for 15-17 mins (do not overbake as it will result in a dry mooncake).

5) Remove the mooncakes from baking sheet and cool completely on a wire rack before storing them in airtight container.
Before bake
After baked
Lovely golden colour of these mini custard mooncakes

Here's sharing of some photos that the group made the walnut moontarts and snowskin mooncakes :)
Refer and click this link for Walnut moontart


Happy Mid Autumn Festive Season to everyone !  
中秋佳节愉快!


Sunday, 1 September 2019

Chocolate Orange Chiffon Cake


I remembered that I've tried making some curvy waves on one chiffon cake Trio colour chiffon cake 2 but that was to spoon the batter to create the curves.

After my attempt in making a hurrican swiss roll, I saw another sharing of hurrican pattern chiffon cake in video link https://youtu.be/ANLDACjWWGo

I used one of my chiffon cake recipes here  and modified/adjusted for this chocolate and orange flavour.

Chocolate Orange Chiffon Cake
17cm chiffon pan
Ingredients:
For egg yolk batter :
4 egg yolks
20 grams caster sugar
30 grams canola oil
45 grams fresh orange juice
1 teaspoon orange zest
75 grams cake flour, sifted

1.5 tablespoon cocoa powder - sifted

For meringue :
4 egg whites
50 grams caster sugar
1/2 teaspoon lemon juice

Method:
1) Separate the eggs into yolks and whites. (the size of my egg is 60g each with shell)

2) Position the rack in 2nd bottom level and preheat oven to 160°C.
(Note: The temperature of the oven may vary, do adjust accordingly)

3) In a clean mixing bowl, whisk the cold egg whites and lemon juice till foamy using the electric stand mixer. Gradually add in caster sugar in 3 separate additions and beat till stiff peak, formed into a firm meringue. Transfer to a big bowl and chill in the fridge.

4) In the same mixing bowl, cream together egg yolks and caster sugar until pale and thickened using the electric mixer (about 3 - 4 minutes).  Add oil, orange juice and zest and whisk until the mixture is combined.

5) Sieve in cake flour and whisk again until mixture is well combined.

6) Scoop about 1/2 of the batter and add 1.5 tablespoon cocoa powder, mix well.

7) Divide the meringue into 2 portions: for cocoa mixture and the remaining for orange mixture.

8) Gently fold meringue (in 2 batches) into the cocoa mixture with a manual whisk or spatula until it looks evenly mixed (no streaks of meringue).

9) Gently fold the meringue (in 2 batches) into the orange mixture with a manual whisk or spatula until it looks evenly mixed (no streaks of meringue).

10) Pour the vanilla batter into the un-greased chiffon pan.
Smooth the top evenly with spatula. Lightly tap the pan  2 - 3 times on a table top to get rid of any trapped air bubbles in the batter.

11) Gently spoon the cocoa batter on to the vanilla batter using a big spoon.

To make the hurrican effect on the side, use the base of a spatula/spoon to draw circle upwards and downwards. Repeat till it reach one full circle.

12) Bake in a preheated 160ºC for 10 minutes. 
Then lower the temperature to 130ºC and bake for 30-35 minutes.

13) Cover with a piece of loose foil over the pan if top of the cake is browning too quickly.  Bake until the cake surface turns golden brown, and a skewer inserted into the centre comes out clean.

14) When the pan was removed from the oven, I used the suggested technique to drop the pan at a height of 20~30cm onto a table top. This action helps to keep the springy texture of the cake when it is left to cool.

15) Immediately invert the pan to cool before unmoulding the cake from pan. To unmould cake by hand, gently pull cake from the sides of the tube pan. Turn the cake pan over and press down on the bottom firmly to dislodge. Gently pull the cake from the base around the edge and around the whole cake. Continue to lift up the cake and moving inwards until you reach the tube.

Well, I didn't achieve those powerful hurricane effect on my chiffon cake :(

Hope to perfect it in my next attempt.


Thursday, 29 August 2019

Nutella Marble Cake

We love anything with Nutella.  Even spread on bread tastes so yummy good.  I've added Nutella in some of my cake baking or as filling :
Nutella butter cake
Nutella bundt cake
Mini baked cheese cupcake


For this Nutella Marble Cake, it is used as filling, piped into the cake.  I supposed Nutella could be spreaded over the cake to save the hassle of piping it?  Whichever way, I'm sure the cake tastes just as good.  Nicely browned although the 'marbling' or zebra effect didn't turn out well.  We like the light not too greasy texture.

Nutella Marble Cake
Recipe source YouTube : https://youtu.be/SESRnQy0S_g
Ingredients:
3 eggs (60g with shell each)
90g caster sugar
40g unsalted butter
45g milk
1 teaspoon vanilla extract
100g cake flour
10g honey

20g warm milk or warm water
10g cocoa powder

70g Nutella

Method :
1) Preheat oven to 170°C. Position the rack in center of oven. Note : The temperature of the oven may vary, do adjust accordingly.

2) Lay a 4x8- inch loaf pan with parchment paper greased with butter.

3)  On the stove, 3/4-fill a cooking pot with water and bring to a simmer.  In a stainless steel bowl placed over a pot of simmering water, whisk together the eggs, caster sugar, vanilla extract and honey with a whisk. Test batter with thermometer for temperature reached 40 degree celsius.  Remove the bowl from pot.

4) Combine the milk and butter in a small bowl and put into the pot of hot water to warm the mixture.

5) With electric mixer, beat in medium speed the egg batter until smooth, light (about 5 minutes) and ribbon trail forms when whisk lifted up.

6) Sift in the cake flour. With a spatula, fold in the flour till combined.

7) Remove the butter and milk mixture from the pot. Add a spoonful of batter and mix it with the butter and milk mixture. Pour all into the batter, fold and mix well with a spatula.

8) Divide the batter, pour half into a jug.

9) Add warm milk or water to cocoa powder and mix well. Mix in one portion of the vanilla batter and pour the batter into another jug.

10) Begin from the middle of the pan (the long length), pour some of the vanilla batter, fill the base for this first layer.  Then pour the cocoa batter in the middle of the pan.  Alternate the process with vanilla batter till finished up the batters. Lightly tap the pan  2 - 3 times on a table top to get rid of any trapped air bubbles in the batter. Bake in preheated oven for about 30 minutes.

11) Check for doneness with a skewer or toothpick inserted into the center of the cake if it comes out clean.

12) Remove cake from pan onto a wire rack to cool completely.

13) Insert with a chopstick into the cake to make 3 or 4 holes in a row in the middle of the cake.

14) Fill Nutella in a piping bag fitted with a round nozzle. Push the piping tip into the hole and pipe/squeeze some amount.


Slice the cake and serve !


Enjoy !

Tuesday, 20 August 2019

Hurricane Swiss Roll (cocoa & vanilla)

Update on 27 August.  As the saying goes, practice makes perfect. My 3rd attempt in Hurricane swiss roll and so glad it turned out well. Same recipe but added whole strawberries in the filling and managed to achieve a rounder roll. 


2nd attempt in Hurricane Swiss Roll


I've been wanting to make this Hurricane Swiss Roll when it was so popular sharing in FB and by many recipe bloggers two years ago.

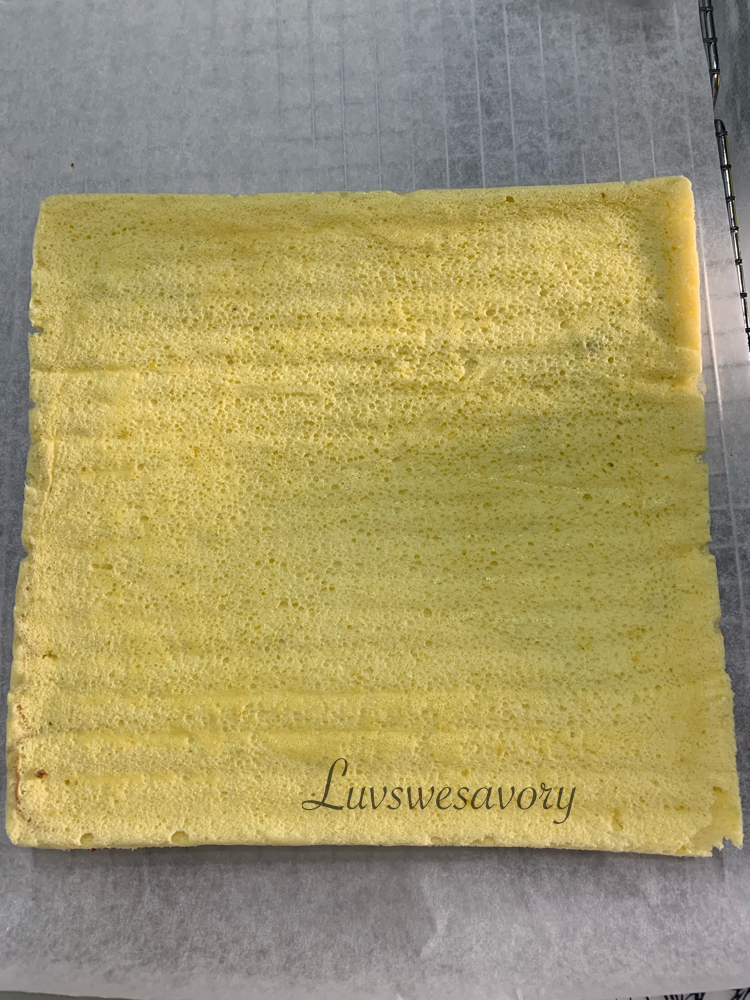
Finally ... had some fun to try it out together with my baking kakis (friends) on a relaxing weekend afternoon.  But the cake sheet was too thick (I knew cos I didn't have the right pan size) and the roll broke and turned out flat.  But we loved the fluffy soft roll texture.

I made another attempt the next day with scale down the ingredient quantity.

Recipe adapted from Bakingintotheether typhoon chiffon swiss roll with my adjustment made for a 10 x 10 inch tray.

Hurrican Swiss Roll (Vanilla & Chocolate)
Ingredients (10 × 10 inch tray)
Vanilla batter:
2 egg yolk
1 teaspoon vanilla extract
25g canola oil
40g milk
45g cake flour, sifted

Cocoa batter:
2 egg yolk
1 teaspoon vanilla extract
25g canola oil
40g milk
30g cake flour, sifted          }combine and sift
15g cocoa powder, sifted   }

Meringue
4 egg white
60g caster sugar

For the filling:
200g cold whipping cream
15g caster sugar
1 teaspoon vanilla extract

Method :
1) Sift the flour and set aside. You will need a baking sheet/tray 10 x 10 inch size, line with parchment paper and lightly grease with butter.  Preheat the oven to 170°C and position the rack in center of oven.

2) Separate the eggs into yolks and whites.
(the size of an egg is 60g with shell)

3) For the vanilla batter, cream egg yolks until pale and thick using the electric mixer (about 4 minutes).  Add in vanilla extract, canola oil and milk and continue beating till it incorporated.

4) Add the sifted flour and mix with manual whisk until combined/no longer lumpy. Set aside.

5) In another mixing bowl, repeat the same process to make the cocoa batter. Set aside.

6) In a clean mixing bowl, whisk the cold egg whites and  till foamy using the electric mixer.  Gradually add in caster sugar in 3 separate additions and beat till stiff peak, formed into a firm meringue.

7) Gently fold in about 1/2 of the meringue (in 2 batches) into the vanilla batter with a manual whisk or spatula until it looks evenly mixed (no streaks of meringue).

8) Gently fold in the remaining  1/2 meringue (in 2 batches) into the cocoa batter with a manual whisk or spatula until it looks evenly mixed (no streaks of meringue).

9) Pour the vanilla batter onto the baking sheet. Using a spatula, quickly spread evenly the top. Then carefully use a big spoon to spoon the cocoa batter on top of the vanilla batter.  Briefly level evenly with the back of the spoon.

10) Draw lines closely for the entire sheet from left to right using a chopstick, then repeat the lines vertically for the entire pan.

At this stage, DO NOT attempt to level surface as you may risk tainting the cocoa top with original batter.

11) Gently tap the baking sheet a few times on table top to release the trapped bubbles in the batter.

12) Bake in pre-heated oven for about 15 - 17 minutes or the top is evenly light browned, and a toothpick inserted into the centre comes out clean.

13) Remove the baking tray from the oven, immediately drop the baking tray at a height onto a table top. This action helps to keep the springy texture of the sponge when it is left to cool.

14) Remove the sponge from the tray by lifting the parchment paper and place it on the cooling rack. Cover the surface with the tray for about 3 minutes to retain its soft and moist for easy rolling.

15) Remove the tray and turn/flip the 'skin' side over onto another clean sheet of parchment paper. Peel off and remove the other sheet of parchment paper.

16) Spread the whipped cream on the sponge. Spread more cream on the edge closest to you. Roll up gently by lifting it up with the parchment paper. Place the rolled cake seam side down. Wrap with parchment paper and chill in the refrigerator for a few hours before cutting and serving.

To make the whipped cream:
(Note: I've prepared the whipped cream in advance of baking and chilled it in the fridge till ready to spread the sponge roll).

Freeze the cleaned mixing bowl for about 10 minutes.  Take it out from the freezer, immediately put all together the cold whip cream, vanilla extract and caster sugar in the cold mixing bowl. Use the electric mixer to whisk till stiff peaks form.


Glad that able to roll it abit rounder but some of the 'skin' peeled off :(


Practice makes perfect.  Hope a achieve a perfect hurricane on my next bake. Until then, we enjoyed a slice of this hurricane swiss roll with a cup coffee !

Happy baking!

Sunday, 4 November 2018

Bacon Wrapped Potato Roses

When I saw Potato roses (tasty.com) this video, it reminded me on the rose shape of some buns or tarts that I had made few years ago.
Peach Rose Tart
Ham & Cheese Bun
Pumpkin Rose Mantou

But these loaded with carbs yet sinfully tasty savoury bites definitely are my big kids' favourite to serve as main or sides.

Bacon Wrapped Potato Roses 
Recipe adapted from Potato roses (tasty.com)
Ingredients:
6 strips bacon
About 4-5 medium size potatoes
2 tablespoon olive oil
1/2 teaspoon salt
1 teaspoon chopped fresh rosemary leaves
some ground black pepper to taste
6 - 7 tablespoon parmesan cheese

About 1 tablespoon olive oil to grease the muffin cup.

Instructions:
Prepare a 6-cup muffin pan or 6 individual aluminium cases

Lightly grease the muffin cup with olive oil, set aside.

Preheat the oven to 200°C.  Position the rack in the center of the oven.
*Note : The temperature of the oven may vary, do adjust accordingly.

Peel potatoes and slice them using a mandoline or vegetable slicer.

In a big bowl, combine potato slices, olive oil, black pepper, rosemary and salt.  Stir and toss well to coat the potato slices.

Place 1 strip of bacon on a big plate or clean cutting board.
Arrange the potato slices along one edge so they are slightly overlapping (about 15 - 20 potato slices) *note: use 2 strips of bacon and more potato slices for a bigger rose.

Sprinkle evenly about 1 tablespoon parmesan cheese onto the potatoes.

Roll up the bacon and potatoes to form a rose shape and put it in the cup of a muffin pan.  Repeat the process.

Cover the muffin pan with aluminium foil and bake for 60 minutes.  Remove the foil in the last 10 mins and continue to bake until the potatoes are cooked through and the edges are brown and crispy.

Transfer the potatoes to a serving platter, serve immediately.


Enjoy these tasty bacon wrapped potato as main or sides with some greens.

Monday, 22 October 2018

Baked Fish with Rosemary & Breadcrumbs

On some weekdays after work, I just wanna have a simple home-cooked meal that doesn't require too much preparing, cooking or baking time in the kitchen (plus not too many utensils to wash). Ready in under 30 - 35 minutes. This baked fish with rosemary & breadcrumbs is easy to whip up.  Just serve it with some salad (or fruits) to make a decent nutritious meal.


I like to add some fresh herbs to the meat for oven bake, grill or pan-fry dishes.  Recipe inspiration from the baked lemon thyme breadcrumbs prawns I cooked few weeks ago.
Baked lemon thyme breadcrumbs prawns served with rice and pumpkin
Still have some leftover breadcrumbs .... some mayonnaise in the fridge to hold the breadcrumbs.

Baked Fish with Rosemary & Breadcrumbs
Ingredients:
3 white fish fillets (about 150g each)
2 tablespoon olive oil to grease the baking pan

Ingredient A (mayonnaise mixture):
1/2 teaspoon grated lemon zest
1 tablespoon lemon juice
3 tablespoon mayonnaise

Ingredient B (breadcrumbs mixture):
100g panko breadcrumbs
1 tablespoon chopped fresh rosemary leaves
Pinch of salt and sprinkle some coarse ground black pepper

Instructions:
1) Preheat the oven to 190°C.  Position the rack in the center of the oven.
*Note : The temperature of the oven may vary, do adjust accordingly.

2) Line the baking pan with baking paper and lightly grease with olive oil. Set aside.

3) Wash and pat the fish dry with some kitchen towels.  (If you are using frozen fish fillets, make sure you thaw them first.)

4) Prepare the ingredients for A & B.
In a small bowl, combine and mix well ingredient A with a spoon.
In a dry clean plate, combine and mix well ingredient B.

5) Spread some mayonnaise mixture with a spoon onto 1 side of the fish, then dredge in the panko mixture, pressing to coat evenly. Transfer the fillet onto the baking pan with crumb-side up.


6) Bake for about 25 minutes or until golden and crisp.

Done! Serve the baked fish fillets with some *salad and lemon wedges. 

*make any salad green if you can find them in your fridge. Or some cut fruits if you have some apples, pears or oranges sitting in your fruit basket :)


As I do not like the “fishiness” smell, this aromatic fresh herb adds balance to this 'fishy' dish. Enjoy!

Wednesday, 17 October 2018

Roselle Jam Chiffon Cake

The homemade Roselle jam  in the jar left with just a few tablespoon, so I just simply add them to bake a roselle jam chiffon cake.  Baked the cake on a weeknight for the next morning's breakfast.  Adjusted the recipe from Apricot yogurt chiffon cake


Roselle Jam Chiffon Cake
17cm chiffon pan

Ingredients :
For the yolk mixture
4 egg yolk
30g canola oil
35g caster sugar
50g yogurt
50g roselle jam
1 teaspoon lemon juice
1/4 teaspoon salt
80g cake flour (sifted)

For the meringue
4 egg white
2 - 3 drops of lemon juice
35g caster sugar

Method :
1) Separate the eggs into yolks and whites. (the size of my egg is 65g each with shell)

2) Position the rack in the lowest level and preheat oven to 170°C.

3) In a dry clean mixing bowl, beat the cold egg whites and lemon juice till foamy using the electric stand mixer. Gradually add in caster sugar in 3 separate additions and beat till stiff peak, formed into a stiff peak meringue. Transfer to a big bowl and chill in the fridge.

4) In the same mixing bowl, cream together egg yolks and caster sugar until pale and thickened using the electric mixer (about 3 - 4 minutes). Add canola oil and lemon juice and continue beating till combined.  Next, add the yogurt and jam and whisk until the mixture is combined.

5) Sift in cake flour and salt and whisk again until mixture is well combined.

6) Gently but quickly fold 1/3 of the meringue into the yolk mixture with a manual whisk. Fold the remaining meringue in 2 batches into the mixture until it looks evenly mixed (no streaks of meringue).

7) Pour the batter into the un-greased chiffon pan. Lightly tap the pan a few times on a table top to get rid of any trapped air bubbles in the batter.

8) Bake in a preheated 170ºC for 10 mins. Reduce to 160ºC and continue baking for 25 mins or until the cake surface turns golden brown, and a skewer inserted into the centre comes out clean.
Cover with a piece of loose foil over the pan if top of the cake is browning too quickly.
(Note: The temperature of the oven may vary, do adjust accordingly and observe especially in the last 10 - 15 minutes of baking.)

9) Remove the chiffon pan from the oven, drop the pan at a height of 20~30cm onto a table top. This action helps to keep the springy texture of the cake when it is left to cool.

10) Immediately invert the pan to cool before unmoulding the cake from pan.
*note: to unmould the cake:
a) Run a thin-bladed knife or palette knife around the edge of the pan and the funnel. Release the cake and run the knife along the base of the pan to remove the cake.
Or
b) By hand, gently pull cake from the sides of the tube pan. Turn the cake pan over and press down on the bottom firmly to dislodge.  Gently pull the cake from the base around the edge and around the whole cake. Continue to lift up the cake and moving inwards until you reach the tube.


Soft texture with the slight burst of fruity tangy jam flavor in each mouthful bite  ... glad that my big kids loved it.  Two slices for me paired with a cup of hot coffee ! That's how I enjoyed my early morning brekkie :)

Happy baking !