Monday, 29 June 2015

Mini Baked Alaska with Swiss Roll

The hot weather here is driving me crazy ... haiz! ... and I'm really out of my mind to make baked Alaska !

Recently, I've added a handy "Just 5 Ingredients Cakes & Desserts" recipes collection cookbook and bookmarked this recipe.  And since I've got few tubs of ice-cream (store bought) in the freezer, and made a jam swiss roll for our weekend coffee snack ... so why not try this pretty easy to make Mini Baked Alaska with Swiss Roll.


Glad that the center of the ice-cream is
 still cold & intact 

The swiss roll recipe adapted from Cakes and Bakes 500 Cookbook Martha Day. The original recipe is Almond & Raspberry Swiss Roll. My modified version below as I don’t have any raspberries and whipped cream for the filling, instead, I decided to use the bottle of strawberry jam idling in the fridge.

Almond Swiss Roll
Makes one 23cm long roll
Ingredients :
3 eggs
75g caster sugar  (I cut down to 55g)
50g plain all-purpose flour
2 tablespoons ground almonds

Filling:
Strawberry jam about 130g

Method :
1. Preheat the oven to 190°C. Grease a 33 x 23 cm swiss roll tin and line with lightly greased parchment paper.

2. Whisk the eggs and caster sugar in a heatproof bowl until blended. Place the bowl over a pan of simmering water and whisk until thick and pale.
(*note : I transferred the batter to the electric stand mixer bowl and continued to whisk until thick and creamy for about 6 - 8 minutes and when lifted the beater, the batter will fall back into the bowl in a slow ribbon).

3. Gently fold in the sifted flour and almonds with a spatula until just combined and smooth texture.

4. Pour the batter into the prepared tin, level the top with spatula. Gently tap the tin a few times on the table top to release the trapped bubbles in the batter. Bake for 10-12 minutes, or the top is evenly browned and springy to touch.

5. Invert the cake in its tin on to a clean sheet of parchment paper. Leave to cool about 3 minutes, then remove the tin and the lining paper.

6. Spread the strawberry jam over cake leaving about 1/2-inch border all around.

7. With the shorter side, gently but firmly roll the cake up into a Swiss roll. Place the rolled cake seam side down. Wrap with parchment paper and chill in the refrigerator for few hours.
Trim the ends using a sharp knife. Cut into slices just before serving.

To make the Mini Baked Alaska 
Adapted from Just 5 Ingredients Cakes & Desserts Published by Hamlyn
Ingredients :
4 slices of jam Swiss rolls or trifle sponges
4 scoops of strawberry and vanilla or vanilla ice-cream (I used Napoleans flavour)
2 egg whites (I used cold egg whites)
50g caster sugar (I cut down to 35g)

Method :
Arrange the slices of Swiss roll on a baking sheet. Top each with a scoop of ice-cream. Put into the freezer for 10 minutes or longer if you have time.


Preheat the oven to 190°C.

Using the electric mixer, whisk the cold egg whites until stiff, moist-looking peaks form. Gradually whisk in the caster sugar for a few minutes until thick and glossy.

Take out the Swiss roll with ice-cream from the freezer and quickly swirl the meringue over the top and sides to cover completely. Cook on preheated oven at 190°C for 5 minutes until the peaks are golden brown, the meringue is cooked through and the ice-cream is only just beginning to soften.

Quickly, transfer the baked Alaskas to shallow serving bowls and serve the dessert immediately.


Yes, actions must be fast ! No time to wipe my sweat ... hee hee ! (haiz ! hot weather !)
Must EAT these mini baked Alaskas immediately and I couldn't take my own sweet time to snap photos though ... else the ice-cream would soon become milkshake !

Very nice ! Enjoy ! Our 2-in-1 Mini Baked Alaska with Swiss Roll.

Happy baking & have a great week ahead !


I'm joining Best Recipes for Everyone June 2015 Event Theme: Secret of Chiffon & Roll Cakes. 
Organized and hosted by Fion of XuanHom’s Mom Kitchen Diary

Also

Sharing this post with Cook Your Books #24 
Hosted by Joyce of Kitchen Flavours


Cook-Your-Books


Thursday, 25 June 2015

Sour Cream Chip Muffins

The usual quick fix for our brekkie, baked some quick & easy muffins on one of the weeknights.


Recipe and baking instructions adapted from Taste of home
I halved the recipe to make 6 as I left with just some sour cream in the fridge.

Sour Cream Chip Muffins (6 muffins)
Ingredients
75g all-purpose flour
40g caster sugar
1/4 teaspoon baking powder
1/4 teaspoon baking soda
Pinch of salt
1 egg
60g sour cream
35g butter, melted
1 teaspoon vanilla extract
55g mint or semisweet chocolate chips

Directions
1) In a large bowl, using a manual whisk to combine the flour, sugar, baking powder, baking soda and salt.

2) Combine the egg, sour cream, butter and vanilla in a bowl or small jug. Stir into dry ingredients just until moistened. Fold in the chocolate chips.

3) Fill greased or paper-lined muffin cups three-fourths full. Bake at 180°C for 18-20 minutes. Check for doneness with a toothpick inserted into the center of a muffin if it comes out clean.
The temperature of the oven may vary, do adjust accordingly.
Cool for 5 minutes before removing from pan to a wire rack for cooling.

Tasted wonderfully soft and moist even on the 2nd day !

Happy baking ^-^ !
♡~~♡~~♡


Linking this post to Little Thumbs Up Event : June 2015 Theme Cream
Organized by 
Zoe from Bake for Happy Kids and Doreen from my little favourite DIY

and hosted by Diana from The Domestic Goddess Wannabe


Monday, 22 June 2015

Potted Chocolate-Mint Puddings

Isn't it cute and a creative way to enjoy chocolate puddings that looked like potted plants ? Hee .. hee .. edible "dirty mud" ^-^!

I've bookmarked this recipe for sometime already. The pudding texure is much creamier than the chocolate mint pudding here which I had made before.


Recipe adapted from : Martha Stewart
Below my slight modifications made in blue adjusted the quantity of some ingredients, used some crushed mint leaves instead of mint extract, used Oreo cookies etc.

Potted Chocolate-Mint Puddings
Containers : 4 x 200ml pudding jars
Ingredients :
1/4 cup plus 2 tablespoons sugar (I reduced to 40g)
3 tablespoons cornstarch (I used 2 tablespoons)
1 tablespoon plus 1 1/2 teaspoons unsweetened cocoa powder
1/8 teaspoon Salt
1 1/4 cups heavy cream (300ml Thickened cream)
1 1/4 cups whole milk (300ml)
1/2 teaspoon pure vanilla extract
6 ounces semisweet chocolate, chopped (1 cup) 150g dark chocolate, chopped
1/2 teaspoon pure mint extract 
(I used 2 small pcs of mint leaves crushed & finely chopped with knife).
20g unsalted butter, cut into small pieces

For "mud/dirt" & garnish
10 Oreo slice cookie (without cream)
Mint sprigs

Method :
1) Whisk together sugar, cornstarch, cocoa powder, and 1/8 teaspoon salt in a medium saucepan.

2) Combine cream, milk, and vanilla extract in a liquid measuring cup.


3) Cook over medium heat, pour about 240ml cream mixture into sugar mixture, and whisk until cornstarch is dissolved. Add the remaining cream mixture, and whisk constantly for about 5 minutes until smooth and thickened to a mayonnaise-like consistency.

4) Reduce heat to low, and add chocolate. Whisk until chocolate melts, about 1 minute.

5) Remove the saucepan from heat. Add the crushed mint leaves and butter, and whisk constantly until the butter melts.

6) Quickly pour into individual containers, glasses or glass flowerpot votive candle holders, leaving about 1/2 inch of space at the top of each. Refrigerate until set, about 2 hours or more, depending on the types of container used.

To make the "mud/dirt" & garnish
Put Oreo cookies in Ziploc bag and gently pound / crush them with a roller pin or any hard object.

Top each pudding with about 1.5 tablespoon crushed Oreo cookies  "mud/dirt," and garnish with a planted mint sprig. Serve chilled.


Yummy! They truly enjoyed a jar of muddy bitter-sweet creamy chocolate mint pudding :D
♡~~♡~~♡


Linking this post to Little Thumbs Up Event : June 2015 Theme Cream
Organized by 
Zoe from Bake for Happy Kids and Doreen from my little favourite DIY

and hosted by Diana from The Domestic Goddess Wannabe


Monday, 15 June 2015

Honey Roll

This recipe is from one of the cookbooks I borrowed from the library. When I read the ingredients, I know I'm so going to bake this allspice pungent and fragrant with a hint of coconut aroma and delicious honey cream ... all in one swiss roll.


Recipe adapted from cookbook The Baker Leanne Kitchen.
Below my slightly modified version as I've left with some "soon to be expired" cream cheese in the fridge, added to the honey cream, and my notes in blue.

Honey Roll
Serves 8
Ingredients for cake :
90g self-raising flour
2 teaspoons mixed (pumpkin pie) spice (I used allspice powder)
3 eggs
125 soft brown sugar (I reduced to 85g)
25g desiccated coconut (it's too much and I'll cut down to 20g when I bake this again)

Honey Cream :
125g unsalted butter, softened (I used 80g)
2 tablespoons honey
80g caster sugar (I used 50g)
80g Low-fat Cream Cheese, room temperature, my addition 

Method :
Preheat the oven to 210°C.
(I adjusted the oven temperature 190°C. Position the rack in the middle.The temperature of the oven may vary, do adjust accordingly).

Grease a 30cm × 25cm (12 × 10 inch) swiss roll pan (jelly roll pan). Line the base with parchment paper, leaving the paper hanging over two opposite sides.

Sift the flour together with allspice powder 3 times.

In a clean mixing bowl, whisk the eggs with an electric mixer till thick and pale for about 5 minutes in medium - high speed. Gradually add in the soft brown sugar in 3 separate additions. Beating constantly until the sugar has dissolved and the mixture is pale and glossy.

Gently fold in the sifted flour with a spatula until just combined and smooth texture.

Pour the batter into the prepared pan, level the top with spatula. Gently tap the pan a few times on table top to release the trapped bubbles in the batter. Bake in the oven for about 12 minutes or the top is evenly lightly golden and springy to touch.

While the cake is baking, prepare the honey cream :
Using an electric mixer, beat the butter and sugar till fluffy and creamy (about 4 minutes). Next, add the cream cheese and honey, continue beating for another 2 minutes or until light and fluffy. Set aside.

Remove the cake from the oven and leave to cool in the pan for 1 minute.

Turn the cake (skin side) onto a clean sheet of parchment paper sprinkled with dessicated coconut and leave for 1 minute. Peel off the lining paper.

With the shorter end, roll the cake up gently together with the parchment paper. Leave for about 5 minutes, or until cool, then unroll the cake. (According to some info - This will give the cake a "shape memory" so it will be easier to roll again with filling.)

Spread the honey cream over cake leaving about 1/2-inch border all around. This is to prevent the excess cream oozes out when rolling the cake.

Gently but firmly roll the cake up into a Swiss roll. Trim the ends using a sharp knife.

Refrigerate the roll in an airtight container. Cut into slices just before serving.


I trimmed both the ends and asked my big boy to try. He could tell the difference that this honey swiss roll is so different from the previous swiss rolls I've baked. He loved it and commented the fragrant and honey cream tasted so good.

Spongy cake texture spreaded with honey cream beneath the crisp springy roll skin covered with crisp dessicated coconut. Love the wonderful aroma ... Enjoy our brekkie on a cool rainy Sunday morning.

Happy baking & have a great week ahead !


I'm joining Best Recipes for Everyone June 2015 Event Theme: Secret of Chiffon & Roll Cakes. 
Organized and hosted by Fion of XuanHom’s Mom Kitchen Diary

Also

Sharing this post with Cook Your Books #24 
Hosted by Joyce of Kitchen Flavours

Cook-Your-Books


Friday, 12 June 2015

Lavender Cookies

I suddenly had craving for some home-baked cookies recently .... hee .. hee ... Saw this recipe in the cookbook which I've bookmarked sometime ago ... besides .. I've got lots of dried lavender flowers to try out in baking !


Easy to bake these yummy fragrant lavender cookies with just few steps to follow. They are best pair-off with a cup of hot beverage but I like it with a glass of cold chocolate milk ... yes, in such warm and humid weather lately.

Recipe adapted from the cookbook "Cakes and Bakes 500" by Martha Day, below my slight modification and notes made in blue.

Lavender Cookies
Makes about 30
Ingredients :
150g unsalted butter, softened
115g caster sugar  (I reduced to 80g)
1 egg, lightly beaten
15ml/1 tablespoon dried lavender flowers
175g self-raising flour
Some fresh leaves and flowers to decorate

Method :
Preheat the oven to 180ºC, position the rack in the center. The temperature of the oven may vary, do adjust accordingly.

Grease two baking sheets.

Cream the butter and sugar together with electric mixer. Stir in the egg. Next, mix in the dried lavender flowers and the flour.
Drop spoonful of mixture on the baking sheets.

Bake for 15 - 20 minutes or until the cookies are golden.

Remove the cookies from the baking sheet and cool on a wire rack before storing them in airtight container.

If you wish, serve with some fresh leaves and flowers to decorate.

Enjoy ^-^!


Sharing this post with Cook Your Books #24 
Hosted by Joyce of Kitchen Flavours

Cook-Your-Books


Wednesday, 10 June 2015

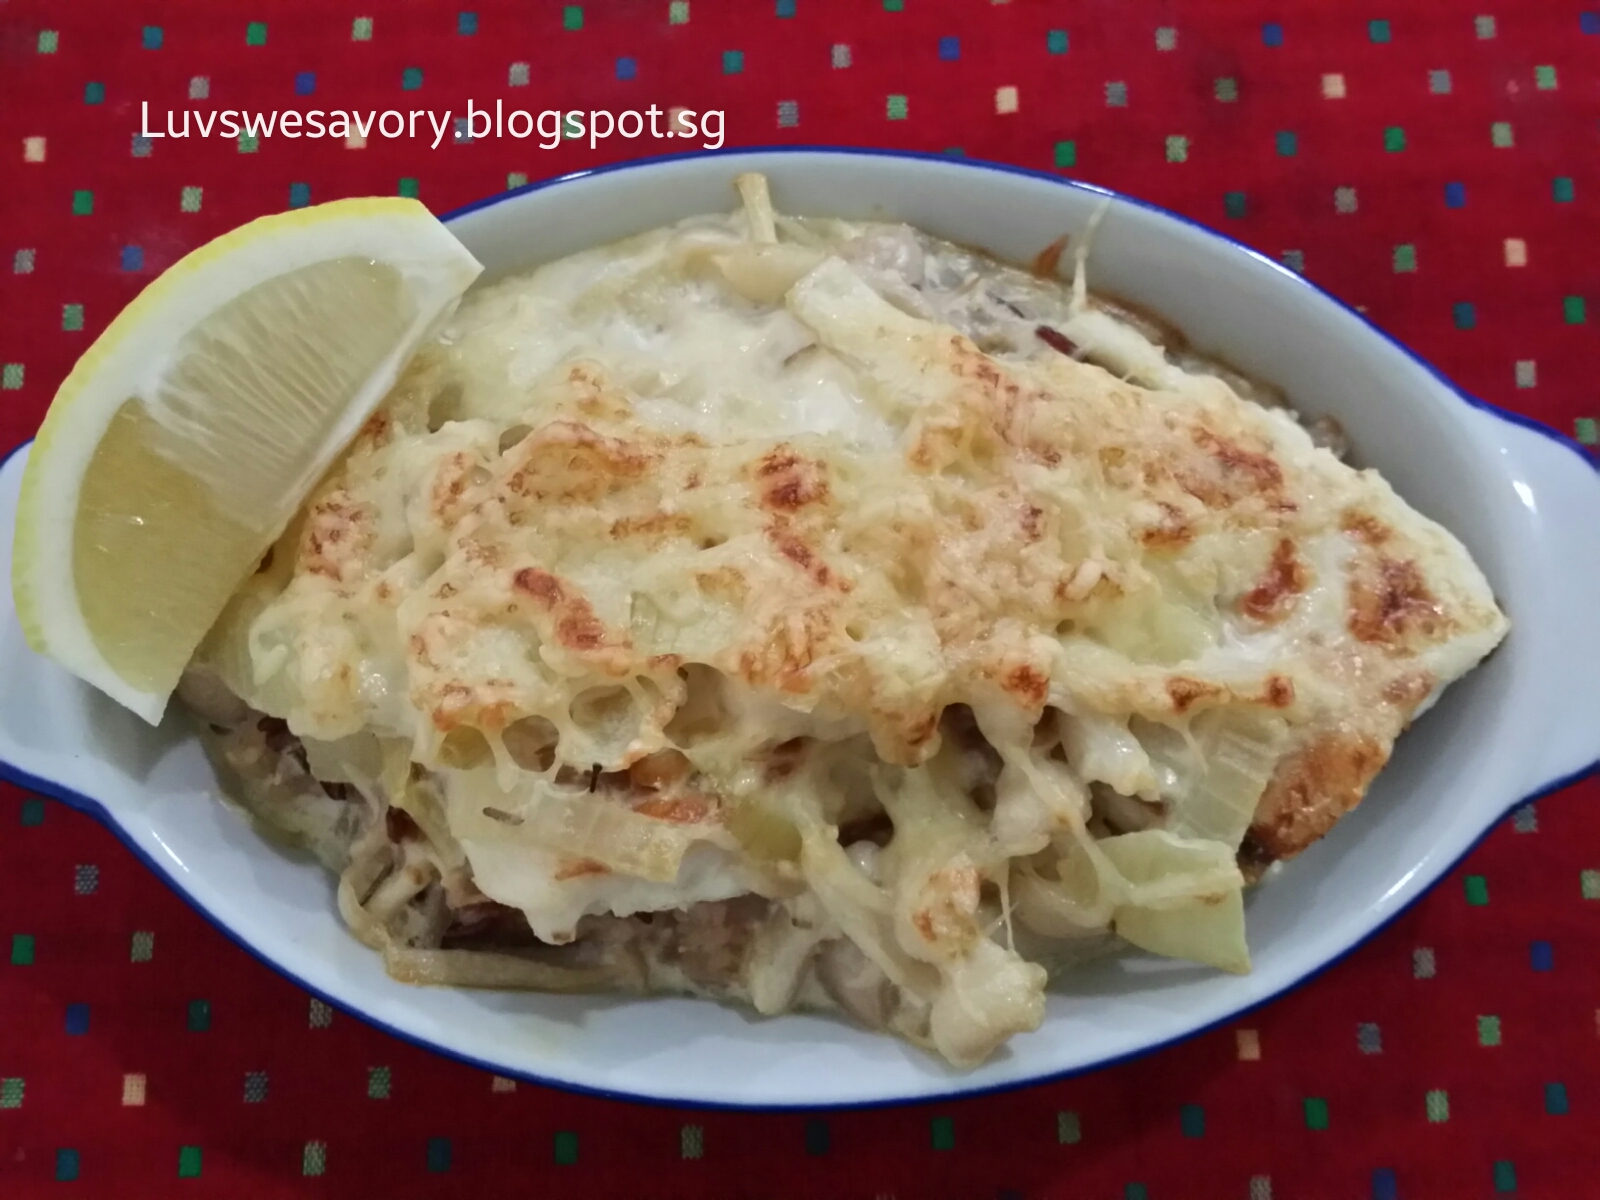
Easy Baked Fish with Rice

Cheesy baked rice is one of my big kids' favourite. I cook these often with variations using chicken, mushrooms or fish fillet etc. To make the baked rice more flavourful and creamy texture, I added some cream of mushroom soup to it. Pretty easy to prepare and it's done in about half an hour.


Baked Fish with Rice
Ingredients:
(makes 3 servings)
To make the sauce :
300g Fish fillet, cut into big chunks and seasoned with pinch of salt for about 10 ~ 15 minutes
Half big onion, diced
3 tablespoons Olive oil
200ml Cooking Cream
200ml water
2 tablespoons cream of mushroom soup (from a can of Campbell soup)
some Parmesan cheese
Salt & ground pepper to taste
Garnish with wedges of lemon.

To cook the rice :
1.5 cup mixed brown rice
*per rice cooker measurement cup
100g Shimeji mushroom (1 pack)
2 tablespoons cream of mushroom soup


Method:
1) Mix together the washed rice grains, cream of mushroom, Shimeji mushroom and some water and cook accordingly using the automatic electric rice cooker.

Once the rice is cooked, make the sauce.


2) Heat a frying pan with medium flame. Add 2 tablespoons of olive oil and pan fried the fish fillets, about 2 - 3 minutes on each sides till lightly browned. Dish onto a plate and set aside.

3) Saute diced onions with 1 tablespoon of olive oil in a frying pan until translucent and lightly browned.


3) Pour in the cooking cream and cream of mushroom. Stir occasionally, add the water. Dash of salt and ground pepper and bring to a boil.

4) For each serving, scoop some cooked rice into an oven-proof dish. Top with the cooked fish fillets.

5) Pour the sauce onto each dish and sprinkle top with some Parmesan cheese.

6) Bake in preheated oven at 180°C for about 10 ~15 mins or until the cheese turned golden brown.

Note: Do adjust the taste and the amount of sauce to your preference.

Dinner is ready :D

To serve, garnish with some wedges of lemon.


I like to squeeze the lemon juice on my baked fish with rice ... my way of enjoying fish with tangy taste ^-^!

Happy cooking :D

♡~~♡~~♡


Linking this post to Little Thumbs Up Event : June 2015 Theme Cream
Organized by 
Zoe from Bake for Happy Kids and Doreen from my little favourite DIY

and hosted by Diana from The Domestic Goddess Wannabe


Tuesday, 9 June 2015

Swiss Roll

It has been a while since I last made swiss roll cakes for my family.

When I baked the chiffon cakes recently, I remembered some chiffon swiss roll recipes that yielded fluffy soft texture which I've made about 2 years ago.


I always have mixed feelings when I make swiss rolls. Sometimes if the rolling turned out well with no cracks, I was happy and don't wish to frost any cream on it. But I would also like to beautify it with cream and toppings etc. But of course if there's crack in the roll ... hee.. hee .. just camouflage with frosting !

Here's sharing this fluffy soft and moist roll cake adapted from Cookpad

Recipe source : Cookpad, below my slightly modified version using some methods I'm comfortable with in making swiss rolls.

Swiss Roll
Ingredients (makes a 25cm x 25cm roll cake)
For the egg batter :
4 egg yolks
70 grams Top flour
25 grams Caster sugar
30 grams Vegetable oil
30 grams Water

For the Meringue :
4 egg white
25 grams caster sugar
1/4 teaspoon cream of tartar

For the filling :
250ml Whipping cream
20 grams caster sugar
1 teaspoon vanilla extract

Method :
1) Sift the flour and set aside. You will need a baking sheet/tray 25cm x 25cm size, line with parchment paper.
Preheat the oven to 180°C.

2) Separate the eggs into yolks and whites.
(the size of an egg is 60g with shell)

3) In a clean mixing bowl, whisk the cold egg whites and cream of tartar till foamy using the electric mixer. Gradually add in caster sugar in 3 separate additions and beat till stiff peak, formed into a firm meringue. Transfer to a big bowl and chill in the fridge.

4) In the same mixing bowl, cream together egg yolks and caster sugar until pale and thick using the electric mixer (about 3 - 4 minutes).  Add vegetable oil and water and continue beating till it incorporated.

5) Add the sifted top flour and mix until just combined.

6) Gently fold 1/3 of the meringue into the batter with a spatula. Fold the remaining meringue into the batter in 2 batches until it looks evenly mixed (no streaks of meringue).

7) Pour the batter into baking sheet. Gently tap the baking sheet a few times on table top to release the trapped bubbles in the batter. Bake in the oven for about 12 minutes or the top is evenly light browned, and a toothpick inserted into the centre comes out clean.
(I used the middle rack. The temperature of the oven may vary, do check, do not over bake the cake as it will be too dry and may crack easily when rolled)

8) Remove the baking sheet from the oven, immediately drop the baking sheet at a height onto a table top. This action helps to keep the springy texture of the sponge when it is left to cool.

9) Remove the sponge from the tray by lifting the parchment paper and place it on the cooling rack. Cover the surface with a clean damp cloth for about 3 minutes to retain its soft and moist for easy rolling.


10) Remove the cloth and turn/flip the 'skin' side over onto another clean sheet of parchment paper. Peel off and remove the other sheet of parchment paper.

Happy ... no crack :D
Wrap with parchment paper and chill in fridge for few hours.

11) Spread the whipped cream on the sponge. Spread more cream on the edge closest to you. Roll up gently by lifting it up with the parchment paper. Place the rolled cake seam side down. Wrap with parchment paper and chill in the refrigerator for few hours. Unwrap the parchment paper, spread the roll with whipped cream and decorate as desire. I used some chocolate rice and strawberries.


To make the whipped cream:
(Note: I've prepared the whipped cream in advance of baking and chill it in the fridge till ready to spread the sponge roll).

Freeze the cleaned mixing bowl for about 10 minutes.  Take it out from the freezer, immediately put all together the cold whip cream, vanilla extract and caster sugar in the cold mixing bowl. Use the electric mixer to whisk till stiff peaks form.


Each slice tasted so fluffy soft and my big kids loved it too ^-^ Enjoy !
Happy baking & have a great week ahead!


I'm joining Best Recipes for Everyone Event June 2015 Theme: Secret of Chiffon & Roll Cakes. 
Organized and hosted by Fion of XuanHom’s Mom Kitchen Diary

And


Linking this post to Little Thumbs Up Event : June 2015 Theme Cream
Organized by 
Zoe from Bake for Happy Kids and Doreen from my little favourite DIY
 and hosted by Diana from The Domestic Goddess Wannabe