Showing posts with label Dim Sum. Show all posts

Monday, 10 August 2015

Fried Yam Puff (Wu Kok 芋角)

I don't own many cookbooks ... just a few handful which were bought many years ago. And this Dim Sum cookbook has been with me for more than 20 years. I recalled that I was so 'crazy' in making fried yam puff (Wu Kok in Cantonese) in the early years when I had this cookbook. I would make some for family gatherings cos I love fried yam puff.

After the birth of my kids, I seldom make dim sum at home. Occasionally would make those easy and less "tedious/hassle in cooking" like steamed Lo Mai Kai, fried Wanton, steamed/fried Siu Mai, Salad Prawn Dumplings etc. It has been a long long time since I'd last made fried yam puff. After when I'm finally done with it ... I was like 'Oh! look at the kitchen, what a mess' ... hee hee ... glad that these yam puff turned out OK even with my rusty skills :D


Recipe adapted from the cookbook - Quick & Easy Dim Sum Appetizers and Light Meals by Judy Law.

Below my slightly modified ingredients with notes in blue
Fried Yam Puff (Wu Kok 芋角)
(Makes about 10)
Ingredients
Filling:
225g Minced pork or chicken
(I used 200g of minced pork. Seasoning the meat with below and keep in refrigerator for about 1 hour)
1/2 teaspoon salt
1 teaspoon sesame oil
1 teaspoon five spice powder
1 tablespoon rice wine (omitted)
Dash of pepper

60g black dried mushroom - softened & diced (40g Shitake mushroom)
60g big onion - diced (40g)
Carrot - some 30g diced carrot my addition 

To cook the filling:
1 tablespoon Cooking oil
60ml soup stock (I replaced with water + 1/2 teaspoon granulated chicken seasoning powder)
1 tablespoon cornflour
2 tablespoons Oyster sauce (vegetarian oyster sauce)

For the crust:
450g Yam
1 teaspoon cooking oil
Pinch of salt
2 tablespoon cornflour
Soup stock (I replaced with 100ml water + 1/2 teaspoon granulated chicken seasoning powder)

For coating the yam crust:
1 egg beaten
220g Panko breadcrumbs
2 tablespoons all-purpose plain flour
Some cornflour to dust fingers

Cooking oil for deep frying  (enough to cover the yam puff)

Method :
1) Heat wok/pan with medium heat, add cooking oil. Stir-fry the diced onions till fragrant (about 1 - 2 mins). Add the carrots, minced meat and mushrooms and continue to cook for about 2 - 3 minutes. Add oyster sauce.

2) Dissolve 1 tablespoon cornflour in the stock. Pour in, continue cooking and bring to a boil to thicken sauce. *Add 2 - 3 tablespoons of water if you preferred to have more sauce.  Remove from pan and set aside to cool.

3) To steam the yam: Peel the yam skin, clean and slice about 1.5 cm thickness. Arrange in steamer and steam under rapidly boiling water on medium heat for about 1/2 hour or till tender.

4) In a small pan, dissolve 2 tablespoons cornflour with 100ml water + 1/2 teaspoon granulated chicken seasoning powder. Cook in small flame. Bring to boil and let cool.

5) Drain any excess liquid and mash the yam while still hot. Mix in enough of the thickened soup stock (refer to step 4) and cooking oil to resemble thick mashed potatoes. Add salt and mix thoroughly.

6) Divide the mashed yam into 10 equal portions.
About 60g each, form into a round ball and flatten to form a 1/2" (1.5cm) thick round.
(It's easier to shape/handle the mashed yam when it's slightly cooled)
Dust your fingers with some cornflour to keep from sticking.

7) Place about 1 tablespoon filling in the center of the yam and close / seal the top. Roll and shape to form an oval shape with hands.
Coat with plain flour, then dip in egg liquid and roll in panko breadcrumbs.

8) In a frying pan/wok, heat cooking oil over medium-high flame.  Carefully drop in the yam puff and deep-fry for about 3 - 4 minutes or until golden brown.

9) Place the fried yam puff on a plate lined with kitchen towel to drain some excess oil. Serve immediately.

Suggestions :
° For variations, add green peas, sweet corn kennels, water chestnut, prawns etc. to the filling.
°Adjust the taste to your preference.

Enjoy and have a great week ahead ^-^!


Jom ! Let's go yum cha! Enjoy !



Also
Sharing this post with Cook-Your-Books #26 
Hosted by Joyce of Kitchen Flavours

Cook-Your-Books


Tuesday, 4 August 2015

Salad Prawn Dumplings 沙律明虾角

Occasionally we have dim sum as brunch when we dine at some Chinese restaurants. Sometimes we also indulge in Dim Sum Buffet Hi-Tea too :D
All the dim sums are so tempting ... we love anything from steamed, soupy (eg. 灌汤饺, 汤包, 皮蛋瘦肉porridge etc.), baked Egg Tart to deep-fried types ... a must to order 芋角Yam Turnover/Fried Taro Dumpling my favourite! All the servings are in small portions, so we always thought "not enough", and we tend to have "over-ordered" and "over-eaten" ... Burp! Oh ! excuse me ... hee ! hee !

At home, I tried to replicate some homemade dim sum for our 'yum cha' teatime too ... previously shared here steamed bao and siu-mai, Har Gow, steamed egg custard buns etc. And some of their "all-time" favourites like : steamed Lo Mai Kai, fried Wanton, steamed/fried Siu Mai, Salad Prawn Dumplings etc.

Made some Salad Prawn Dumplings for our weekend 'yum cha'. They simply enjoy dipping these deep-fried dumplings with mayonnaise sauce. 


Method :
1) Cleaned, shelled and deveined the prawns. Chop the cleaned prawns coarsely and mash/flatten slightly on chopping board using the blade of the knife to form a rough paste. (Alternatively, use a grinder to grind the meat)

2) Transfer the prawn paste to a bowl. Mix with the seasoning well, add the beaten egg white and mix till well blended together.

3) Cover and refrigerate for about 1 - 2 hours.

4) To make the dumplings, place about 1.5 heap of teaspoon filling in the center of the wrapper. Wet the edge and seal to form pleats, tuck in both ends to make slightly a rectangular shape. Hold top edge and seal the opening.

5) In a frying pan/wok, heat cooking oil over medium-high flame. Deep fry the dumplings for about 3 - 4 minutes or until golden brown. Turning the dumplings occasionally during the frying process to ensure fully cooked/fried.

6) Place the fried dumplings on a plate lined with kitchen towel to drain some excess oil. Serve immediately with some mayonnaise, salad or tartar sauce.


These deep-fried prawn dumplings are best eaten immediately, else the crisps and crunchiness of the fried wanton wrapper will become soft and soggy.  Served with some mayonnaise, salad cream or tartar sauce.  Perhaps that's why some restaurants named this dish as Salad Prawn Dumplings ?!
Jom ! Let's go yum cha! Enjoy !


Tuesday, 28 October 2014

Pumpkin Rose Mantou 南瓜玫瑰馒头

I had at first watched a video tutorial on making valentine rose mantou and I've bookmarked it. But my first attempt two weeks ago didn't yield the nice texture I wanted. 

With some leftover butternut squash, decided to give it a try again as I really like the roses ... inspired by few blogger pals whom had made such lovely sweet roses mantou : LY Kitchen VentureSharon 之味Joceline of Butter. Flour & MeIrene of mymeloves.

Do refer to the links above for picture tutorial on steps in making the roses.


Below my modified version adjusted on quantity. Recipe adapted mostly from Sharon 之味
Pumpkin Rose Mantou南瓜玫瑰馒头
Ingredients :
(A)
Instant dry yeast - 1/2 teaspoon
Water - 40g

(B)
All-purpose plan flour - 200g
Sugar - 20g
Pinch of salt
Pumpkin puree - 75g (pumpkin steamed and mashed)
Vegetable oil - 8g

Method :
(A) Mix instant yeast and water together till dissolved. Pour into (B)

(B) In another bowl, add flour, sugar and oil. Add in the instant yeast mixture and mix well. Use hand to knead mixture to form a smooth dough (About 5 to 10 mins)

Divide the dough into 20 balls. Roll out the dough to round disc.
To assemble, lay 5 round disc overlap each other in a row. Use one piece to roll into a small log.
*note that I've made some smaller roses and some big ones. You may adjust the weight/ size of the disc according to your preference.

Put the log-shaped dough at the end of the circle of dough and roll up the dough pieces. Once all rolled up like a big log, place it horizontally and cut the center using a dough cutter to make 2 roses.

Place the rose bun cut side down on a small piece of baking paper and adjust the rose petals (spread out the petals slightly). Rest the rose buns in warm mist for 20 - 30 mins.

Steam the rose buns under rapidly boiling water on high heat for about 15mins.

Slightly open a little gap of the lid for 5 mins to allow the heat to escape before taking the buns out from steamer.


Should have 10 roses but I ate one
since can't squeeze all into the box ^-^!

I'm pleased on my second attempt ^-^. The mantou tasted soft ... and I'm so in love with these sweet yellow roses.

Have a lovely day !

This post is linked to the event Little Thumbs Up (Oct 2014 Event: PUMPKIN

Photobucket


And I'm submitting this post link to "My Treasured Recipes #3 - Taste of Autumn (Oct/Nov 2014)"
 & co-hosted by Charmaine of Mimi Bakery House


Also I'm joining Best Recipes for Everyone October 2014 Event Theme: Bun in My Hot Steamer hosted by Fion of XuanHom's Mom.


Sunday, 12 October 2014

奶黄包 / Egg Custard Steamed Buns

Pumpkin buns again ?! No ! No ! ... just that its bright golden colour look alike ...


It wasn't too long ago that I've made the fragrant and delicious mini custard mooncakes that were very well received by my family & my sisters. Awesome ! The fragrance of custard & coconut fillings still lingered on my mind. So I decided to make custard steamed buns 奶黄包 .... to satisfy my craving and to join this month's BREE 'Bun In My Hot Steamer'.

Lai Wong Bao / Egg Custard Steamed Buns (with fat-reduced filling)
Recipe adapted from Zoe of Bake for Happy Kids with few of my notes taking in blue (Thanks to Zoe for sharing this wonderful recipe).

Custard Filling:
1/8 tsp salt
30g custard powder
20g icing sugar
20g cornflour
1 tbsp condensed milk
(It is ok to use the 99% fat free ones or any regular ones)
60ml coconut milk (I used Ayam brand light)
(It is ok to use the fat reduced ones or any regular ones)
15g butter
1 large egg yolk

Make the filling one day ahead.

Sift salt, custard powder, sugar, and cornflour into a saucepan. Whisk in coconut milk and condensed milk. Heat over medium-low heat, stirring constantly, until smooth. Add butter and stir until the butter has melted.

Keep stirring while mixture thickens substantially. Continue to stir and cook at medium-low heat until mixture thickens to form firm texture and leaves itself off the side of the pan. Remove the pan off the heat and whisk in egg yolk. This will thin the mixture out slightly. Return the pan to the heat and keep stirring to ensure that the yolk is well-incorporated and mixture thickens again.

Transfer the filling to a bowl and allow it to cool down completely. Once it is cooled, cover the surface of the custard with cling wrap to avoid any condensation form on the cling wrap dripping on the custard. Chill mixture for 1hr or more in the fridge.

Bao Dough:
280g flour, preferably with 7-9% protein content (I used Hong Kong Flour)
1/2 tsp baking powder
(If you are using flour which is NOT self raising, please add this. Otherwise, please omit this.)
1/2 tsp salt
1 1/2 tsp active dry yeast
15g sugar
1 tbsp canola oil
125-140ml lukewarm water (I used about 130ml)

To make bao dough, place the sugar, salt, oil, and water in the bottom of the breadmaker pan. Top with flour (with or without baking powder). Add yeast the last and switch on the machine with "dough” setting.

If breadmaker is not available, combine all bao ingredients and knead to form a smooth dough (at least 20 mins) and then let it rise for 1 hr.

(I'm using hand knead with my steps in (1) & (2) for easy reference)
1) Place sifted flour, baking powder, salt and sugar in a large mixing bowl and make a well in the middle.

2) Fill well with lukewarm water, add yeast. Use a spatula, gently stir the water to dissolve the yeast then slowly bring together flour mixture. Add in canola oil.

3) Knead to form a smooth dough (at least 20 mins) and then let it rise for 1 hr.
{I didn't fall asleep this time as I've to catchup the exciting Hong Kong drama ...lol}

4) When the dough is ready, divide into 10 portions (weighed 40g each). Meanwhile, set water to boil in a steamer.

5) Flatten the dough pieces with your *hands, and place about 1 tbsp custard filling in the center. Pinch up the sides of the dough to completely enclose the filling.
(*hee.. I like to roll & play with the mini rolling pin to flatten the dough). 

6) Place each bao on each paper cup liner or a small piece of baking paper with its seam sides down. Rest the bao in warm mist for 10-15 mins.

7) Steam baos for about 8-15 mins until done. The steam timing varies if you have multiple layers of baos to steam. The layer that is closest to the direct steam will take 8 mins to cook.
Serve immediately but beware that filling can be steaming hot!

"Bun in my hot steamer"
Well, we enjoyed our weekend afternoon break with some piping hot steamed 奶黄包 / Egg Custard Steamed Buns! And keeping few for the next morning's brekkie ^-^!


I'm joining Best Recipes for Everyone October 2014 Event Theme: Bun in My Hot Steamer hosted by Fion of XuanHom's Mom.


Thursday, 9 October 2014

Steamed Pumpkin Buns 南瓜小包子


Aiyoh! Ha ha! ... 我的胖胖南瓜矮包子 ^-^!

Some leftover lotus paste from the last mooncakes making is still idling in the fridge. When the theme for this month's BREE is 'Bun In My Hot Steamer', I know the lotus paste will be put to good use in making some buns. Although I'm not very fond of bread & bun baking, after "think think think" (much consideration), decided to steam these mini buns for our weekend snacks.


Concurrently, to participate events in LTU's Pumpkin and MTR's Taste of Autumn,  I've used pumpkin to make the dough (bun skin) using recipe adapted from Sonia  (Nasi Lemak Lover, thanks Sonia) with slight modification in blue.

Steamed Pumpkin Buns with Lotus Paste filling 南瓜小包子
(Yield 11 buns instead of 13)

Ingredients :
150g pumpkin - skin peeled and deseeded, cut roughly in small pieces. Mashed (steam or microwave to soften)
225 all purpose flour (I used Hong Kong Flour)

1tbsp sugar
1/3 tsp salt

To make yeast water (set aside for 5mins to bloom)
1tbsp lukewarm water
1tsp sugar
1tsp instant yeast

Filling - lotus paste ( you can replaced with red bean paste, peanut or etc)

Pumkin skin - cut into small piece to make as pumpkin’s stem

Method :
1. Add in all ingredients and yeast water in a mixing bowl and knead till smooth dough.
2. Cover with damp cloth and rest for 60mins. (I used cling wrap) 
{zzZzz ... Zzz ... I doze off at my cosy corner ... Rrring !! My timer woke me up! Blur blur me ... Go ! Go! Get up to punch the dough! lol !}
3. Knock down dough to expel some air, transfer to a lightly floured surface and knead for a while.
4. Weigh & divide the dough : 30g each and roughly shape into a ball and rest for 10mins.
5. Lotus paste : 15g each and lightly shape into ball.

6. Fatten and roll out the dough into a circle. Place lotus filling onto the center, wrap and pleat up the sides and seal.
7. Use a butter knife, mark from top and lightly press down towards bottom, keep a small gap in between, repeat this step till whole dough ball finished. Place a small piece of pumpkin skin in the middle and lightly press down.
8. Place the pumpkin buns (pleat area face down) onto a piece of greaseproof paper, on the rack for steaming. Cover with a piece of damp cloth and let rise for another 10-15 mins.
9. Lightly mark bun with butter knife again (to sharpen the pattern) {opps, I've forgotten this step}.
Steam the buns under rapidly boiling water on high heat for about 15mins.
10. Wait for 2mins then only open the lid and remove from the steamer.

While in the process of making these buns, it brought me back to those fun and fond memories of mooncakes making too .... the weighing & rolling the dough and filling into balls ... wrapping and shaping the balls ... hee hee!

My girl joined in the fun in wrapping and shaping these pumpkin buns.
Well .... it's tea-break time ! Come, join me for some piping hot steamed mini fatty sweet pumpkin buns with lotus paste. Enjoy with some hot tea !

Happy "steaming" and have a blessed weekend !


I'm joining Best Recipes for Everyone October 2014 Event Theme: Bun in My Hot Steamer hosted by Fion of XuanHom's Mom.

And
This post is also linked to the event Little Thumbs Up (Oct 2014 Event: PUMPKIN

Photobucket

Thursday, 11 September 2014

Shrimp Dumpling 虾饺 Har Gow


Well ... I'm not 'Dim Sum Dolly' ... LOL ! Since the last mini homemade dim sum feast for our weekend tea, I've got the "hang of it" ... to make some Har Gow.  So far I've done once ... but that was really "N" years ago ...

Other than our occasional dim sum brunch indulgence at some restaurants,  we like to patronize the dim sum stall in the hawker center too. Serves handmade dim sums with wide steamed varieties ... bao, har gow, siu mai, fan choy, lo mai kai, braised chicken feet, steamed mince pork with mushroom, beancurd rolls, yam cake etc. etc. There are 2 to 3 cooks (or 师父) in the stall making the dim sums and 2 other attending to customers with piping hot dim sums dishing out from the traditional big "multi-decker" steamer. The hawker center is usually very packed on the weekends morning. Sometimes, we could hardly find a table / seat for our breakfast.  Alternative option is to (dabao 打 包) pack the food home.

I suppose the difficulty in making nice Har Gow is in the pleating of the dough and getting the 'right' dough texture.  I followed the steps and had some nice pleats actually... but once steamed,  the Har Gow skin (dough) became translucent (like facial mask) ... all the pleats disappeared :(


Adapted from the cookbook of Judy Lew
Ha Gow 虾饺 (Shrimp Dumpling)
3 - 4 servings

Ingredients
Filling
300g shrimp, deveined and chopped small
25g chopped bamboo shoots
1 teaspoon salt
1 teaspoon sesame oil
1/2 teaspoon sugar
1 egg white (I forgot to add)
1 tablespoon cornstarch
Combine filling ingredients and set in refrigerator for 1 hour.

Dough
100g wheat starch
50g tapioca starch
1/2 teaspoon salt
240g Boiling water
2 tablespoon cooking oil

*Note : dough can be made ahead. Wrap with foil or cling wrap.  Dough keeps one day at room temperature.

1) Mix wheat starch, tapioca starch and salt together in a large pot. Make a well in the center and pour in the boiling water.

2) Stir to moisten ingredients (used chopsticks to stir).

3) Cover pot and allow to rest 10 minutes.

4). Knead until a smooth dough forms, adding oil. Set aside. Keep covered until use.

5) Roll portions of dough into a long roll and cut into walnut size pieces.  Roll each piece in hand until smooth.  Then generously oil cleaver and counter top. Press out dough to form a 3" circle.  (Or use a tortilla press).
(When I cut it to walnut size piece, it didn't press out to 3" circle, so I made bigger size about 50 cents coin size)

Pages from the cookbook

6) Pleat half of circle to form a pouch. Put in 2 teaspoons filling, cover and pinch ends together.

7) Gently curve dumpling to form a crescent.

8) Place an oiled steaming plate and steam 15 minutes.

We enjoyed our weekend tea snacks with these dainty hot steamed Har Gow. Tasted good served with some hot tea.

Have a nice weekend ahead ^-^

I'm linking this post with 

Cook-Your-Books

Tuesday, 5 August 2014

Steamed Bao包 and Siu Mai 烧卖

'Har Gow 虾饺, Siu Mai 烧卖, Char Siu Bao 叉 烧 包, Lo Mai Kai 糯米鸡' !!!

Those were the familiar Dim Sum names when the waitress pushed the trolley filled with freshly baked or steamed Dim Sums and announced (like rhyming) as she passed by every table. Customers would just stopped her and choose whatever they wanted from the trolley.   Those were my fond memories when I indulged Dim Sum feast in some Chinese restaurants in the late 80s. Occasionally we have Dim Sum too, but I could hardly find such a scene now.

At home, Mom's shouting for big kids "Dim Sum is ready, Har Gow, Siu Mai, Char Siu Bao, Lo Mai Kai! ... Opps ! sorry .. no Har Gow & Lo Mai Kai  ... next time."

So, what's our mini homemade Dim Sum feast for our weekend tea-break ?  Ta dah da! Steamed Colorful Siu Mai, Char Siu Bao & Chicken Bao ^-^!
Chicken Bao & Siu Mai
Fillings for :
A) Char Siu Bao 叉烧包 (qty: 8)
About 120g roasted char siu (bought from the roasted meat stall), chopped small pieces
* I used the sauce that comes with the char siu. If not using the ready provided char siu sauce from stall, you may use below suggestion to make your own sauce for the char siu filling.
1 tablespoon cooking oil
1 teaspoon sesame oil
1 small onion, dice
Sesame seeds
1 teaspoon sugar
1 tablespoon oyster sauce
1 teaspoon soy sauce
A2) 60 ml water
1 teaspoon cornflour - add a little water (1 tablespoon) to dissolve the cornflour in separate bowl.
Method:
1) Heat wok/pan with medium heat, pour cooking oil.
2) Pan fry onions till fragrant (about 1 - 2 mins), add in the char siu, tossing a little.
3) Pour in the char siu sauce and continue to cook for another 3 mins.
4) Add water, sesame oil and corn flour to thicken the sauce slightly, bring to a boil. A few quick stirring just before turning off the flame.
Sprinkle some sesame seed and set aside.

B) Chicken Bao 鸡肉包 (qty: 8)

120g chicken fillet,  diced finely
2 tablespoon vegetarian oyster sauce
1 teaspoon sugar
1 clove of garlic finely chopped
1 teaspoon freshly grated ginger
1 tablespoon cooking oil
1 teaspoon sesame oil

B2) 60 ml water

1 teaspoon cornflour - add a little water (1 tablespoon) to dissolve the cornflour in separate bowl.

Method:

1) Heat wok/pan with medium heat, pour cooking oil.
2) Pan fry ginger & garlic till fragrant (about 1 - 2 mins).
3) Add in the chicken meat, tossing a little.
4) Pour in the oyster sauce & sugar and continue to cook for another 5 mins.
5) Add water, sesame oil and corn flour to thicken the sauce slightly, bring to a boil. A few quick stirring just before turning off the flame.
Sprinkle some sesame seed & some spring onions if you like. Set aside {note: I had cooked the chicken filling the previous night and refrigerated it.}

As I'm making 2 types of different fillings, do adjust the quantity, ingredients and taste to your preference. 
I'm using the bao - dough recipe adapted from Rasamalaysia
Ingredients for dough :
8g instant dry yeast
160ml lukewarm water
½ tsp white vinegar or lemon juice (optional)
280g low-protein flour aka hong kong flour
100g wheat starch
90g icing sugar
30g shortening or vegetable oil (I used vegetable oil)
10g baking powder
10ml cold water

Method
Buns:
1. Sift together flours and icing sugar. Place sifted flour mixture in a large mixing bowl and make a well in the middle.
2. Fill well with lukewarm water, vinegar and yeast. Use a spatula, gently stir the water to dissolve the yeast then slowly bring together flour mixture.
3. Add in shortening or oil and knead for 10-15 minutes until soft dough is formed. It should be smooth on the surface.
4. Cover dough with damp cloth and let it rise for 30 minutes or until it is doubled in size. (I proofed my dough for 1 hour)
5. Dissolve baking powder in cold water, sprinkle over dough and knead until well combined. Divide dough into 16 equal portions and flatten with a rolling pin to make a 3” circle. (Note: the dough weighed 605g in total, each 37g). Then place a heap teaspoon of filling in the middle, wrap and pleat the dough to seal. Place it on a 1.5” square parchment paper, seal side up. Proof about 10 minutes before arranging the buns into steamer. 
6. Arrange buns into a steamer, leave about 1” gab in between buns. Spray water mist over buns (I didn't do this), and steam in a preheated steamer on high heat for 12 minutes. Remove buns from steamer and cool on rack to prevent soggy bottom.

As for the Siu Mai, I made a batch of small quantity ... about 12 pieces.

Fillings for Siu Mai烧卖
About 80g of minced lean pork
2 - 3 pieces water chestnut, peeled, washed and finely diced
3 - 4 pieces medium-sized prawns - shelled, devein, cleaned and diced.
Add seasoning :
Pinch of salt
1.5 teaspoon light soya sauce
1 teaspoon sugar
1 teaspoon sesame oil
1 teaspoon cornflour
1 teaspoon brandy
Dash of pepper
Combine and marinate the fillings, let stand for at least 1 hour in the fridge. 

A pack of siu mai wrap (I bought the round type).

Instead of wrapping the usual Siu Mai, I like to add some colours to it with some toppings.  

Colorful topping ingredients:
Finely chopped some red capsicum, mushroom, pumpkin and carrot. 
(Can use other variations like some chopped ham, colourful capsicums etc.)

Place 1 tablespoon level filling on each Siu Mai wrapper.  Close the wrapper by pinching in half, then into quarters (tuck in the sides), so forming 4 small cups on top. 

Fill the 'cups'  or 'loops' with small amount of the selected topping ingredients.

Place them in a steamer and steam about 8 - 10 minutes on high heat. Serve hot.

Note : to prevent the Siu Mai wrappers from sticking onto the steamer,  use lettuce as base or lightly grease the parchment paper with oil. 


Hee hee ... you could tell that
I need more practice in pleating the baos

Phew ! Sweat !  Done with all the steaming ! Now, I can sit down comfortably and enjoy my Dim Sums .... let's "yum cha" ^-^! 
Well, we couldn't finish all the baos ... kept a few in the fridge for next day's brekkie ! 

Have a great day!

I'm linking this post to Little Thumbs Up event and the theme for August 2014 is Flour
Photobucket

Hosted by Diana of  Domestic Goddess Wannabe

Thursday, 19 June 2014

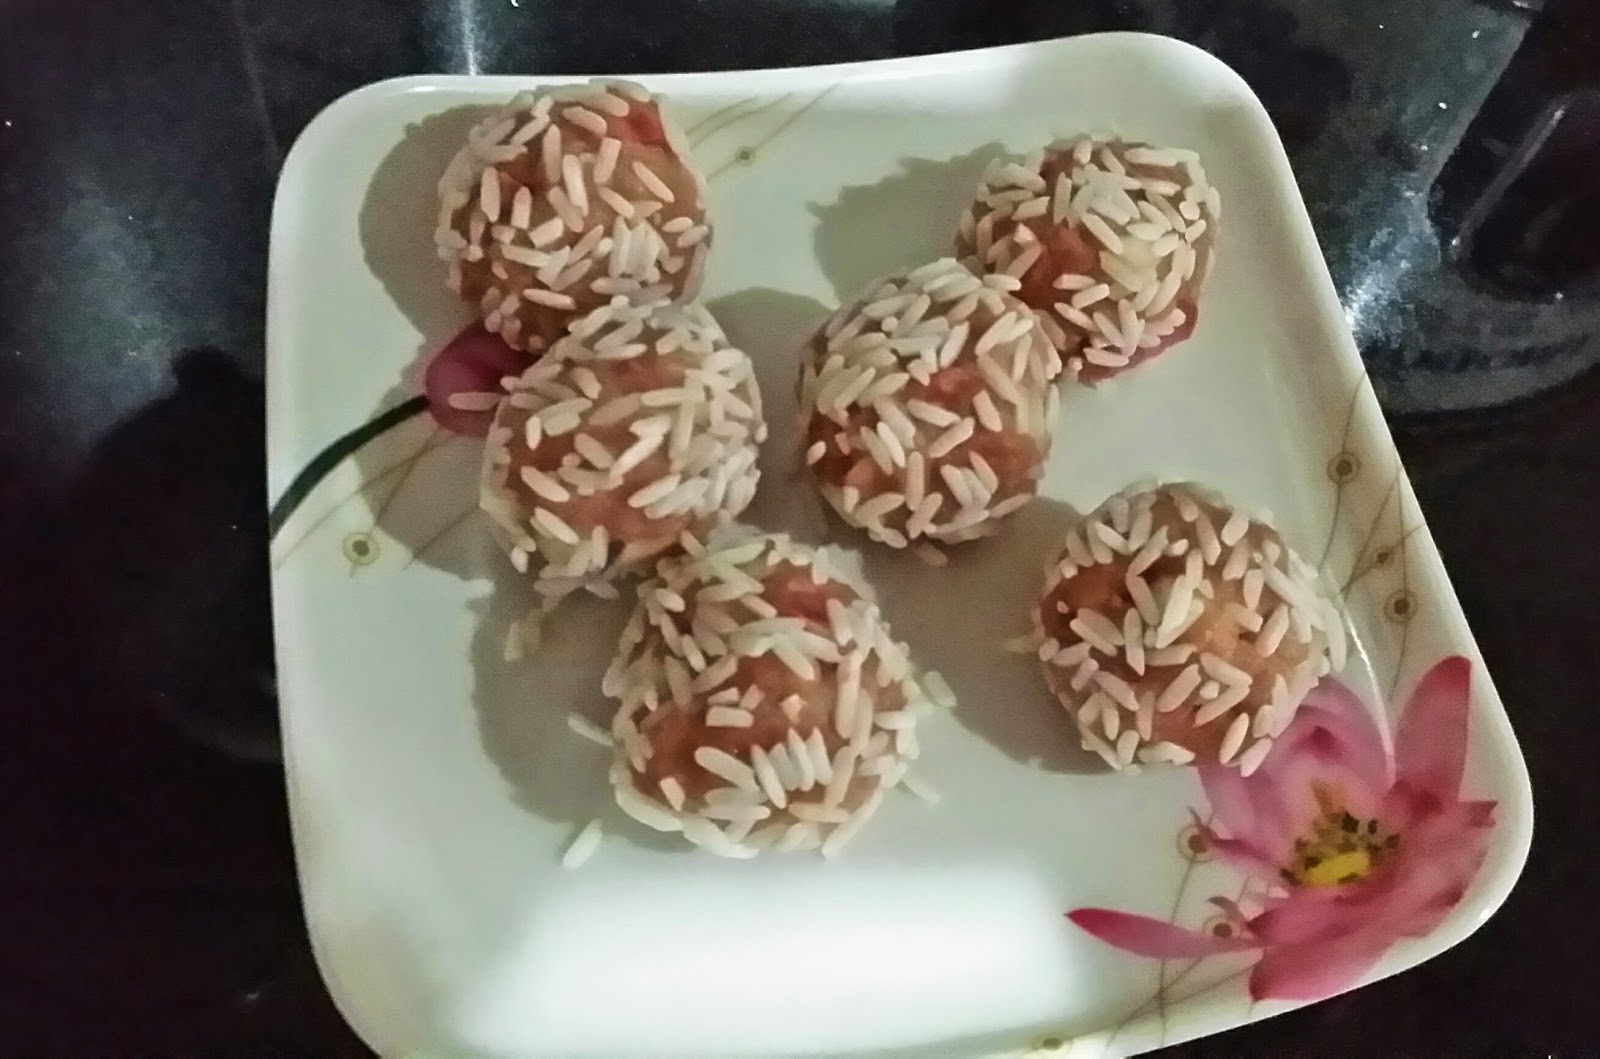
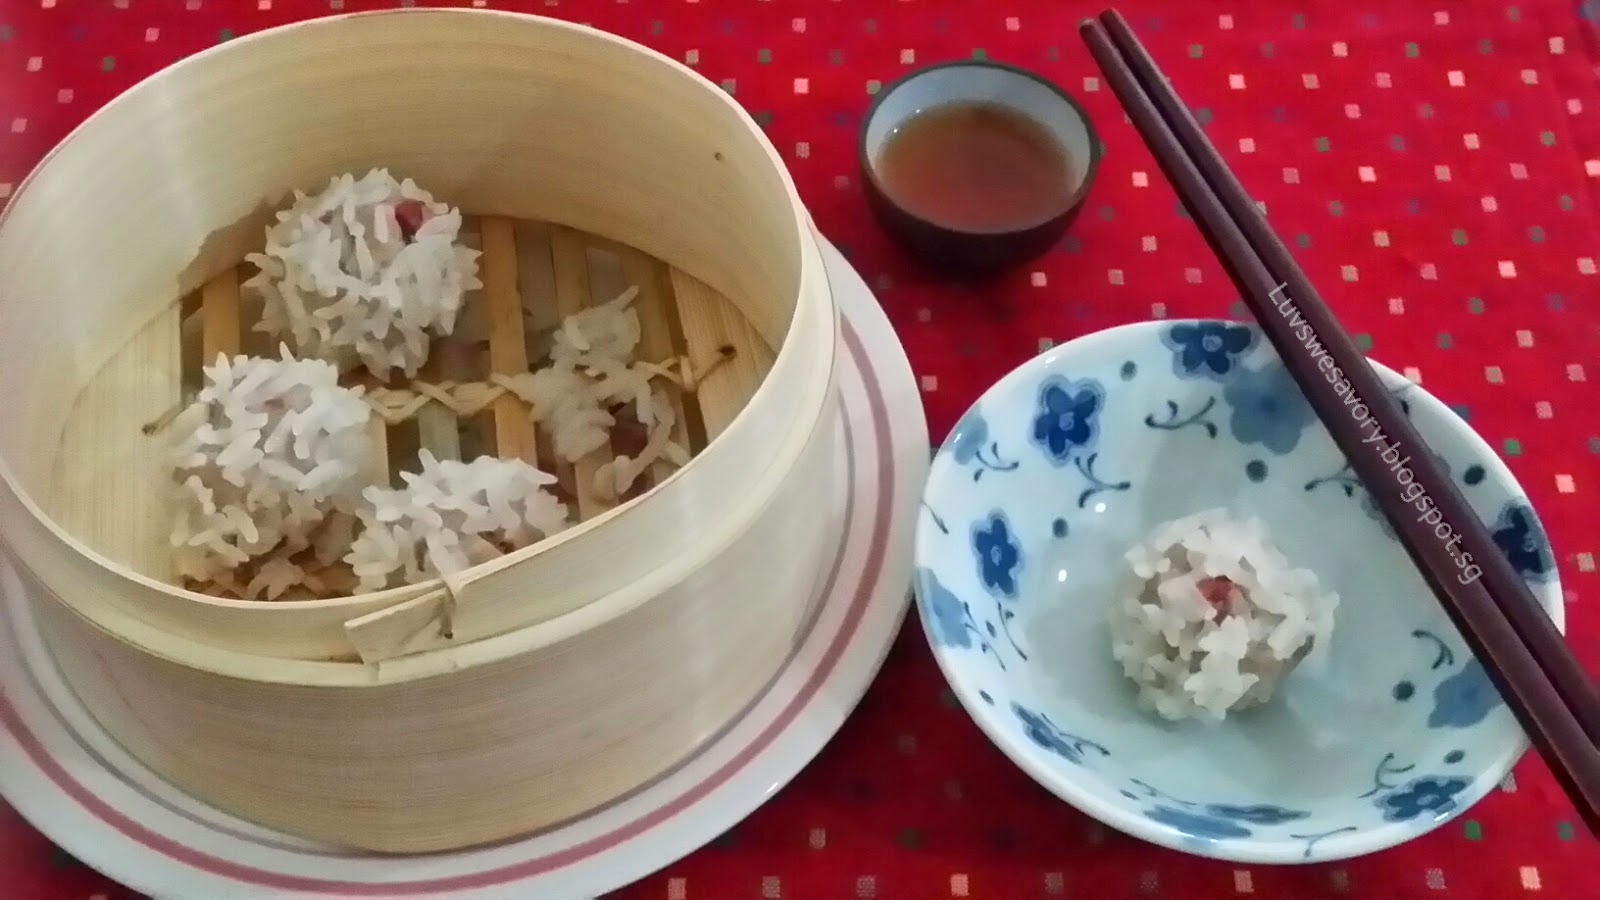
Pearl Balls - Dim Sum

Dim Sum refers to a wide variety of light Chinese snacks usually enjoyed with tea.
I'm always very 'greedy' when having dim sum brunch at the restaurant or tea house (茶楼),  I tend to 'over ordered' and 'over eaten' cause wanna try a bit of everything... be it steamed,  deep fried or baked types. That's why I prefer to enjoy dim sum at the restaurant (especially dim sum buffet) vs homemade as I would not be able to make such huge varieties.  But still, I would occasionally dish out 1 or 2 types of homemade dim sum for my family on some weekends.

I haven't made dim sum for quite sometime. Made some steamed Lo Mai Kai 糯米鸡 was last December.

As my dim sum cookbook was 'lost & found' hee hee LOL ! ... decided to try some dim sum recipes that I haven't attempted from this cookbook ...  small meaty Pearl Balls 珍珠丸子 for our afternoon tea.


Pearl Balls 珍珠丸子
Adapted from the cookbook of Judy Lew
Ingredients: makes 18
Meat mixture
450g lean ground pork
1 Chinese sausage, minced
1/4 Cup : chopped bamboo shoots, Chinese mushroom soaked, rinsed and chopped.
1 tablespoon rice wine (I used brandy)
1 tablespoon soy sauce
1 teaspoon salt
2 tablespoons cornstarch
1 tablespoon sesame oil
(I marinated meat mixture and let it stand for 30 mins)

5 water chestnuts cut into quarters
1 Cup glutinous rice (soaked in water for 1 hour and drained)

Method
1) Combine meat mixture. Surround each piece of water chestnut with meat mixture to form a 4cm ball.


2) Roll each meat ball in glutinous rice.
3) Place in a steamer and steam for 25 minutes.

I have omitted the bamboo shoots and replaced with some finely minced water chestnut.

Served with some hot Chinese tea ... these small meaty balls are really tasty ... not overly filling for our tea snack.


I am linking this post to Cook-Your-Book#13 organized by Joyce (Kitchen Flavours).