Sunday 27 July 2014

Chive and Potato Scones

Not sure if you've tried savoury potato scones?

Since my teens love potatoes ... french fries, cheesy fries,  baked potato skins, mashed potatoes, Shepherd's Pie etc. etc.  I thought that they might like these savoury potato scones too. So I bookmarked this from the cookbook and made for our weekend tea treat.

I almost fell off my chair when my girl asked "pan-fried scallops for tea-break ? ... wow expensive snacks!"
"No, these are potato scones!!! ... LOL!

I was quite amused when my boy said it tasted like "thick doughy" roti prata ... maybe taste good if dip with some curry sauce ... ha ! ha >○<.

CHIVE & POTATO SCONES
Chive and Potato Scones
Makes 20
(adapted from cookbook Cakes and Bakes 500 by Martha Day)
Ingredients:
450g potatoes
115g plain all purpose flour, sifted
2 tablespoon olive oil

2 tablespoon chopped chives
Salt and group black pepper
Low-fat spread for topping

Method:
1) Wash the potatoes and peel the skin. Cook the potatoes in a pan of boiling salted water for 20mins, then drain thoroughly. Return the potatoes to the clean pan and mash them.

2) Preheat a griddle or heavy frying pan over low heat. Tip the hot mashed potatoes into a bowl. Add the flour, olive oil and chopped chives, with little salt and ground black pepper. Mix into a dough.

3) Roll out the dough on a well-floured surface to a thickness of 5mm. Stamp out rounds with a 5cm scone (cookie) cutter, re-rolling and cut the trimmings, or cut into squares with a sharp floured knife.


4) Cook the scones, in batches, on the hot griddle or frying pan for about 10 mins, or until they are golden brown. Keep the heat low and turn the scones once.
(I turned it 3-4 times as afraid that it might burnt)
Nicely browned in the frying pan
5) Remove from the griddle or pan, top with a little low-fat spread and served immediately.

My batch yielded about 17 pieces.

From their expressions and since these scones were 'not gone in few minutes' ... I've guessed as much ... these ain't their 'cup of tea' for their tea break snacks :( They've hinted ... missed those oven baked scones where they could spread with some fruity jam or Nutella.

I was quite hesitant to share this recipe as my big kids didn’t quite like it. But I find this is a less fat, healthier scone recipe. I like these savoury scones ... dough texture abit chewy starchy... fragrant and taste wise ...a little like the lighter version of Chinese 葱油饼.

Hope you enjoy your long weekends !

Photobucket

This post is link to Little Thumbs Up event and the theme for July  2014 is Potato 
This event is organised by Zoe of Bake For Happy Kids 

Wednesday 23 July 2014

Baked Japanese Curry Rice


I've always wanted to make baked rice but didn't quite have the chance as the sauce (cooking cream, carbonara etc) would always be used for pasta
 ^-^.
I bought a pack of Japanese rice for sushi making few months ago. In between, I've cooked some Chicken Teriyaki rice bowl. When I saw the blog post by HHB earlier this month on her Baked Japanese Curry Rice ... bingo! my 2 packs of Japanese vegetable curry roux hidden in the cabinet can be put to good use ^-^!

Recipe adapted from Happy Home Baking, replicated below adjusted to our preference and taste.
Baked Japanese Curry Rice
Some prepared ingredients
Ingredients:
(makes 4 servings)
200g chicken clean and cut into bite size
Half medium yellow onion, coarsely chopped
2 medium potatoes, peeled, cut into bite size chunks
Some pumpkin, sliced thickly.
2 tablespoons vegetable oil
2 cups water
2 packets Japanese curry roux (200g per pack) yes they love to have thick sauce
4 cups cooked Japanese rice
1 cup broccoli floret
some Parmesan cheese

Method:
1) Blanch the sliced pumpkin and broccoli with boiling water for 2 to 3 minutes. Drain and set aside.

2) Saute chopped onions with the vegetable oil in a frying pan until translucent and lightly browned.

3) Add in the meat, saute the meat till lightly browned. Add in potatoes and stir fry for a couple of minutes.
Add the water (use enough water to cover the ingredients) and bring to a boil. Lower the heat, cover and let it simmer for about 5~8 minutes.

4) Add curry roux and simmer for amother 10 minutes, or until thickens. Keep stirring to ensure the curry roux is fully dissolved.
Adjust the thickness of the curry to your preference.

5) For each serving, *place 1 cup of cooked rice in an oven-proof dish. Place 1/4 portion of the Japanese curry over the rice. *you may adjust the quantity of the rice to your preference. Like for myself ... the lesser the better :D

Put some blanched broccoli and pumpkin on top. Sprinkle top with Parmesan cheese.

Bake in preheated oven at 180 degC for about 10~15 mins or until the cheese turned golden brown.

Serve hot & enjoy our dinner! They liked this non spicy baked curry rice.
This big bowl is for my boy


Happy baking and 
Enjoy the long weekends ! 
Photobucket

This post is link to Little Thumbs Up event and the theme for July 2014 is Potato 
This event is organised by Zoe of Bake For Happy Kids 


Monday 21 July 2014

Shepherd's Pie


I must say that Shepherd's Pie was introduced by my big boy whom had baked twice for the family. Once for our weekend dinner and another time was baked specially for me on Mother's Day in May.

It all started when I was chatting with my baking kakis (friends) on some recipes and we mentioned Shepherd's Pie.  My boy heard that and commented he baked that during his home economic lessons in school. There were few cooking lessons taught in the secondary schools where the students learned to cook some meals like pasta, fried rice and bake some muffins and cookies etc. etc. All the ingredients were provided by the schools.

So, he was keen to 'cook up a storm' on one weekend. It has indeed become his signature dish. All this mom had helped was to buy some ingredients and to adjust the oven timing and temperature setting for him.

This time round, mommy decided to have a hand to bake Shepherd's Pie for the family's weekend dinner. Since my boy had used minced chicken for his previous pies, I used beef as I don’t take mutton.

Recipe adapted from simply recipes  with some slight modification in blue adjusted to our taste.

Shepherd's Pie - serves four
INGREDIENTS
1 1/2 lbs ground round beef (I used 450g)
1 onion chopped (half onion)
1-2 cups vegetables - chopped carrots, corn, peas (I used 250g)
1 1/2 - 2 lbs potatoes (3 big ones)
8 tablespoons butter (I used 2 tablespoons for mixing the cooked potatoes)
1/2 cup beef broth (omitted, I just add some water)
1 teaspoon Worcestershire sauce
I used 2 tablespoons of olive oil for frying the meat.
Salt, pepper, other seasonings of choice

METHOD
1) Peel and quarter potatoes, boil in salted water until tender (about 20 minutes).
Some prepared ingredients and bought
 a bottle of Worcestershire sauce
2) While the potatoes are cooking, pour 2 tablespoon olive oil in large frying pan.

3) Sauté onions in olive oil until tender over medium heat (10 mins). If you are adding vegetables, add them according to cooking time. Put any carrots in with the onions. Add corn or peas either at the end of the cooking of the onions, or after the meat has initially cooked.

4) Add ground beef and sauté until no longer pink. Add salt and pepper and worcesterchire sauce.
Add some water and cook, uncovered, over low heat for 6 - 10 minutes. 
(*Add half a cup of beef broth if using it and cook, uncovered, over low heat for 10 minutes, adding more beef broth as necessary to keep moist)

5) Drain and mash potatoes in bowl with butter, season to taste. (I omitted any salt to the mashed potatoes as the sauté meat should taste salty enough).


6) Place the cooked beef, onions & vegetables in baking dish. Distribute mashed potatoes on top. Rough up with a fork so that there are peaks that will brown nicely. You can use the fork to make some designs in the potatoes as well.

7) Cook in 200°C oven until bubbling and brown (about 30 - 35 minutes). Broil for last few minutes if necessary to brown.

With some wild rocket and cherry
tomatoes ... simply delicious! 
Girl : mommy, have you snapped some photos ?
Mom: yes done !
Girl: me too !
Mom: for what hah ? You have blog?
Girl : Nope ..'We Chat' show my friends lah !
Boy : Okay... let's tuck in ... mom, did you add some fresh milk to the mashed potato?
Mom : No, not in recipe mah ...
Boy : Add some milk to it, texture creamier and taste better.
Mom : Okay noted ... next time ...^-^.
Oh man ! Looks who's talking ! 

Fresh from the oven ... Shepherd's Pie!  Enjoy!

Photobucket

This post is link to Little Thumbs Up event and the theme for July  2014 is Potato 
This event is organised by Zoe of Bake For Happy Kids 

Saturday 19 July 2014

Raisins Soda Bread


With slightly more than half the pint of buttermilk in the fridge,  not sure what to bake ....
Decided to have a cup of tea
instead of coffee
Saw this quick soda bread recipe from the cookbook Cakes and Bakes 500 by Martha Day. Unlike bread made with yeast, it takes only a few minutes to make and needs no rising or proving. I quickly baked this early in the morning for brekkie ^-^!

A rustic-looking bread ... this bread is tasty, easy to make and goes well with a cup of hot beverage or soup. If possible,  eat soda bread warm from oven as it does not keep well.

Raisins Soda Bread
Makes one loaf
340g all purpose plain flour
1/2 teaspoon salt
1 teaspoon bicarbonate of soda (baking soda)
150g raisins
300 - 350 ml buttermilk

1) Preheat the oven to 220°C. Lightly grease a baking sheet and set aside.

2) Sift the flour with salt and bicarbonate of soda into a large bowl.

3) Stir in the raisins and add enough buttermilk to make a soft dough.  Do not over-mix or the bread will be heavy.

4) Shape the dough into a round loaf and place on the lightly greased baking sheet.


5) Cut a cross in the top, cutting deep into the dough.

6) Bake in the oven for about 40 mins, or until the loaf is well risen and sounds hollow when tapped on the base.
* You could form the dough into 2 smaller loaves and bake them for 25-30 mins.
Leave to cool in a wire rack.
I'm linking this post to 


Thursday 17 July 2014

Coffee Rice Flour Chiffon Cupcakes

I was thinking since there's Hokkaido Chiffon cupcakes,  can we not just have chiffon cupcakes? I was planning to bake pandan chiffon in cupcakes over the weekend as I need to buy some pandan leaves ... also I may need more time cos in case the bake didn't turn out well, I have the 'long' weekend to "sob sob" to get over it >w<

When I saw Zoe's post on Pandan Chiffon Cupcakes this morning,  it gave me the affirmation ! YES, CAN !
And when I saw Lena's post on Coffee Rice Flour Chiffon Cake, I was scratching my hands ... I've got the ready ingredients and COFFEE ! As soon as I reached home from work, baked these cutie cupcakes for our brekkie !

Dust some snow powder
Click here to visit recipe adapted from Lena of Herfrozenwings and Kimmy of Cooking Pleasure and chiffon cupcakes by Zoe of Bake for Happy Kids


Coffee Rice Flour Chiffon Cupcakes 
My slight modifications in blue
Ingredients
30ml hot brew coffee (Expresso Intenso) add to 20ml cold fresh milk
4 egg yolks
4tbsp castor sugar
4tbsp corn oil
70gm cake flour, sifted
30gm rice flour, sifted

4 egg whites
4tbsp castor sugar

Directions
Preheat oven to 170C/180C.
Hot brew coffee add to cold milk set aside and let cool.
Combine both the flours together. Using a hand whisk, beat the egg yolks and sugar till blended and slowly add in oil and whisk till well combined.
Slowly drizzle in the coffee mixture and continue to whisk till well combined. Add in the sifted flour and mix till batter is smooth and well combined.

Whisk egg whites till foamy and gradually add in the sugar and whisk till soft medium peaks formed (do not over beat).
Fold in 1/3 of the meringue to the egg yolk mixture till well combined and fold in the remaining meringue into the egg yolks batter.
I used a 12 square cups muffin tin.
 I couldn't smooth the batter top
Ta da ! The top look smooth when baked ^-^ 
For 12 cupcakes using a muffin tin :
I used baking paper. Line 12 muffin cups with paper liners or baking paper. 
Do not grease.
Pour the batter evenly, filling about 3/4 full in each cup.
I bake it at 160°C for about 30 to 35 minutes.(or until cupcakes are cooked completely)
Leave on cooling rack to cool.

If using a chiffon tube pan:
Pour batter into a 7 inch ungreased chiffon pan and bake for 35-40 minutes.
Invert baked cake immediately to cool before unmoulding from pan.

Take note :
Different oven may varies in temperature.
Do not open the oven door while the cakes are baking as the sudden change of temperature especially during the first 30 minutes of baking will deflate and damage the cakes completely.


I was quite happy with this batch of chiffon cupcakes ^-^! The top were smooth and no crack .... a few cupcakes sunk very slightly in the middle but overall okay, texture soft and fluffy :)

Glad to bake along theme chiffon with so many wonderful friends. Cheers & enjoy your weekends ! ^-^

Bake-Along #64 : Theme - Chiffon CakePhotobucket

Linking this post for Bake-Along event 
post linking direct to event organisers (JoyceLena or Zoe)


Monday 14 July 2014

Orange Rice Chiffon Cake

These chiffon cakes (using tube pan) are really driving me crazy !!! Never had I been so 'nuts crazy' ... to bake 3 chiffon cakes in a row in less than one and half weeks ^w^! But surprisingly my teens liked chiffon cakes and asked when will I bake the pandan flavour. {Gosh ! Aren't they equally crazy enjoy seeing mom "suffering the unmould pan with irregular heartbeat stress" syndrome in baking chiffon ?... ha ha! Orange and lemon flavour I could hardly bake well ... they want pandan flavour? !!!}

Yeah ! It has risen 1cm taller than my previous 2 chiffon cakes ! Yeah LOL! BUT ... Next comes the "pong ! pong heartbeat" drum against my chest ... Aiya! Got no 'sarong' or skirt to wrap around it. The sides are not browned! Haiz !


Well, here's a slice of orange rice chiffon cake
The texture of this 3rd chiffon cake is definitely much better ...cottony fluffier and softer than the previous two. It raised slightly taller too ^-^!

All I could say that for all my chiffon cakes :
All didn’t have cracked top ^-^!
All are rather "shorties" and "sexy without sarongs" >~<

My girl: this one taste more fluffy, good!
My boy: hee hee ! this cake is 'bouncing ... like doi doi, feel so springy' [as he picks up a slice from the container]

Recipe adapted from Vivian Pang's Kitchen here using rice flour.
Orange Rice Chiffon Cake
Ingredients:
(A)
5 egg yolks
15g sugar
40g vegetable oil
1/4 tsp salt
50ml orange juice and zest
(B)
60g cake flour
30g rice flour
(C)
5 egg whites
45g sugar

Method:
1. Pour egg yolks and sugar in a bowl. Whisk till sugar dissolves.
2. Add in oil, salt, and juice & zest into the bowl. Stir well.
3. Fold in sifted flour. Mix till smooth.
4. In another bowl, whisk the egg whites till frothy. Add sugar gradually and beat until stiff.
5. Fold in 1/3 of the whites into the yolk mixture till well incorporated.
6. Pour in the remaining egg whites and fold gently till well combined.
7. Pour into 20 or 22 cm chiffon mould.
Gently tap the pan on a table top to get rid of any trapped air bubbles in the batter. Bake at 160C for 40 minutes.
8. Immediately invert it after removed from oven. Leave to cool. When cake is cold, remove from mould.

When  the pan was removed from the oven, I used the suggested technique to drop the pan at a height of 20~30cm onto a table top.
This action helps to keep the springy texture of the cake when it is left to cool.

Once again, thanks to my baking kakis JoSua for her chiffon tube pan and JSeow for some tips. We indrectly had a 'chiffon cake bake along' session too ... through our Watsapp chats ^-^!

Okay I know ... more practice is needed ... But I need to take a short break from baking chiffon cake in tube pan! I need to "infuse some magical chiffon charismatics power to my hands" before making a comeback for chiffon cake ^0^ (Borrowed a famous tag line from Terminator ... I'LL BE BACK!) LoL >●<!

Bake-Along #64 : Theme - Chiffon CakePhotobucket

Linking this post for Bake-Along event 
post linking direct to event organisers (JoyceLena or Zoe)


Sunday 13 July 2014

Mango Sticky Rice


Besides durians & bananas, my teens love mangoes too. I just cut a thick slice from each side of the seed on the unpeeled mango. Make some criss-cross cuts in the flesh. Turn it inside out and they would just hold the mango skin, bite the cubes of juicy mango flesh ... enjoy eating the fruit in this way.
Ever since they had tasted Mango Sticky Rice at one of those Thai Restaurants when they were young, they had asked 'can mommy make this at home?'

I couldn't recall where I have obtained the recipe from. During those days, I just glance few recipes here and there for some "know-how" and adjusted the quantity and sweetness etc. But I would usually make a small portion as glutinous rice is very filling coupled with the milky coconut milk.
Left 2 mangoes in the fruits bowl
Yeah it's mango season. Bought some and when my big boy saw these mangoes,  he said "wah ! So many mangoes ... it's been a long time you didn't make mango sticky rice hor". He hinted ... hee hee.

I like to add few pieces of pandan leaves to the rice and coconut milk mixture ... more fragrant.

Mango Sticky Rice (4 servings)
Ingredients:
170g of glutinous rice (I used the cup for measuring cooking rice 1 full cup).
1 small packet 200ml coconut milk
3 to 4 small pcs crystal rock sugar with 4 to 5 tablespoons of water
Few pieces of pandan leaves
Pinch of salt
1 ripe mango

Method:
1) Wash and soak glutinous rice for few hours or overnight.

2) Drained, spread rice with 2 pieces of pandan leaves over a heatproof plate, place over a saucepan of simmering water. Cover the saucepan and steam for 25 - 30 minutes or until rice is tender and translucent.

3) Prepare the coconut milk mixture. Dissolve the rock sugar with water in a small saucepan over medium heat. Place 1 - 2 pieces pandan leaves (about 3" - 4" lengthwise), pour in 100ml coconut milk. Stir the coconut milk till heated through (do not boil).

4) Once the glutinous rice is cooked, transfer the rice to a large bowl. *Add the coconut milk mixture and stir to combine, ensure the rice is coated with coconut milk. Set aside for 10 minutes to stand.
* may add all the coconut milk or lesser according to your preference.

5) In a clean saucepan,  pour the remaining coconut milk and a pinch of salt.  Stir till heated through (do not boil).

6) Divide the rice among serving plates. Top with some mango slices. Spoon over the thick coconut milk.

A spoonful of juicy sweet mango and sticky coconut rice ...yum yum! Enjoy!


Saturday 12 July 2014

Hokkaido Chiffon Cupcake

I had baked a batch of Hokkaido Chiffon cupcakes sometime early last year. Like Zoe of Bake for Happy Kids,  I too used the recipe adapted from Sonia Nasi Lemak Lover. I was very happy to see a chiffon cake recipe using cupcake liners as I don’t have a chiffon tube pan.  Zoom ! Zoom ! With super fast action ... lined the cupcakes liners, whisked the egg, folded in the whites ... popped them into the oven ... BUT that bake was a 'disaster' ... the cupcakes deflated (almost flat) and I couldn't even pipe the custard filling.

Okay, pick up the courage to bake these chiffon cupcakes again. Well, my 2nd attempt turned out quite well. The texture is so soft ... so delicate ... that's why I quickly stopped pipping the filling as I scared they might 'burst' LOL!


Hokkaido Chiffon Cupcakes 北海道牛奶蛋糕
Recipe adapted from Nasi Lemak Lover
makes 9 cupcakes
3 egg yolks
20g sugar
35g corn oil
60g milk
70g cake flour

3 egg whites
25g sugar

Filling
60g dairy whipping cream
10g sugar
1tsp instant custard powder

Icing sugar, for dusting (I used snow powder, mango & strawberry for topping)

Method
1. Pre-heat oven to 170C.
2. Arrange paper liners on baking tray.
3. Hand whisk egg yolk and sugar till pale in colour.
4. Add in corn oil and milk, mix well.
5. Sift in cake flour, stir to combine.
6. Beat egg white until foamy, gradually add sugar, and continue beat till soft peak form.
7. Take 1/3 of egg white and use a hand whisk to mix into egg yolk batter.
8. Fold in the balance egg white with a spatula till well combine.
9. Scoop batter into pre-arranged paper liners to about ¾ full.

10. Bake for 20-25 mins at middle rack.
11. Beat whipping cream with sugar till firm and stiff (over a bowl of iced water).
Mine is not detachable to use as electric hand whisk.
12. Add in custard powder, mix well.
13. Pipe custard cream into cupcake and dust with icing sugar. Refrigerated before consume.

Fluffy soft texture ... I should have piped more
custard filling !
Yummy ... all gone within minutes! 
We can't wait to have these yummy lovely chiffon cupcakes for our tea time !
Enjoy and have a great weekend!
Thanks to Zoe and Sonia for sharing the wonderful recipe!

Bake-Along #64 : Theme - Chiffon CakePhotobucket

Linking this post for Bake-Along event and 
post linking direct to hosts' post (JoyceLena or Zoe)

Thursday 10 July 2014

Lemon Chiffon Cake

These lovely browned chiffon cakes baked by some blogger pals like Kimmy of  http://kimmy-cookingpleasure.blogspot.sg/2014/04/orange-rice-flour-chiffon-cake.html?m=0, Tze http://awayofmind.blogspot.sg/2011/07/honey-lemon-chiffon-cake.html?m=1 & Phong Hong http://phonghongbakes.blogspot.sg/2012/06/pandan-chiffon-cake.html?m=0 and my baking kaki JSeow had really inspired me to attempt chiffon cake ... even though I don't have a chiffon tube pan.

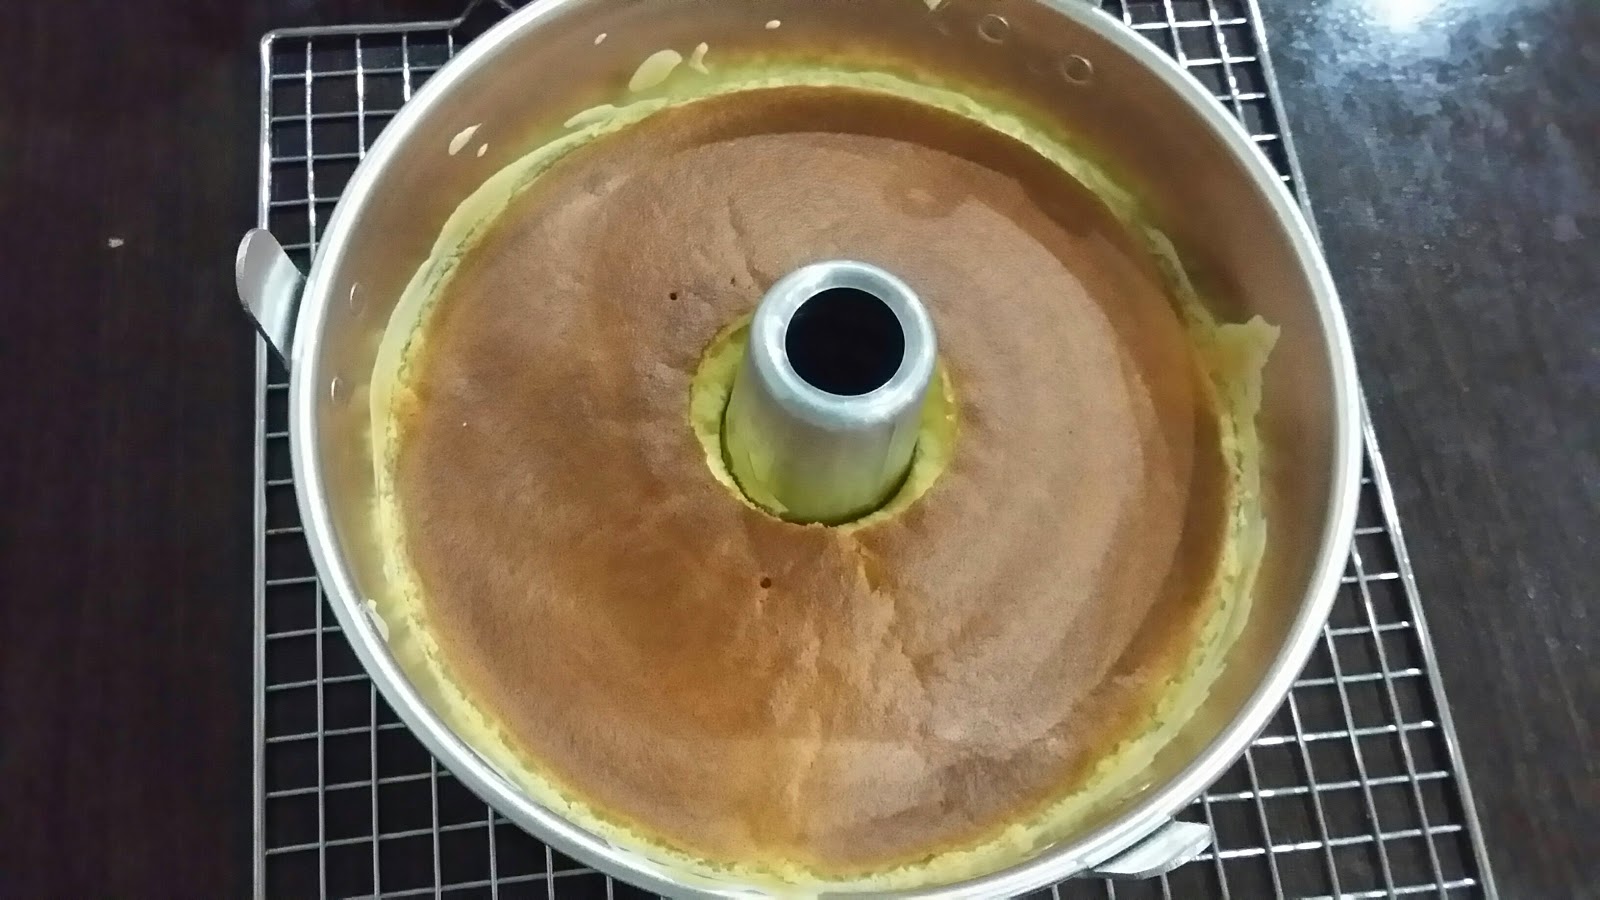
I was laughing at my 'naked' chiffon cakes as I thought that chiffon cakes were supposedly wrapped with "brown sarong" ... that has very nicely browned sides in most chiffon cakes pictures I've seen.
Lemon Chiffon Cake
I borrowed a chiffon tube pan from my 'baking kaki' to try 2 recipes that I've bookmarked long ago, both adapted from Happy Home Baking :
cranberry orange chiffon cake
lemon chiffon cake

Sadly :( ... both my attempts yielded unsatisfactory results.

Here's my sharing :
1st cake: Cranberry Orange Chiffon Cake
When I took the pan out from the oven, I didn't handle it well as I accidentally hit the center of the pan when trying to invert it. Gosh! I've forgotten that it was a 'REMOVABLE' base cake pan ... It got unmould... obviously I couldn't put on it's 'sarong' or 'skirt' back and just leave it to cool 'naked' on the rack... LOL!

Pls don't look at me ... shy shy !
Cranberry Orange chiffon cake

2nd cake: Lemon Chiffon Cake (adapted from Happy Home Baking)
Ingredients
(makes one 18cm cake) <I used a 21cm tube pan>

100g cake flour
1 1/2 teaspoons baking powder
1/2 teaspoon salt
3 egg yolks
40g caster sugar
50ml vegetable oil
50ml water
25ml lemon juice
zest of 1 lemon

3 egg whites
40g caster sugar

Method:
  1. Sieve flour, baking powder and salt together, set aside.
  2. Separate egg yolks/whites and bring to room temperature. (It is easier to separate eggs when they are cold.)
  3. Place egg yolks in a mixing bowl, add sugar in 3 separate additions and with a manual whisk, whisk till the mixture becomes sticky and turns pale.
  4. Drizzle in the oil, whisking at the same time till the mixture is well combined. Repeat the same with the water, followed by the lemon juice. Sieve over the flour mixture and whisk until flour mixture is fully incorporated into the batter. Add in the lemon zest and mix well.
  5. In a clean, dry mixing bowl, beat egg whites with an electric mixer until mixture becomes frothy and foamy. Gradually beat in the sugar and beat on high speed until  just before stiff peaks form* (after note: after several attempts at baking chiffon cakes, I learned that the whites should be beaten until just before stiff peaks form).
  6. Add the beaten egg white into the egg yolk batter in 3 separate additions, each time folding gently with a spatula until just blended.
  7. Pour batter into a 18cm (7 inch) tube pan (do not grease the pan). Tap the pan lightly on a table top to get rid of any trapped air bubbles in the batter.
  8. Bake in pre-heated oven at 170 degC for 45 ~ 50mins or until the cake surface turns golden brown, and a skewer inserted into the centre comes out clean.
  9. Remove from the oven and invert the pan immediately. Let cool completely before unmould. To remove the cake from the pan, run a thin-bladed knife around the inside of the pan and the center core. Release the cake and run the knife along the base of the pan to remove the cake.
For both cakes when removed from the oven, I used the suggested technique to drop the pan at a height of 20~30cm onto a table top. This action helps to keep the springy texture of the cake when it is left to cool.

I was extremely careful this time not to strip off the 'sarong'. But when unmould ... opps ... no 'sarong' again !

Why you didn't rise to 3rd storey high? 
Yeah ! I'm covered !
Oh O ! No 'sarong' again :(
Both cakes didn't rise as tall, perhaps I've used a smaller quantity recipe unfit for a bigger pan size. (Lesson learned,  don't be 'k kiang' act smart ... use the right recipe for right pan size!!!) ... Or perhaps I've not beaten the whites to peak ... :(

But overall the texture was ok, soft and fluffy but not to its maximum fluffiness ( which I'm expecting) for both cakes.

Thanks to my baking kakis JoSua for her chiffon tube pan and JSeow for some of her professional advice.

Lemon chiffon cake
Saw some chiffon cake recipes that uses rice flour ... okay okay ... my next chiffon lesson ^-^ 加油 !

Bake-Along #64 : Theme - Chiffon CakePhotobucket

Linking this post for Bake-Along event and 
post linking direct to hosts' post (JoyceLena or Zoe)