Saturday 27 September 2014

Chocolate Chip Buttermilk Pancakes

Bought a pack of buttermilk but did not bake the cake that I had planned to. Need to use before it expires soon. Craving for some pancakes for our breakfast ... and this recipe calls for buttermilk. Bingo! 
But ... Oh NO! 
Chocolate indulgence ... again ?! 
Hee hee ... ok ok in moderation ... 
Choco-licious Chocolate Chip Buttermilk Pancakes for our weekend brekkie.


The recipe yields 4 servings but I halved it to 2 servings. Recipe source : Annies eats

Chocolate Chip Buttermilk Pancakes
2 servings (about 10 pieces) enough for 2 - 3 persons.
Ingredients:
1 egg
240ml buttermilk
2 tbsps butter (melted and cooled)
1/4 tsp vanilla extract
125 grams all-purpose flour
1 tbsp sugar
1 tsp baking powder
1/2 tsp baking soda
1/2 tsp salt
105 grams chocolate chips

Method:
1) In a large bowl, lightly beat the eggs.  Whisk in the buttermilk, butter and vanilla extract and mix until well combined.  Add in the flour, sugar, baking powder, baking soda and salt.  Mix just until incorporated. Add in the chocolate chips and stir just until combined.

2) Preheat the oven to 90°C (to keep the cooked pancakes warm).
Heat a griddle or skillet over medium heat. Melt a thin pat of butter in the pan and spread it around.  Once the bottom of the pan has been covered, wipe the butter out gently with a paper towel so that only a very thin film remains.

3) Drop scoops of batter of your desired size (I used ice cream scoop) into the pan. Cook the first side until bubbles form on the surface and begin to pop, and the bottom is golden brown.  Flip gently with a spatula and cook again until cooked through and golden brown on both sides.  Transfer the cooked pancakes to an oven-safe dish in the warmed oven and repeat the process with the remaining batter.  Serve immediately.

Fluffy soft pancakes with chocolate chips. To serve, sprinkle some chocolate chips and drizzle maple syrup over the warm pancakes. As usual, my girl loved to spread with her favourite Nutella.
Yummy ! Choco-licious !
Have a nice weekend ^-^!


This post in joining Best Recipes for Everyone September Event : Chocolate Wonderland


Thursday 25 September 2014

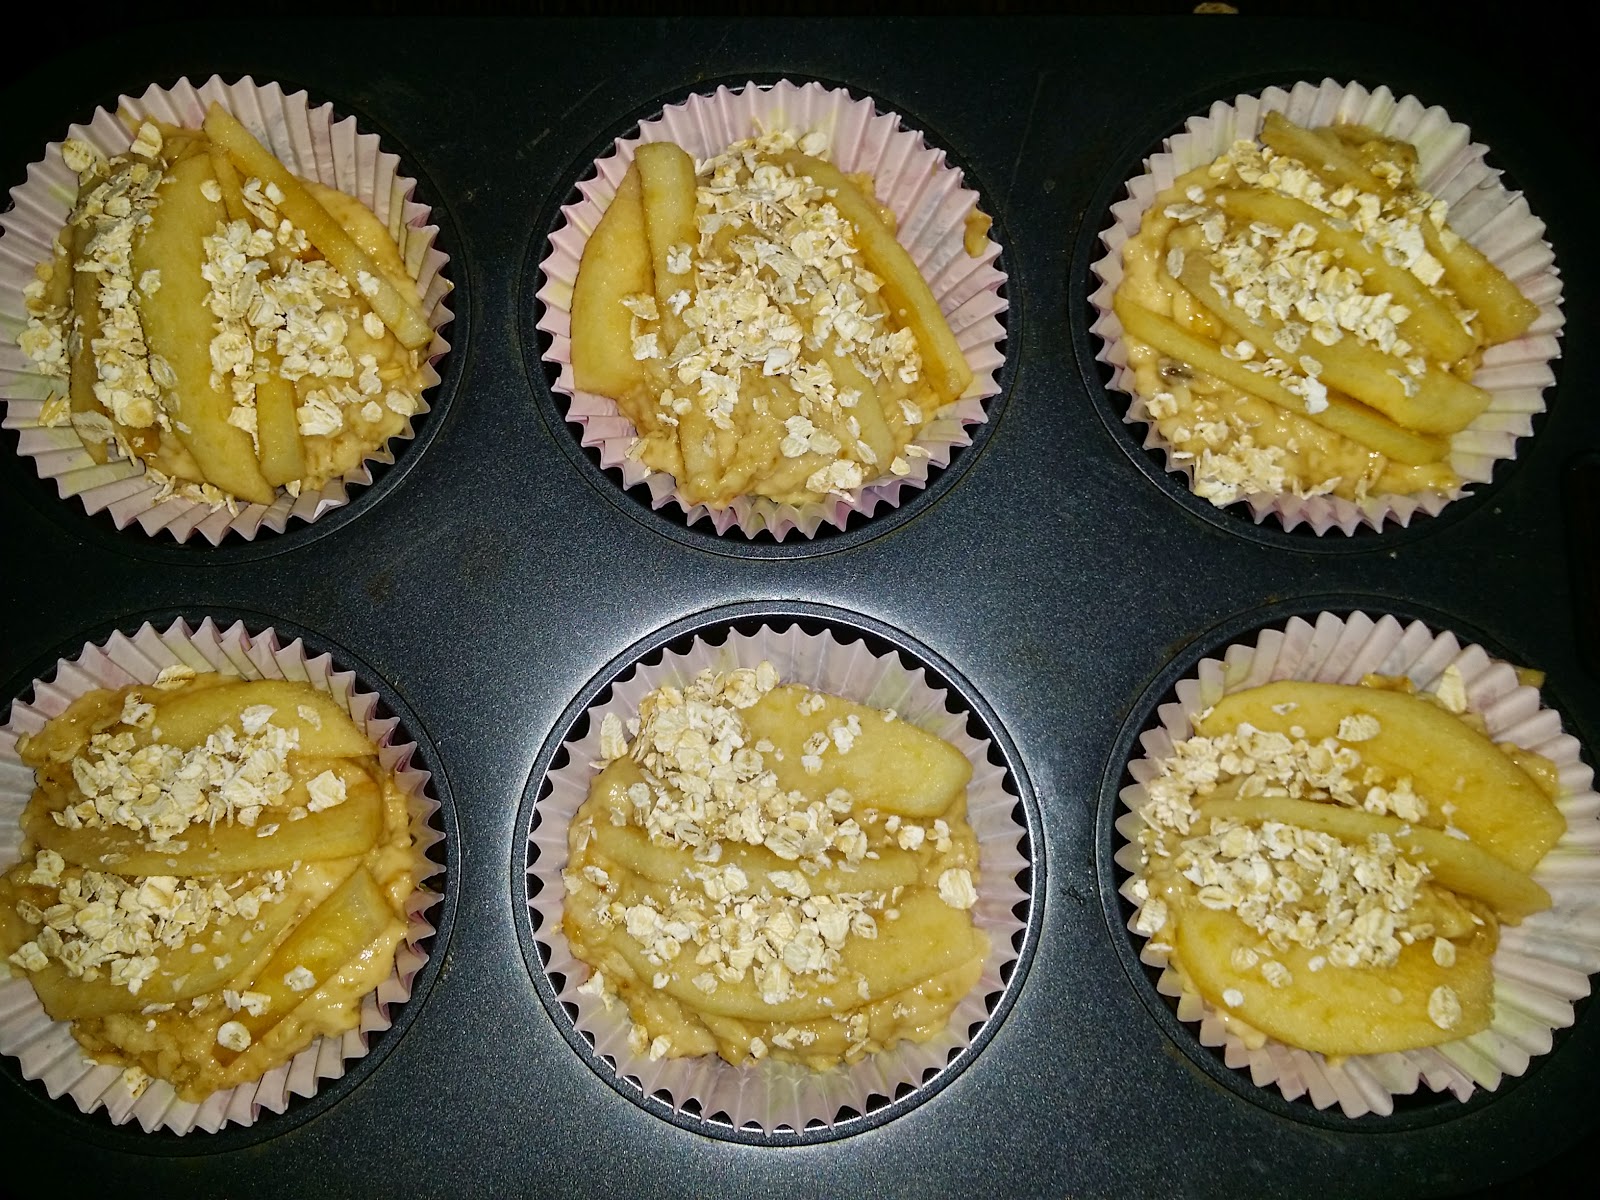
Apple & Oat muffins

I like to bake some healthy oatmeal muffins ... I want to add some fruits to the muffins too .... Ah ha! Apple + Oat ! That's because I've got a new pack of rolled oats and some apples 'idling' in the fruit basket ... lol !


Recipe source from Taste.com  I halved the recipe and made few slight modifications to suit our taste. Please visit Taste.com for the full recipe.

Apple & Oat Muffins (makes 6)
Ingredients:
70g self-raising flour
70 plain flour
1 teaspoon baking powder
60g light muscovado sugar
20g rolled oats, plus 1 tablespoon extra
100ml natural yogurt, at room temperature
1 egg, lightly beaten
50ml light olive oil
1 red or green apple, peeled, cored and thinly sliced

Method :
Step 1
Preheat oven to 180°C. Grease a 6 cups muffin pan with cooking spray or line with muffin cases.

Step 2
Sift flours and baking powder together. Stir in sugar and rolled oats.
Whisk yogurt, egg and oil together. Add to flour, mix until just combined. Do not over-mix.

Step 3
Divide mixture evenly into muffin pans until three-quarters full. Gently push slices of apple into mixture until covered and sprinkle with extra rolled oats.


Step 4
Bake for 25 minutes or until golden in colour and cooked when tested (insert a toothpick and it comes out clean). Cool for 5 minutes in pan before transferring to a wire rack to cool. Serve warm.

Yum yum .... tasted fluffy soft with some apple crisp.  Complete with a glass of juice/milk or your preferred hot beverage. Wholesome goodness healthy breakfast to start the day !

Enjoy & happy baking! ^-^!
Hope you'll have a great day too !


Photobucket

This post is linked to the event, Little Thumbs Up (September 2014 Event: Apple) organized by Zoe (Bake for Happy Kids), Doreen (My Little Favourite DIY) and hosted by Kit (I-Lost in Austen).

Monday 22 September 2014

Lemon and Almond baked Salmon

As shared previously,  the complimentary Savour magazine from Cold Storage has a few interesting recipes that I'm keen to try.

My teens loved salmon. But seriously ... I don't like fish and could take only very selective ones. Needless to say ... I hardly cook with fish at home. Very occasionally I will make pasta with fish fillet, pan fried fillet (frozen non fishy smell), steamed Grouper fillet loaded with lots of ginger etc. The fishy smell and the sight of the fish bones really gets the nerves on me. But I do encourage them to have fish in their menu whenever we eat out.

Looking at some recipes from Savour, I know my girl would love to have this 'Lemon and Almond baked Salmon'! She keeps asking if I'm seriously going to cook salmon as I have never cooked salmon before.


And ta da ... Lemon & Almond Baked Salmon specially for her ^-^


I reduced the amount of ingredients just for 1 serving, omitted the green onions as she didn't like it.
Press bread mixture over the salmon
Here's the recipe adapted from the magazine Savour. The preparation and cooking time takes less than 45 minutes for me to whip up this dish.


I could smell that herbs fragrant.  She squeezed the lemon juice on the toppings. She said the crunchy toppings tasted refreshingly yummy with the salmon.
She gave big thumbs up and exclaimed 'very nice' !

If you like salmon, do give a try on this fragrant Lemon & Almond Baked Salmon.

I'm linking this post with 

Cook-Your-Books


Saturday 20 September 2014

Chocolate Chunk Cookies


I'm not sure if you like Subway sandwiches ... Subway Melt , Subway Club, Chicken & Bacon Range etc... No, I'm not making publicity promotion for Subway.

So why I mention Subway? The outlets here offer sandwich combo meal that comes with a drink and choice of either a cookie or a small pack of potato chips. Obviously, we (my girl & I) opted for the BIG cookies. Only a few limited flavours to choose from ... chocolate chips, chocolate & mixed nuts, peanut butter. The center is soft and chewy, while the edges are slightly crisp. We loved these big yummy cookies ... ^-^

Since I've baked a batch of crispy chocolatey Famous Amos double choc chips cookies last month, now, I decided to replicate similar Subway "big giant" cookies ... to satisfy our weekend "chocoholic" cookies craving ^-^!

Recipe adapted from Joy of Baking with slight modification made in blue

Chocolate Chunk Cookies:
Makes about 18 large cookies.

Ingredients:
260 grams all purpose flour
1 teaspoon baking soda
1/4 teaspoon salt
170 grams unsalted butter, at room temperature
130 grams granulated white sugar (I cut down to 90g)
140 grams firmly packed light brown sugar (cut down to 100g)
1 large egg (50 grams without shell), at room temperature
1 large egg yolk (18 grams), at room temperature
1.5 teaspoons pure vanilla extract
220 grams semi-sweet or bittersweet chocolate chunks or chips (I used a mixture of chocolate chunks, some dark thin square and chocolate chips)

Method:
1) Preheat your oven to 180°C.
Line two baking sheets with parchment paper.

2) In a large bowl, whisk together the flour, baking soda, and salt.

3) In the bowl of your electric mixer (or with a hand mixer), beat the butter until smooth. Add the sugars and beat until light and fluffy. Scrape down the sides of the bowl as needed. Add the egg, egg yolk, and vanilla extract and beat until well combined.

4) Add the flour mixture to the creamed mixture and beat just until incorporated. Stir or beat in the chocolate chunks. If the batter is quite soft, cover and refrigerate until firm (about 30-60 minutes).

It spreads bigger when baked
5) For large cookies, take about 1/4 cup (55 grams) of batter and form it into a round ball (can also use an ice cream scoop). Place six balls of batter on each baking sheet, spacing them several inches apart (about 8 cm). With the palm of your hand, gently flatten each ball into a round. Bake the cookies for about 14 - 16 minutes, or until they are golden brown around the edges but still a little soft in the center. (The longer you bake the cookies the more crispy they will be). Rotate your baking sheet front to back about halfway through the baking time. Remove from oven and place on a cooling rack. Let the cookies cool for a few minutes on the baking sheet before transferring them to a wire rack to cool completely.


These cookies are best the day they are baked but can be stored in an airtight container at room temperature for a few days.

Yum yum ... tasted like those from Subway ... crisp edges and yet their centers are soft and chewy. Choco-licious !! ... I can't stop at 2 for brekkie ...  Oops ! Another 2 ... Gosh ! Very addictive! 
Enjoy ! Have a nice weekend !

Enjoying my morning brekkie
at the little cosy corner!


This post in joining Best Recipes for Everyone September Event : Chocolate Wonderland


Wednesday 17 September 2014

Green Apple & Aloe Vera with Honey Soup


I chance upon this easy peasy soup or dessert when I watched one of those Hong Kong cooking variety shows on TV many years ago. I made a few variations and this version can be easily done in about 15 minutes. I like the soothing effect of this warm soup. Sometimes if I'm having dry cough or slight sore throat, a bowl of this soup really helps to relieve the dryness, scratchiness or irritation in my throat. But of course, this tangy sweet soup can be served as dessert too ... any time of the day ^-^!

So, here's my sharing Green Apple & Aloe Vera with Honey Soup
Serves 2 - 3
Ingredients:
2 green apples
200g - 250g aloe vera (if unable to find/buy fresh ones, use canned) * here, I'm using canned aloe vera.
800ml - 900ml water

Method:
1) Wash the green apples, cored, cut into small pieces or wedges. (peel or unpeel the apple skin is entirely your preference).

2) Pour water into a cooking pot and bring to boil. Add the green apples and aloe vera. Continue to boil on medium flame for 10 minutes. Off the flame.

3) Serves warm. Stir in 1/2 teaspoon of honey to the bowl of soup. Add more if you prefer more sweetness.

If you like to have a bowl of cold dessert, chill in the fridge for a few hours. Refreshingly tasty ! Enjoy and have a great day !


Photobucket

This post is linked to the event, Little Thumbs Up (September 2014 Event: Apple) organized by Zoe (Bake for Happy Kids), Doreen (My Little Favourite DIY) and hosted by Kit (I-Lost in Austen).

Monday 15 September 2014

Pork chops with baked apples

There are many apples in the fruit basket. I was thinking to use some for baking .... but indecisive ... for muffin, cake, dessert or accompaniment to entrée ? Finally,  decided to cook this meal for lunch.

So, here's our weekend lunch menu :
Pork chops with baked apples
2 side dishes - Sautéed Shimeji mushroom with carrots in olive oil and baked apples.
Cream of mushroom soup.


Recipe adapted from taste.com with slight modification made in blue.

Pork chops with baked apples
Ingredients:
4 large pork chop (I used pork loin)
3 unpeeled red apples, wash clean and cut into wedges (I used green and red apples)
2 teaspoons rosemary leaves (dried rosemary leaves)
2 teaspoons olive oil
salt and cracked black pepper
olive oil spray (omitted, added 1 teaspoon olive oil to the frying pan instead in Step 2)

Method:
Step 1
Preheat oven to 210°C.
Using a sharp knife, score fat around edge of chops at 3cm intervals. Sprinkle chops with salt and pepper and spray with oil spray. (I omitted the oil spray, marinated pork loin for at least 1 hour in the fridge for more flavourful taste)

Step 2
Heat a large non-stick frying pan over high heat. Add 1 teaspoon olive oil. Add pork chops, and cook for 2-3 minutes on each side until golden brown. Remove from heat.


Place the pork chops on top of apples

Step 3
Toss apple with rosemary and oil. Spread roughly over the base of a large baking dish (do not line with baking paper). Place pork chops on top of apples and cook for 10 minutes or until pork is cooked through and apples are tender. (I baked for 15 minutes)

Step 4
Serve pork with apples and steamed greens.

You may like to serve with some steamed greens or garden veggie salads. Since I've got a bunch of Shimeji mushroom,  sautéed the mushroom with some carrots in 1 tablespoon of olive oil. Pinch of sea salt to taste.


A bowl of Campbell cream of mushroom soup makes an accompaniment to the entrée. Enjoy!

Happy cooking and have a blessed week ahead ^-^!

Photobucket

This post is linked to the event, Little Thumbs Up (September 2014 Event: Apple) organized by Zoe (Bake for Happy Kids), Doreen (My Little Favourite DIY) and hosted by Kit (I-Lost in Austen).

Saturday 13 September 2014

No Bake Chocolate Cake


Baking cakes, muffins or tarts for our snacks or breakfast is getting 'harder' for me now ... just the two of us ... mommy & girl. My boy is currently in overseas doing his 5-month school programme. And my sister-in-law may join us sometimes ... but being a 'small eater' herself, we could hardly finish the small quantity and often with leftover to consume the next day.

So, for whatever bakes/snacks I make now, I've to halve the quantity. And ... fuss free, quick and easy as the thoughts of just the 2 of us ... sometimes "laziness" just wriggling into my bones .... ha haa !

This chocolate dessert/snack No Bake Chocolate Cake from Joy of Baking fits into my bill perfectly!

It contains just four ingredients:
chocolate, butter, toasted and chopped nuts, and Digestive Biscuits (or graham crackers). As its name implies, there is no baking involved which makes it the perfect dessert for the harried. Preparation time 30 mins. All you do is mix the ingredients together in a bowl, press it into a tart or cake pan, and leave it to chill in the refrigerator. 

No Bake Chocolate Cake (it is also known as a Chocolate Biscuit Cake)
I've halved the recipe below, click Joy of Baking for the full recipe.

Ingredients:
90g walnuts
50g unsalted butter, room temperature (cut into small pieces)
55g semi-sweet or bittersweet chocolate, chopped
55g Digestive cookies (or graham crackers, shortbread cookies or butter cookies)

Method:
1) Preheat the oven to 177 degree C and place rack in the middle of the oven. Place walnuts on a baking sheet and bake for about 8 - 10 minutes or until lightly brown and fragrant. Let cool then chop coarsely.

2) Lightly butter a 750ML rectangle Pyrex dish.
(You may use an 8 inch (20 cm) tart or cake pan for full recipe)

3) Then in a heatproof bowl, placed over a saucepan of simmering water, melt the butter and chocolate.

4) Meanwhile, break or chop the digestive cookies into small pieces (about 1/2 inch).


5) Once the butter and chocolate are melted, remove from heat and stir in the digestive cookies, along with their crumbs, and the chopped nuts.

6) Spread this mixture into a lightly buttered dish, tart or cake pan, cover, and refrigerate for several hours or until set. Cut or break into slices. Store in an airtight container in the refrigerator.


Here's a slice of the chocolate cake ... yummy! 
Chocolate + walnuts ... love this cold chocolaty and nutty crunchy biscuit cake ... truly decadent ! Perfect for afternoon snack or served as dessert ^-^
Enjoy your weekend !


Hosted by Fion


Thursday 11 September 2014

Shrimp Dumpling 虾饺 Har Gow


Well ... I'm not 'Dim Sum Dolly' ... LOL ! Since the last mini homemade dim sum feast for our weekend tea, I've got the "hang of it" ... to make some Har Gow.  So far I've done once ... but that was really "N" years ago ...

Other than our occasional dim sum brunch indulgence at some restaurants,  we like to patronize the dim sum stall in the hawker center too. Serves handmade dim sums with wide steamed varieties ... bao, har gow, siu mai, fan choy, lo mai kai, braised chicken feet, steamed mince pork with mushroom, beancurd rolls, yam cake etc. etc. There are 2 to 3 cooks (or 师父) in the stall making the dim sums and 2 other attending to customers with piping hot dim sums dishing out from the traditional big "multi-decker" steamer. The hawker center is usually very packed on the weekends morning. Sometimes, we could hardly find a table / seat for our breakfast.  Alternative option is to (dabao 打 包) pack the food home.

I suppose the difficulty in making nice Har Gow is in the pleating of the dough and getting the 'right' dough texture.  I followed the steps and had some nice pleats actually... but once steamed,  the Har Gow skin (dough) became translucent (like facial mask) ... all the pleats disappeared :(


Adapted from the cookbook of Judy Lew
Ha Gow 虾饺 (Shrimp Dumpling)
3 - 4 servings

Ingredients
Filling
300g shrimp, deveined and chopped small
25g chopped bamboo shoots
1 teaspoon salt
1 teaspoon sesame oil
1/2 teaspoon sugar
1 egg white (I forgot to add)
1 tablespoon cornstarch
Combine filling ingredients and set in refrigerator for 1 hour.

Dough
100g wheat starch
50g tapioca starch
1/2 teaspoon salt
240g Boiling water
2 tablespoon cooking oil

*Note : dough can be made ahead. Wrap with foil or cling wrap.  Dough keeps one day at room temperature.

1) Mix wheat starch, tapioca starch and salt together in a large pot. Make a well in the center and pour in the boiling water.

2) Stir to moisten ingredients (used chopsticks to stir).

3) Cover pot and allow to rest 10 minutes.

4). Knead until a smooth dough forms, adding oil. Set aside. Keep covered until use.

5) Roll portions of dough into a long roll and cut into walnut size pieces.  Roll each piece in hand until smooth.  Then generously oil cleaver and counter top. Press out dough to form a 3" circle.  (Or use a tortilla press).
(When I cut it to walnut size piece, it didn't press out to 3" circle, so I made bigger size about 50 cents coin size)

Pages from the cookbook

6) Pleat half of circle to form a pouch. Put in 2 teaspoons filling, cover and pinch ends together.

7) Gently curve dumpling to form a crescent.

8) Place an oiled steaming plate and steam 15 minutes.

We enjoyed our weekend tea snacks with these dainty hot steamed Har Gow. Tasted good served with some hot tea.

Have a nice weekend ahead ^-^

I'm linking this post with 

Cook-Your-Books

Wednesday 10 September 2014

Dorset Apple Cake


There's no need to use an electric mixer or a hand whisk to cream the butter to bake this cake. Just using rub-in method and a spatula to mix the ingredients well. Pour batter into the baking tin (pan) and bake. Pretty easy to bake this apple cake!

I bookmarked this recipe in the cookbook, but I was wondering what is Dorset Apple cake.  So ... a quick Google search ...
Quote from west dorset foodie :
"Dorset Apple Cake is just a cake that has apples, brown sugar and sometimes cinnamon. They can be in the cake, on top, both on top and in the cake; it’s entirely up to you."

A little more sharing :
Dorset is one of the most rural counties of England and is situated on the south coast between Devon and Hampshire. Visit Dorset.

More about Dorset Apple Cake recipe baking for britain.

DORSET APPLE CAKE
Recipe adapted from Cakes and Bakes 500 by Martha Day, with slight modification in blue
Makes one 18cm/7 inch round cake
Ingredients:
225g cooking apples,  peeled,  cored and chopped
Juice of 1/2 lemon
225g plain (all-purpose ) flour
1.5 teaspoon baking powder (1 teaspoon)
115g butter, diced (I used unsalted butter)
165g soft light brown sugar (cut down to 130g)
1 egg, beaten
About 2 - 3 tablespoons milk to mix
1/2 teaspoon ground cinnamon (1 teaspoon)

Method:
1) Preheat the oven to 180°C. Grease and line an 18cm/7 inch round cake tin (pan).

Prepared the ingredients ... opps where's the egg?
2) Toss the apple with the lemon juice and set aside. Sift the flour and the baking powder together,  then rub in the butter using your fingertips or a pastry cutter, until the mixture resembles breadcrumbs.


3) Stir in 115g (90g) of the brown sugar, the apple and the egg, and mix well, adding sufficient milk to make a soft dropping consistency. (I used a spatula to mix the ingredients)

4) Transfer the batter to the prepared tin. In a bowl, mix together the remaining sugar and the cinnamon.  Sprinkle over the cake mixture,  then bake for 45-50 minutes,  or until golden. (I cover it with loose foil in the last 10 mins of baking)

Leave to cool in the tin for 10 minutes,  then transfer to a wire rack to cool completely.


My girl said it tasted like Apple Crumble. Yes, it reminds me of the Apple Crumble that I baked few months ago. Perhaps the same ingredients used - apple and cinnamon.

We like the top crisp brown sugary texture although we find it abit too sweet. Yum yum ... enjoyed a slice of freshly baked soft and moist apple cake ^-^!

Happy baking and have a nice day!

Photobucket

This post is linked to the event, Little Thumbs Up (September 2014 Event: Apple) organized by Zoe (Bake for Happy Kids), Doreen (My Little Favourite DIY) and hosted by Kit (I-Lost in Austen).

and

I'm linking this post with 

Cook-Your-Books