Sunday 4 November 2018

Bacon Wrapped Potato Roses

When I saw Potato roses (tasty.com) this video, it reminded me on the rose shape of some buns or tarts that I had made few years ago.
Peach Rose Tart
Ham & Cheese Bun
Pumpkin Rose Mantou

But these loaded with carbs yet sinfully tasty savoury bites definitely are my big kids' favourite to serve as main or sides.

Bacon Wrapped Potato Roses 
Recipe adapted from Potato roses (tasty.com)
Ingredients:
6 strips bacon
About 4-5 medium size potatoes
2 tablespoon olive oil
1/2 teaspoon salt
1 teaspoon chopped fresh rosemary leaves
some ground black pepper to taste
6 - 7 tablespoon parmesan cheese

About 1 tablespoon olive oil to grease the muffin cup.

Instructions:
Prepare a 6-cup muffin pan or 6 individual aluminium cases

Lightly grease the muffin cup with olive oil, set aside.

Preheat the oven to 200°C.  Position the rack in the center of the oven.
*Note : The temperature of the oven may vary, do adjust accordingly.

Peel potatoes and slice them using a mandoline or vegetable slicer.

In a big bowl, combine potato slices, olive oil, black pepper, rosemary and salt.  Stir and toss well to coat the potato slices.

Place 1 strip of bacon on a big plate or clean cutting board.
Arrange the potato slices along one edge so they are slightly overlapping (about 15 - 20 potato slices) *note: use 2 strips of bacon and more potato slices for a bigger rose.

Sprinkle evenly about 1 tablespoon parmesan cheese onto the potatoes.

Roll up the bacon and potatoes to form a rose shape and put it in the cup of a muffin pan.  Repeat the process.

Cover the muffin pan with aluminium foil and bake for 60 minutes.  Remove the foil in the last 10 mins and continue to bake until the potatoes are cooked through and the edges are brown and crispy.

Transfer the potatoes to a serving platter, serve immediately.


Enjoy these tasty bacon wrapped potato as main or sides with some greens.

Monday 22 October 2018

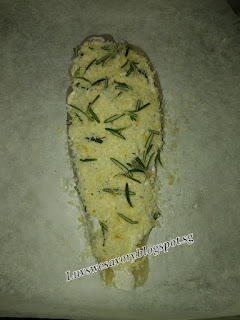
Baked Fish with Rosemary & Breadcrumbs

On some weekdays after work, I just wanna have a simple home-cooked meal that doesn't require too much preparing, cooking or baking time in the kitchen (plus not too many utensils to wash). Ready in under 30 - 35 minutes. This baked fish with rosemary & breadcrumbs is easy to whip up.  Just serve it with some salad (or fruits) to make a decent nutritious meal.


I like to add some fresh herbs to the meat for oven bake, grill or pan-fry dishes.  Recipe inspiration from the baked lemon thyme breadcrumbs prawns I cooked few weeks ago.
Baked lemon thyme breadcrumbs prawns served with rice and pumpkin
Still have some leftover breadcrumbs .... some mayonnaise in the fridge to hold the breadcrumbs.

Baked Fish with Rosemary & Breadcrumbs
Ingredients:
3 white fish fillets (about 150g each)
2 tablespoon olive oil to grease the baking pan

Ingredient A (mayonnaise mixture):
1/2 teaspoon grated lemon zest
1 tablespoon lemon juice
3 tablespoon mayonnaise

Ingredient B (breadcrumbs mixture):
100g panko breadcrumbs
1 tablespoon chopped fresh rosemary leaves
Pinch of salt and sprinkle some coarse ground black pepper

Instructions:
1) Preheat the oven to 190°C.  Position the rack in the center of the oven.
*Note : The temperature of the oven may vary, do adjust accordingly.

2) Line the baking pan with baking paper and lightly grease with olive oil. Set aside.

3) Wash and pat the fish dry with some kitchen towels.  (If you are using frozen fish fillets, make sure you thaw them first.)

4) Prepare the ingredients for A & B.
In a small bowl, combine and mix well ingredient A with a spoon.
In a dry clean plate, combine and mix well ingredient B.

5) Spread some mayonnaise mixture with a spoon onto 1 side of the fish, then dredge in the panko mixture, pressing to coat evenly. Transfer the fillet onto the baking pan with crumb-side up.


6) Bake for about 25 minutes or until golden and crisp.

Done! Serve the baked fish fillets with some *salad and lemon wedges. 

*make any salad green if you can find them in your fridge. Or some cut fruits if you have some apples, pears or oranges sitting in your fruit basket :)


As I do not like the “fishiness” smell, this aromatic fresh herb adds balance to this 'fishy' dish. Enjoy!

Wednesday 17 October 2018

Roselle Jam Chiffon Cake

The homemade Roselle jam  in the jar left with just a few tablespoon, so I just simply add them to bake a roselle jam chiffon cake.  Baked the cake on a weeknight for the next morning's breakfast.  Adjusted the recipe from Apricot yogurt chiffon cake


Roselle Jam Chiffon Cake
17cm chiffon pan

Ingredients :
For the yolk mixture
4 egg yolk
30g canola oil
35g caster sugar
50g yogurt
50g roselle jam
1 teaspoon lemon juice
1/4 teaspoon salt
80g cake flour (sifted)

For the meringue
4 egg white
2 - 3 drops of lemon juice
35g caster sugar

Method :
1) Separate the eggs into yolks and whites. (the size of my egg is 65g each with shell)

2) Position the rack in the lowest level and preheat oven to 170°C.

3) In a dry clean mixing bowl, beat the cold egg whites and lemon juice till foamy using the electric stand mixer. Gradually add in caster sugar in 3 separate additions and beat till stiff peak, formed into a stiff peak meringue. Transfer to a big bowl and chill in the fridge.

4) In the same mixing bowl, cream together egg yolks and caster sugar until pale and thickened using the electric mixer (about 3 - 4 minutes). Add canola oil and lemon juice and continue beating till combined.  Next, add the yogurt and jam and whisk until the mixture is combined.

5) Sift in cake flour and salt and whisk again until mixture is well combined.

6) Gently but quickly fold 1/3 of the meringue into the yolk mixture with a manual whisk. Fold the remaining meringue in 2 batches into the mixture until it looks evenly mixed (no streaks of meringue).

7) Pour the batter into the un-greased chiffon pan. Lightly tap the pan a few times on a table top to get rid of any trapped air bubbles in the batter.

8) Bake in a preheated 170ºC for 10 mins. Reduce to 160ºC and continue baking for 25 mins or until the cake surface turns golden brown, and a skewer inserted into the centre comes out clean.
Cover with a piece of loose foil over the pan if top of the cake is browning too quickly.
(Note: The temperature of the oven may vary, do adjust accordingly and observe especially in the last 10 - 15 minutes of baking.)

9) Remove the chiffon pan from the oven, drop the pan at a height of 20~30cm onto a table top. This action helps to keep the springy texture of the cake when it is left to cool.

10) Immediately invert the pan to cool before unmoulding the cake from pan.
*note: to unmould the cake:
a) Run a thin-bladed knife or palette knife around the edge of the pan and the funnel. Release the cake and run the knife along the base of the pan to remove the cake.
Or
b) By hand, gently pull cake from the sides of the tube pan. Turn the cake pan over and press down on the bottom firmly to dislodge.  Gently pull the cake from the base around the edge and around the whole cake. Continue to lift up the cake and moving inwards until you reach the tube.


Soft texture with the slight burst of fruity tangy jam flavor in each mouthful bite  ... glad that my big kids loved it.  Two slices for me paired with a cup of hot coffee ! That's how I enjoyed my early morning brekkie :)

Happy baking !

Friday 12 October 2018

Homemade Roselle Jam

I'm very fortunate that the current company where I'm working has a big courtyard growing organic herbs, vegetables and roselle flowers. Basil, pandan leaves, "black face general" or Strobilanthes crispus, mulberry, brinjal, lady finger etc. Glad to have some of the bountiful harvests occassionally.


Obtained from sources, roselle is extremely healthy and has a ludicrous amount of vitamins and minerals, ranging from vitamins for your nervous system to immune system boosters and natural fats.  According to a recent study, those drinking roselle tea tend to have lower blood pressure and a healthier cardiovascular system.

With the given roselles, I love to boil them to make roselle drinks. Relax with a cup of  warm drink served with some honey.

My favorite roselle tea
This time round, I tried out some roselle jam.

Homemade Roselle Jam
Preparation time: 20 minutes
Cooking time: 30-35 minutes

Ingredients
285g roselle calyx (remove seedpods and washed) (25 small & medium roselle flowers)
125ml water
120g - 150g  granulated sugar (adjust sweetness to your liking)

Fills a 300ml jar

Instructions :
1. Soak the roselle flowers in water for about 5 minutes. Remove the seedpods with a stainless steel core seed remover (twist & push from the bottom). Wash roselle calyx clean with water. Drain water off. Tear the calyx into smaller pieces.

2. In a saucepan, combine water and roselle and cook with medium flame. Stirring occasionally. Once the mixture heats up and begins to boil, turn to low flame and use the electric hand blender to blend. Simply stick it into the saucepan and blend the mixture for about 1 minute or till thick smoothie texture.

3. Add the sugar.  Stir occasionally, making sure that the sugar has completely dissolved. Cook for about 20 more minutes until jam has thickened.

4. Off the flame. The mixture will continue to thicken as it cools. Once cooled, transfer the jam to a jar or airtight container and refrigerate. Fridge for up to 2 weeks.

My colleague harvested these organic produce :

Snapped a few pictures while taking a quick stroll ... so lovely!


For once, I'm immersed in a tranquillity and serenity of rural life!

Saturday 29 September 2018

Vanilla Cocoa Banana Mini Cakes

My big kids like chocolaty bitter-sweet flavor cakes.  They like banana butter cake too. So pairing of vanilla + cocoa banana cake won't go wrong.  Instead of using the normal baking pan, I used muffin pan to make a few mini cakes.


Recipe adapted from here Black & White Banana Cake with slight ajustment made.

Vanilla Cocoa Banana Mini Cakes
Ingredients
110g salted butter, softened at room temperature
130g caster sugar
1 egg
1 teaspoon vanilla extract
200g ripe bananas, peeled & mashed
190g cake flour, sifted
1 teaspoon baking soda
1 teaspoon baking powder

20g  unsweetened cocoa powder, sifted

Method :
1) Preheat oven to 180°C and position the rack in center of oven. (Note: the oven temperature may vary, do adjust accordingly).

2) I used a square muffin pan, lightly greased with butter, makes 8 mini cakes.

3) In a big clean bowl, combine the sifted flour, baking soda, baking powder and set aside.

4) In a mixing bowl, cream the butter with electric mixer in low speed. Gradually add the caster sugar.  Scrape down the sides of the bowl as needed and continue to cream until the mixture is smooth (about 5 minutes). Add in the egg and vanilla extract, followed by mashed bananas and continue to cream for about 1 - 2 minutes.

5) Add in half the flour mixture and mix on low speed until just combined. Pour the remaining flour and mix until just combined.

6) Spoon about 1 and half tablespoon of batter for each of the 8 muffin cups, smooth the surface.

Add the cocoa powder to the remaining batter, mix well and gently spoon 1 tablespoon over the top of the vanilla batter.

7) Bake for about 25 to 30 minutes. Check for doneness with a toothpick inserted into the center of the cake if it comes out clean. 

8) Let the cakes cool for 5 minutes in the muffin pan, then transfer to a wire rack to cool completely before storing in airtight container. Serve warm if you like you.
Do not leave the cakes in the muffin pan otherwise the base will be soggy.


Overall, the taste is a mix of bitter-sweetness.  Love the fragrance of the banana and a hint of bitter cocoa flavor ! Enjoy with a cup of coffee for our afternoon coffee break.

Have a great weekend and happy baking !