Sunday 10 November 2019

Lychee Martini Cake

This is not the first time that I've added some alcohol in dessert bbq orange parcels or in some cooking.  Have heard about Lychee Martini Cake (source Recipe lychee cake) but have not tasted one.


Baked this cake with some adjustments made to my personal preference.
Lychee Martini Cake (7-inch round cake)
Ingredients (A) : Lychee soak in rum
1 cann of lychee
60 - 80 ml Bacardi white rum (you can use Vodka, Martini)

Drain the cann of lychee and cut into small pieces. You can  reserve the #syrup to make syrup water, cold drinks or make cocktail. Put the cut lychee pieces into a bowl of 80ml of white rum and soak for a few hours. Best if it is overnight.

For the Sponge Cake (adapted from mini mango charlotte cake ) :
Ingredients:
3 Eggs (the size of my egg is 60g each with shell)
85 grams Caster sugar
100 grams Cake flour
1/4 teaspoon baking powder
15 grams Vegetable oil
10 grams Unsalted Butter
30 grams Fresh Milk
*1 teaspoon of rum from the soaked lychee

Method:
1) Preheat oven to 170°C. Position the rack in center of oven. Note : The temperature of the oven may vary, do adjust accordingly.

2) Lay a 7- inch round pan with parchment paper greased with butter. Set aside.

3) Sift the cake flour and baking powder together and set aside.
Separate the eggs into yolks and whites. (Note that I prefer using cold eggs)

4) Melt butter and milk in a heatproof dish. Once melted, add the vegetable oil and mix well.

5) In a clean mixing bowl, whisk the cold egg whites till foamy using the electric mixer. Gradually add in caster sugar in 3 separate additions and beat till stiff peak, formed into a firm meringue.

6) Add the egg yolks to the meringue and whisk on low until evenly combined (about 1 minute).  Add in *1 teaspoon rum.

7) Next, fold in the sifted flour in 3 separate additions, folding gently with a spatula until combined.

8) Mix in the melted butter mixture in 2 separate additions with a spatula.

9) Pour batter into the prepared cake pan. Tap the pan lightly on a table top a few times to get rid of any trapped air bubbles in the batter.

10) Bake for about 30 minutes or until the cake surface turns golden brown.  Check for doneness with a skewer or toothpick inserted into the center of the cake if it comes out clean.  (I tent it with aluminium foil in the last 10 minutes of baking).

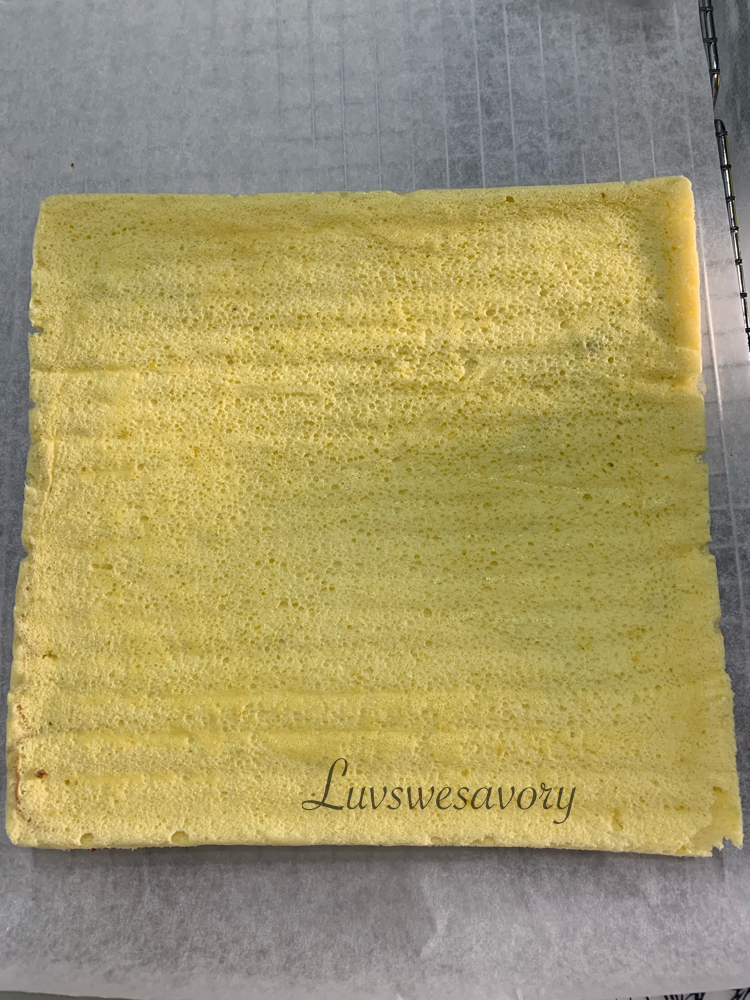
11) When the pan was removed from the oven, I used the suggested technique to drop the pan at a height of 20~30cm onto a table top. This action helps to keep the springy texture of the cake when it is left to cool.

12) Carefully invert cake pan onto wire rack, remove pan and the parchment paper for cake to cool completely on wire rack.

Ingredients B : Lychee icing
350ml whipping cream (note I left with this amount, can use 400 to 500ml)
2 tablespoon icing sugar (add more if you prefer it sweeter)
1 teaspoon Bacardi rum (optional)

Method:
1. Remove the bowl of soaked chopped lychee from fridge, drain and reserve the liquid.

2. Freeze the cleaned mixing bowl for about 15 minutes.  Take it out from the freezer, immediately put all together the cold whipping cream, icing sugar and rum in the cold mixing bowl. Use the electric mixer to whisk till ribbon and a soft peak form.

3. Scoop about 100g of whipping cream and mix with the chopped lychee pieces.

4. Fill some whipped cream in a piping bag fitted with a round nozzle.

To make the syrup water:
2 tablespoon rum (from the soaked lychee)
3 tablespoon lychee #syrup
Mix them and pour the syrup water either into a sprayed bottle or small bowl.

To assemble:
1) With one hand firmly on top of the cake, run a serrated knife around the centre of the cake and slice horizontally into 2 even layers.

2) Spread some whipped cream onto the cake board to stick the bottom cake layer. Place the half of one cake on a cake board and place it on a turntable.

3) Brush the cake top or spray the surface with syrup water. Pipe outer ring with whipped cream. Spoon the lychee cream mixture to fill the center. Then use a straight spatula or off set spatula to evenly frost the lychee cream mixture.  Gently stack the other half cake on top of each other, brush a little syrup water and frost the top with some whipped cream.

4) Apply crumb coat - Use spatula to add frosting to the sides / top of the cake. Wipe the excess frosting off with spatula into a bowl.  Chill in the fridge for 30 min.

5) Frost the cake using the remaining whipping cream.  Wipe the excess frosting off with spatula into a bowl.  When the sides are done, smooth out the top edge. Using your spatula, smooth the excess frosting inward toward the center of the cake. Decorate the cake as desires.


Looks like I'm getting back my motivation in baking cream cakes :)
Enjoy & happy baking !

Saturday 9 November 2019

Blueberry Compote Cake


Looks like I got the hang of baking cream cakes for our weekends snacks.  Afterall, my 2 adults enjoy homebaked cakes.

Using the same sponge cake adapted from Strawberry cake, this time I added homemade simple blueberry compote as filling.  Perfect combination ! I just love the tangy compote with natural sweetness sandwich between the sponge layers.


Blueberry Compote Cake
Ingredients:
3 eggs (60g with shell each)
110g caster sugar
33g unsalted butter melted
53g milk
1 teaspoon vanilla extract
120g cake flour - sifted

To make simple syrup water :
About 150ml water
2 tablespoons granulated sugar
Combine water and sugar in a small saucepan, boil over medium flame over the stove.

Stirring constantly until the sugar dissolves completely and the mixture is clear, approximately 3 to 5 minutes. Put aside to cool.

For the filling :
Blueberry Compote
300g blueberries
2 tablespoon honey
2 tablesppon water
1 teaspoon lemon juice

Combine all ingredients in a small pot and cook over low flame for about 8 - 10 mins.
Stirring and meshing the blueberries ocasionally till all softened. Leave cool and the mixture will be slightly thickened.

For whipped cream
200ml Whipping cream
10 grams caster sugar
1/2 teaspoon vanilla extract

Method :
1) Preheat oven to 170°C. Position the rack in center of oven. Note : The temperature of the oven may vary, do adjust accordingly.

2) Lay a 7- inch round pan with parchment paper greased with butter. Set aside.

3) Fill 3/4 cooking pot with water and bring to a boil.  Off the fire remove the pot from stove.  In a stainless steel bowl placed over the cooking pot of hot water, whisk together the eggs, caster sugar and vanilla extract with a whisk. Test batter with thermometer for temperature reached 40 degree celsius.  Remove the bowl from the cooking pot.

4) Combine the milk and butter in a small bowl and put into the pot of hot water to melt the mixture.

5) With electric mixer, beat in low - medium speed the egg batter until smooth, light (about 3 to 4 minutes), switch to high speed and continue to beat for about 5 minutes and ribbon trail forms when whisk lifted up.

6) Add in the sifted cake flour. With a spatula, fold in the flour gently till combined.

7) Remove the butter and milk mixture from the pot. Add a spoonful of batter and mix it with the butter and milk mixture. Pour all into the batter, fold and mix well with a spatula.

8) Pour the batter into the prepared pan.  Smooth the top evenly with a spatula.  Lightly tap the pan  2 - 3 times on a table top to get rid of any trapped air bubbles in the batter.  Bake in preheated oven for about 35 - 40 minutes.

9) Check for doneness with a skewer or toothpick inserted into the center of the cake if it comes out clean.

10) Remove cake from pan, remove the parchment paper and place cake onto a wire rack to cool completely.

To make the whipped cream:
Freeze the cleaned mixing bowl for about 5 minutes.  Take it out from the freezer, immediately put all together the cold whipping cream,  vanilla extract and caster sugar in the cold mixing bowl. Use the electric mixer to whisk from low speed (about 1 min) then change to high speed until medium to stiff peaks form.  Do not over beat.

Add 1 tablespoon of blueberry compote to the whipped cream, mix well.

Fill some whipped cream in a piping bag fitted with a round nozzle.

To assemble:
1) With one hand firmly on top of the cake, run a serrated knife around the centre of the cake and slice in half horizontally for 2 layers.

2) Spread some whipped cream onto the cake board to stick the bottom cake layer. Place the half of one cake on a cake board and place it on a turntable.

3) Brush the top with a little syrup water. Pipe outer ring with whipped cream. Spoon the blueberry compote to fill the center. Gently stack the other half cake on top of each other, brush a little syrup water and frost the top with some whipped cream.

4) Use spatula to add frosting to the sides of the cake. Wipe the excess frosting off with spatula into a bowl.  When the sides are done, smooth out the top edge. Using your spatula, smooth the excess frosting inward toward the center of the cake.

5) Decorate the top as desires. Chill in the refrigerator for a few hours for the frosting to set before slicing and eating.

Baked a cream cheese frosting blueberry compote birthday cake to a dear frend.
Looked lovely and so glad she had given good compliments to the cake.


Cream Cheese Icing
Enough to frost a 7 inch cake
200g cream cheese, softened
100g unsalted butter, softened
80g sifted icing sugar
1 - 2 teaspoon lemon juice
1 - 2 tablespoon fresh milk (adjust the texture to your preference)

To make cream cheese icing:
1) Allow cream cheese and butter to stand at room temperature. In large mixing bowl beat cream cheese and butter with mixer on medium-high until light and fluffy. Add in fresh milk and lemon juice and whisk to combine.

2) Gradually add in the powdered sugar in 3 additions, beating well. Scrape the sides of the bowl if necessary.  Beat until it reach spreading consistency.

Enjoy & happy baking !

Monday 7 October 2019

Strawberry Cake (mini semi-naked cake)

It's been quite a long while that I've baked a decent layered cake with cream frosting.  Occasionally I would make simple creamy cakes for brithday or tea-time treats.  Had been craving for whipped cream cake but don't wish to indulge in 'too much sweet creamy' cake so a semi-naked cake would be just right to satisfy my craving :)


Strawberry cake (mini semi-naked cake)
Recipe adapted from : https://youtu.be/bqXSNXMf760
I've omitted the corn syrup and reduced caster sugar slightly, below my slight modification adjusted to my preference.

Ingredients:
3 eggs (60g with shell each)
110g caster sugar
33g unsalted butter melted
53g milk
1 teaspoon vanilla extract
120g cake flour - sifted

To make simple syrup water :
About 150ml water
2 tablespoons granulated sugar

Combine water and sugar in a small saucepan, boil over medium flame over the stove.
Stirring constantly until the sugar dissolves completely and the mixture is clear, approximately 3 to 5 minutes. Put aside to cool.

For the filling :
200ml Whipping cream
10 grams caster sugar
1/2 teaspoon vanilla extract
250g Strawberry - washed and pat dry, hulled and chopped into small pieces. *I reserved about 8 - 10 whole pieces to decorate the cake.

Method :
1) Preheat oven to 170°C. Position the rack in center of oven. Note : The temperature of the oven may vary, do adjust accordingly.

2) Lay a 7- inch round pan with parchment paper greased with butter. Set aside.

3) Fill 3/4 cooking pot with water and bring to a boil.  Off the fire remove the pot from stove.  In a stainless steel bowl placed over the cooking pot of hot water, whisk together the eggs, caster sugar and vanilla extract with a whisk. Test batter with thermometer for temperature reached 40 degree celsius.  Remove the bowl from the cooking pot.

4) Combine the milk and butter in a small bowl and put into the pot of hot water to melt the mixture.

5) With electric mixer, beat in low - medium speed the egg batter until smooth, light (about 3 to 4 minutes), switch to high speed and continue to beat for about 5 minutes and ribbon trail forms when whisk lifted up.

6) Add in the sifted cake flour. With a spatula, fold in the flour gently till combined.

7) Remove the butter and milk mixture from the pot. Add a spoonful of batter and mix it with the butter and milk mixture. Pour all into the batter, fold and mix well with a spatula.

8) Pour the batter into the prepared pan.  Smooth the top evenly with a spatula.  Lightly tap the pan  2 - 3 times on a table top to get rid of any trapped air bubbles in the batter.  Bake in preheated oven for about 35 - 40 minutes.

9) Check for doneness with a skewer or toothpick inserted into the center of the cake if it comes out clean.

10) Remove cake from pan, remove the parchment paper and place cake onto a wire rack to cool completely.

To make the whipped cream:
Freeze the cleaned mixing bowl for about 5 minutes.  Take it out from the freezer, immediately put all together the cold whipping cream,  vanilla extract and caster sugar in the cold mixing bowl. Use the electric mixer to whisk from low speed about 1 min) then change to high speed until medium to stiff peaks form.  Do not over beat.

Stir and mix in the chopped strawberries.

To assemble:
1) With one hand firmly on top of the cake, run a serrated knife around the centre of the cake and slice in half horizontally for even layers. (I made 2 layers instead of 3).

2) Spread some whipped cream onto the cake board to stick the bottom cake layer. Place the half of one cake on a cake board and place it on a turntable.

3) Brush the top with a little syrup water. Then use a straight spatula or an off-set spatula to evenly frost the top. Gently stack the other half cake on top of each other, brush a little syrup water and frost the top with some whipped cream. 

4) Use spatula to add frosting to the sides of the cake. Smooth out the sides and allow the cake to peek through.  Wipe the excess frosting off with spatula into a bowl.  When the sides are done, smooth out the top edge. Using your spatula, smooth the excess frosting inward toward the center of the cake.

5) Decorate the top with some strawberries, as desires. Chill in the refrigerator for a few hours for the frosting to set before slicing and eating.


Ta-da! Glad that we enjoyed this fruity whipped cream cake for our afternoon break!

Happy baking!

Sunday 15 September 2019

Fruit Pastry Cake

I remembered I learned to bake this fruit pastry cake about 6 years ago as it was very popularly shared by recipe bloggers then.  A butter cake of light texture with a combination of fruity bites. 

My girl invited 2 friends over for lunch.  Since I have some strawberries and a can of peaches, decided to bake a tray of fruit pastry cake for their afternoon snack.  And it was very well received.


Adapted from recipe source: Happy HomebakingAnncoo Journal

Pan size : 9-inch round pan or 8-inch square pan
Ingredients:
100g unsalted butter, soften at room temperature
200g caster sugar (I cut down to160g)
50g yogurt
3 eggs, lightly beaten, room temperature
1 teaspoon vanilla extract
1 teaspoon lemon or orange zest
210g plain flour (sifted)
1 teaspoon baking powder
400-500g fruits and tossed with 2 tablespoon sugar* (I omitted tossing with sugar)
You can use strawberries, peaches, blueberries, peaches, bananas, oranges, pears, apples, pineapple, or any other fruits that are not too juicy.

Method:
1) Grease the sides of an 8-inch square pan with butter or spray. Lightly coat with flour.  Line the base of the pan with lightly greased parchment paper.

2) Combine plain flour and baking powder in a dry clean bowl. Sieve and set aside.

3) Wash and drain the fruits. Cut in slices or chunks and toss with sugar (if desired) and set aside. If using canned fruits, wash the fruits to remove the syrup, drain and pat dry with kitchen towel. Set aside.

4) Pre-heat the oven to 180ºC. Position the rack in the middle. The temperature of the oven may vary, do adjust the temperature and timing to suit your oven.

5) In a clean mixing bowl, cream together the butter, castor sugar, and yogurt until light and fluffy using an electric mixer on medium speed. Dribble in the eggs gradually and beat till incorporated in the batter. (The mixture may appear slightly curdled.)

6) Add vanilla extract and zest. Mix to combine.

7) Add in the flour in 3 additions, mix till combined and smooth.

8) Pour the batter into the prepared pan and smooth the top with spatula. Tap the pan lightly on a table top a few times to get rid of any trapped air bubbles in the batter.

9) Arrange fruits on top, don’t press the fruits down into the batter. Decorate the fruits as desired.

10) Bake in pre-heat oven for 60-70 minutes or until golden brown.
*note: tent it with aluminium foil in the last 15-20 minutes of baking.

11) To check for doneness, insert a skewer or toothpick in the center of the cake if it comes out clean

12) Leave the cake to cool in the pan for about 5~10 mins. Unmould and transfer to wire rack to let cool completely.

To serve, dust the cake with some snow powder sugar if you like.


While cooling on rack, the fruity tangy fragrance filled the dining place. Finally! Served the cake and glad that they enjoyed it.

Happy baking!

Wednesday 11 September 2019

Mini Custard Mooncake Yr2019

It's been a few years since my last attempt of homemade mooncakes to celebrate the Mid-Autumn Festival.  A few of my good friends were interested to make the walnut moontarts and some snowskin mooncakes with lotus paste, pandan paste and the homemade custard filling.  So I arranged them over to my place and we spent the whole fun-filled afternoon in making mooncakes.  Glad we could pack the delicious homemade mooncakes as gift for our family and friends.

I saw the sharing of custard mooncake by Victoria Bakes.  The crust pastry recipe is slightly different from the mini baked custard mooncakes I baked some years ago.  So since I've have some leftover homemade custard filling, tried out the pastry recipe adapted from Victoria Bakes.  I made a slight change to replace whipping cream with thickened cream.


Love the sweet fragrance! My kitchen was filled with sweet coconut and buttery aroma!

Recipe for custard filling can refer to my baked mini custard mooncakes.

Mades 10 mini mooncakes, about 50g each
Pastry dough ingredients:
(A)
100g cake flour - sifted
20g potato starch
20g caster sugar
15g coconut cream powder
35g thickened cream
15g condense milk

(B)
40g butter, softened

(C)
1 egg yolk mix with 1 tablespoon water for egg wash

Method:
1) In a large bowl, combine and whisk all the ingredients in group (A).

2) Add ingredient (B) and cut the butter till coarse and crumbly using a spatula.

3) Using your hand, mix mixture together and combine them to form a dough. Stop mixing once dough is combined.

4) Divide the dough into 10 equal portions.
My pastry dough is 23g each   /  Custard filling is 25g each
Shape each into balls.

5) Position the rack in top level and preheat oven to 200°C.
The temperature of the oven may vary, do adjust the temperature and timing to suit your oven.

6) Line a baking sheet or tray with parchment paper. (I did not grease it)

To assemble the mooncake :
1) Using a lightly floured hand, flatten a portion of pastry dough into a flat and round circle. Place a custard ball in the middle of the flatten dough. Enclose the custard filling inside the pastry, seal up and gently roll it into a smooth ball.

2) Lightly dust the mooncake ball with flour.  Place each ball into a lightly floured mooncake mould and press it gently until all the edges of the mould are well-filled with the pastry. Dislodged and repeat the process.

3) Place the mooncakes onto the prepared baking sheet.

4) Bake in pre-heated oven for about 5 minutes.  Remove the baking sheet from the oven.  Brush the mooncakes with egg wash.  Adjust the oven temperature to 150°C and continue baking for 15-17 mins (do not overbake as it will result in a dry mooncake).

5) Remove the mooncakes from baking sheet and cool completely on a wire rack before storing them in airtight container.
Before bake
After baked
Lovely golden colour of these mini custard mooncakes

Here's sharing of some photos that the group made the walnut moontarts and snowskin mooncakes :)
Refer and click this link for Walnut moontart


Happy Mid Autumn Festive Season to everyone !  
中秋佳节愉快!


Sunday 1 September 2019

Chocolate Orange Chiffon Cake


I remembered that I've tried making some curvy waves on one chiffon cake Trio colour chiffon cake 2 but that was to spoon the batter to create the curves.

After my attempt in making a hurrican swiss roll, I saw another sharing of hurrican pattern chiffon cake in video link https://youtu.be/ANLDACjWWGo

I used one of my chiffon cake recipes here  and modified/adjusted for this chocolate and orange flavour.

Chocolate Orange Chiffon Cake
17cm chiffon pan
Ingredients:
For egg yolk batter :
4 egg yolks
20 grams caster sugar
30 grams canola oil
45 grams fresh orange juice
1 teaspoon orange zest
75 grams cake flour, sifted

1.5 tablespoon cocoa powder - sifted

For meringue :
4 egg whites
50 grams caster sugar
1/2 teaspoon lemon juice

Method:
1) Separate the eggs into yolks and whites. (the size of my egg is 60g each with shell)

2) Position the rack in 2nd bottom level and preheat oven to 160°C.
(Note: The temperature of the oven may vary, do adjust accordingly)

3) In a clean mixing bowl, whisk the cold egg whites and lemon juice till foamy using the electric stand mixer. Gradually add in caster sugar in 3 separate additions and beat till stiff peak, formed into a firm meringue. Transfer to a big bowl and chill in the fridge.

4) In the same mixing bowl, cream together egg yolks and caster sugar until pale and thickened using the electric mixer (about 3 - 4 minutes).  Add oil, orange juice and zest and whisk until the mixture is combined.

5) Sieve in cake flour and whisk again until mixture is well combined.

6) Scoop about 1/2 of the batter and add 1.5 tablespoon cocoa powder, mix well.

7) Divide the meringue into 2 portions: for cocoa mixture and the remaining for orange mixture.

8) Gently fold meringue (in 2 batches) into the cocoa mixture with a manual whisk or spatula until it looks evenly mixed (no streaks of meringue).

9) Gently fold the meringue (in 2 batches) into the orange mixture with a manual whisk or spatula until it looks evenly mixed (no streaks of meringue).

10) Pour the vanilla batter into the un-greased chiffon pan.
Smooth the top evenly with spatula. Lightly tap the pan  2 - 3 times on a table top to get rid of any trapped air bubbles in the batter.

11) Gently spoon the cocoa batter on to the vanilla batter using a big spoon.

To make the hurrican effect on the side, use the base of a spatula/spoon to draw circle upwards and downwards. Repeat till it reach one full circle.

12) Bake in a preheated 160ºC for 10 minutes. 
Then lower the temperature to 130ºC and bake for 30-35 minutes.

13) Cover with a piece of loose foil over the pan if top of the cake is browning too quickly.  Bake until the cake surface turns golden brown, and a skewer inserted into the centre comes out clean.

14) When the pan was removed from the oven, I used the suggested technique to drop the pan at a height of 20~30cm onto a table top. This action helps to keep the springy texture of the cake when it is left to cool.

15) Immediately invert the pan to cool before unmoulding the cake from pan. To unmould cake by hand, gently pull cake from the sides of the tube pan. Turn the cake pan over and press down on the bottom firmly to dislodge. Gently pull the cake from the base around the edge and around the whole cake. Continue to lift up the cake and moving inwards until you reach the tube.

Well, I didn't achieve those powerful hurricane effect on my chiffon cake :(

Hope to perfect it in my next attempt.


Thursday 29 August 2019

Nutella Marble Cake

We love anything with Nutella.  Even spread on bread tastes so yummy good.  I've added Nutella in some of my cake baking or as filling :
Nutella butter cake
Nutella bundt cake
Mini baked cheese cupcake


For this Nutella Marble Cake, it is used as filling, piped into the cake.  I supposed Nutella could be spreaded over the cake to save the hassle of piping it?  Whichever way, I'm sure the cake tastes just as good.  Nicely browned although the 'marbling' or zebra effect didn't turn out well.  We like the light not too greasy texture.

Nutella Marble Cake
Recipe source YouTube : https://youtu.be/SESRnQy0S_g
Ingredients:
3 eggs (60g with shell each)
90g caster sugar
40g unsalted butter
45g milk
1 teaspoon vanilla extract
100g cake flour
10g honey

20g warm milk or warm water
10g cocoa powder

70g Nutella

Method :
1) Preheat oven to 170°C. Position the rack in center of oven. Note : The temperature of the oven may vary, do adjust accordingly.

2) Lay a 4x8- inch loaf pan with parchment paper greased with butter.

3)  On the stove, 3/4-fill a cooking pot with water and bring to a simmer.  In a stainless steel bowl placed over a pot of simmering water, whisk together the eggs, caster sugar, vanilla extract and honey with a whisk. Test batter with thermometer for temperature reached 40 degree celsius.  Remove the bowl from pot.

4) Combine the milk and butter in a small bowl and put into the pot of hot water to warm the mixture.

5) With electric mixer, beat in medium speed the egg batter until smooth, light (about 5 minutes) and ribbon trail forms when whisk lifted up.

6) Sift in the cake flour. With a spatula, fold in the flour till combined.

7) Remove the butter and milk mixture from the pot. Add a spoonful of batter and mix it with the butter and milk mixture. Pour all into the batter, fold and mix well with a spatula.

8) Divide the batter, pour half into a jug.

9) Add warm milk or water to cocoa powder and mix well. Mix in one portion of the vanilla batter and pour the batter into another jug.

10) Begin from the middle of the pan (the long length), pour some of the vanilla batter, fill the base for this first layer.  Then pour the cocoa batter in the middle of the pan.  Alternate the process with vanilla batter till finished up the batters. Lightly tap the pan  2 - 3 times on a table top to get rid of any trapped air bubbles in the batter. Bake in preheated oven for about 30 minutes.

11) Check for doneness with a skewer or toothpick inserted into the center of the cake if it comes out clean.

12) Remove cake from pan onto a wire rack to cool completely.

13) Insert with a chopstick into the cake to make 3 or 4 holes in a row in the middle of the cake.

14) Fill Nutella in a piping bag fitted with a round nozzle. Push the piping tip into the hole and pipe/squeeze some amount.


Slice the cake and serve !


Enjoy !

Tuesday 20 August 2019

Hurricane Swiss Roll (cocoa & vanilla)

Update on 27 August.  As the saying goes, practice makes perfect. My 3rd attempt in Hurricane swiss roll and so glad it turned out well. Same recipe but added whole strawberries in the filling and managed to achieve a rounder roll. 


2nd attempt in Hurricane Swiss Roll


I've been wanting to make this Hurricane Swiss Roll when it was so popular sharing in FB and by many recipe bloggers two years ago.

Finally ... had some fun to try it out together with my baking kakis (friends) on a relaxing weekend afternoon.  But the cake sheet was too thick (I knew cos I didn't have the right pan size) and the roll broke and turned out flat.  But we loved the fluffy soft roll texture.

I made another attempt the next day with scale down the ingredient quantity.

Recipe adapted from Bakingintotheether typhoon chiffon swiss roll with my adjustment made for a 10 x 10 inch tray.

Hurrican Swiss Roll (Vanilla & Chocolate)
Ingredients (10 × 10 inch tray)
Vanilla batter:
2 egg yolk
1 teaspoon vanilla extract
25g canola oil
40g milk
45g cake flour, sifted

Cocoa batter:
2 egg yolk
1 teaspoon vanilla extract
25g canola oil
40g milk
30g cake flour, sifted          }combine and sift
15g cocoa powder, sifted   }

Meringue
4 egg white
60g caster sugar

For the filling:
200g cold whipping cream
15g caster sugar
1 teaspoon vanilla extract

Method :
1) Sift the flour and set aside. You will need a baking sheet/tray 10 x 10 inch size, line with parchment paper and lightly grease with butter.  Preheat the oven to 170°C and position the rack in center of oven.

2) Separate the eggs into yolks and whites.
(the size of an egg is 60g with shell)

3) For the vanilla batter, cream egg yolks until pale and thick using the electric mixer (about 4 minutes).  Add in vanilla extract, canola oil and milk and continue beating till it incorporated.

4) Add the sifted flour and mix with manual whisk until combined/no longer lumpy. Set aside.

5) In another mixing bowl, repeat the same process to make the cocoa batter. Set aside.

6) In a clean mixing bowl, whisk the cold egg whites and  till foamy using the electric mixer.  Gradually add in caster sugar in 3 separate additions and beat till stiff peak, formed into a firm meringue.

7) Gently fold in about 1/2 of the meringue (in 2 batches) into the vanilla batter with a manual whisk or spatula until it looks evenly mixed (no streaks of meringue).

8) Gently fold in the remaining  1/2 meringue (in 2 batches) into the cocoa batter with a manual whisk or spatula until it looks evenly mixed (no streaks of meringue).

9) Pour the vanilla batter onto the baking sheet. Using a spatula, quickly spread evenly the top. Then carefully use a big spoon to spoon the cocoa batter on top of the vanilla batter.  Briefly level evenly with the back of the spoon.

10) Draw lines closely for the entire sheet from left to right using a chopstick, then repeat the lines vertically for the entire pan.

At this stage, DO NOT attempt to level surface as you may risk tainting the cocoa top with original batter.

11) Gently tap the baking sheet a few times on table top to release the trapped bubbles in the batter.

12) Bake in pre-heated oven for about 15 - 17 minutes or the top is evenly light browned, and a toothpick inserted into the centre comes out clean.

13) Remove the baking tray from the oven, immediately drop the baking tray at a height onto a table top. This action helps to keep the springy texture of the sponge when it is left to cool.

14) Remove the sponge from the tray by lifting the parchment paper and place it on the cooling rack. Cover the surface with the tray for about 3 minutes to retain its soft and moist for easy rolling.

15) Remove the tray and turn/flip the 'skin' side over onto another clean sheet of parchment paper. Peel off and remove the other sheet of parchment paper.

16) Spread the whipped cream on the sponge. Spread more cream on the edge closest to you. Roll up gently by lifting it up with the parchment paper. Place the rolled cake seam side down. Wrap with parchment paper and chill in the refrigerator for a few hours before cutting and serving.

To make the whipped cream:
(Note: I've prepared the whipped cream in advance of baking and chilled it in the fridge till ready to spread the sponge roll).

Freeze the cleaned mixing bowl for about 10 minutes.  Take it out from the freezer, immediately put all together the cold whip cream, vanilla extract and caster sugar in the cold mixing bowl. Use the electric mixer to whisk till stiff peaks form.


Glad that able to roll it abit rounder but some of the 'skin' peeled off :(


Practice makes perfect.  Hope a achieve a perfect hurricane on my next bake. Until then, we enjoyed a slice of this hurricane swiss roll with a cup coffee !

Happy baking!