Tuesday 31 March 2015

Brownies with Ferrero Rocher

Both the birthdays of my big kids fall in March but a day apart. So it's easy for me to just bake 1 simple cake for them ^-^!


They love chocolaty and fudgy brownies.
Well, this is so easy to make ... when I read :
*The beauty of this Brownie is that it is made using just one bowl.
*You do not have to pull out your electric mixer, all you need is a wire whisk and spatula (or wooden spoon).

They love Ferrero Rocher. .. so I just add some to it.

Recipe adapted from : Joy of Baking
Below my version with slight changes made:

Brownies with Ferrero Rocher 
Makes 16 brownies.
Ingredients :
150 grams bittersweet chocolate chopped
113 grams unsalted butter, cut into pieces
2 tablespoons (15 grams) cocoa powder
125grams caster sugar
1 teaspoon pure vanilla extract
3 large eggs
95 grams all-purpose flour
1/4 teaspoon salt
8 Ferrero Rocher cut into halves

Instructions:
1) Preheat oven to 180 degrees and place the rack in the center of the oven. 

2) Butter (or spray with a nonstick cooking spray) an 8 inch (20 cm) square pan, and line the bottom of the pan with parchment or wax paper.

3) Melt the chocolate and butter in a large stainless steel bowl placed over a saucepan of simmering water. Remove from heat and stir in the cocoa powder and sugar. Next, whisk in the vanilla extract and eggs, one at a time, beating well after each addition. Finally, stir in the flour and salt.

4) Pour half the batter into the prepared pan and spread evenly with a spatula. Place the Ferrero Rocher evenly spaced apart. Pour the remaining batter to cover all the Ferrero Rochers. 

5) Bake for about 25-30 minutes, or until a toothpick inserted in the center comes out with a little batter and a few moist clumps clinging to it. Do not over bake. Remove from oven and let cool on a wire rack. Serve at room temperature or chilled. These freeze very well.


When this brownie was taken out from the oven, I was "astonished" ! CRACKED! 
But when I read that 'This is a Brownie with a dry cracked crust, a wonderfully moist texture, and a deep chocolate flavor." 
Hoo ! Phew ! What a relief. .. hee .. hee!


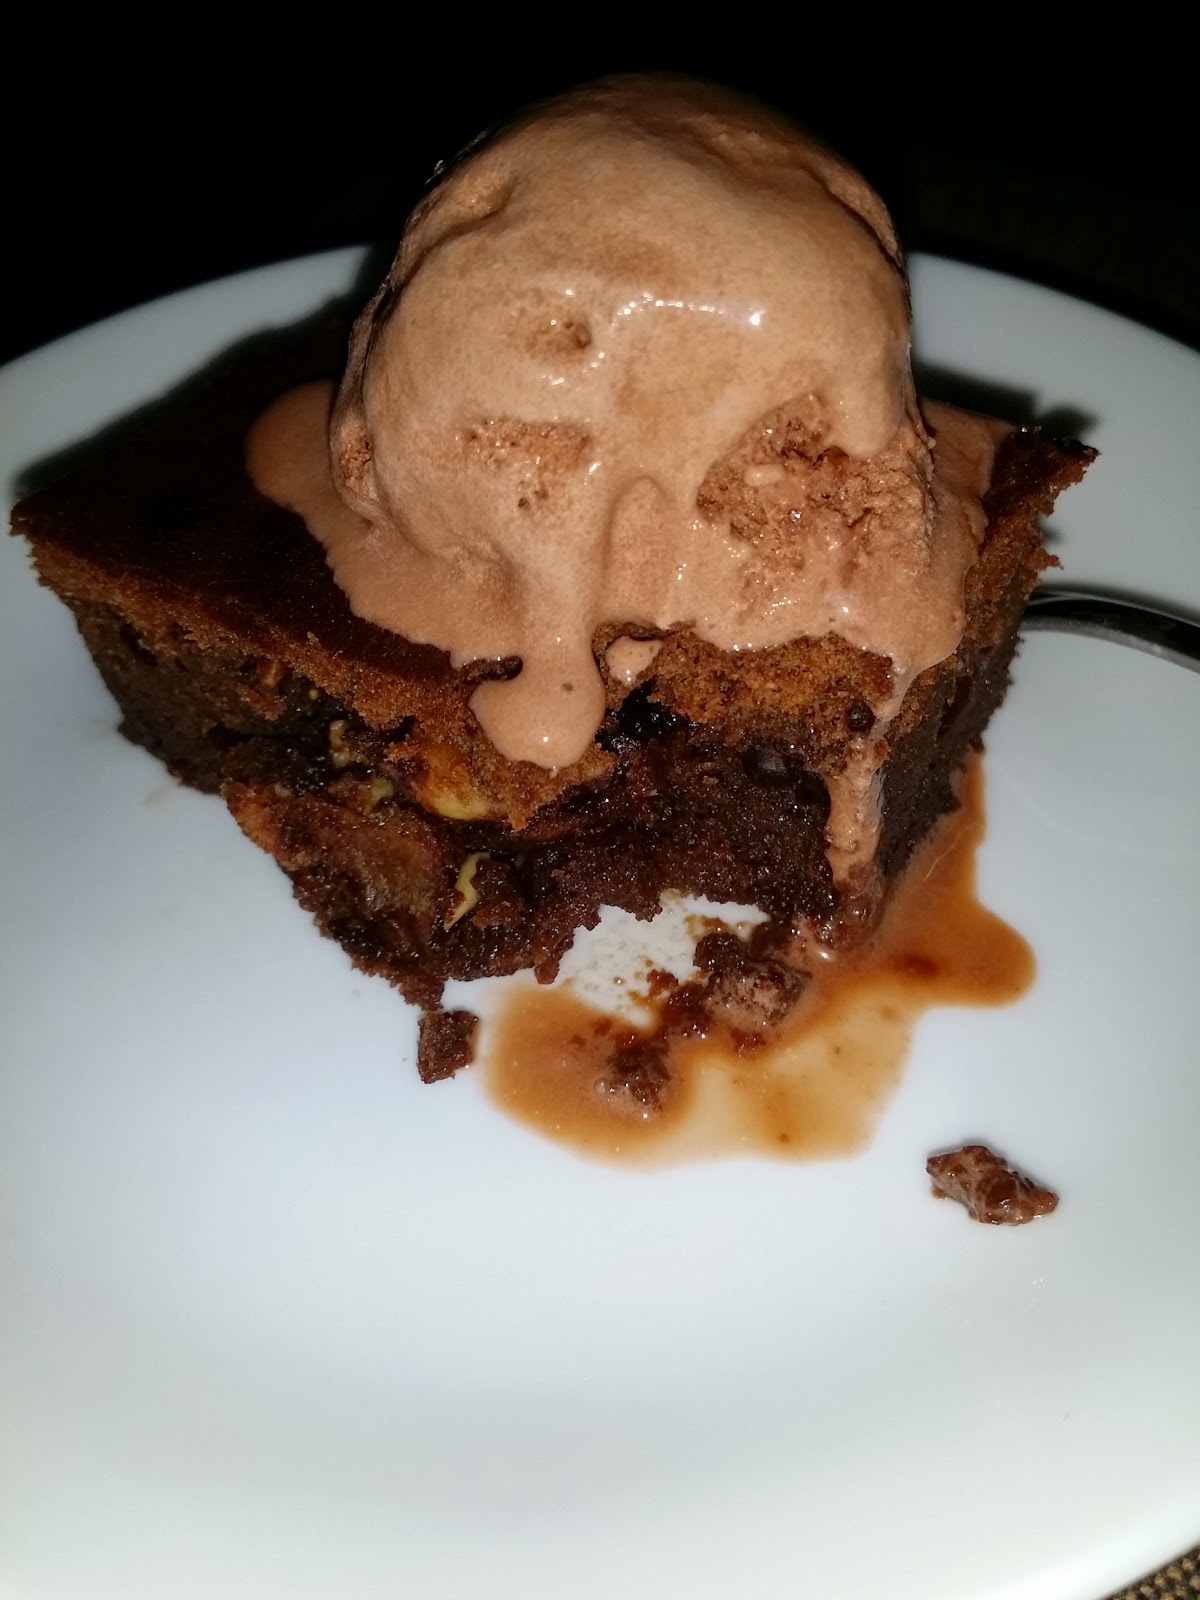
Look ! So moist and fudgy ! Yum yum ! topped with a scoop of chocolate flavour ice cream.


Blessed birthday to C & C ! Brownies baked with love from mom.

Sunday 29 March 2015

Hainanese Coconut Kueh - E-Bua

I loved this kueh when I was a young adult. It is amongst the variety of local kuehs selling in the market food/kueh stalls and most coffee shops. I like the fillings ... sweet fragrance of pandan, Gula Melaka (coconut palm sugar), crunchy ground peanuts and coconut. It was after some years later I got to know that this is the Hainanese traditional kueh often consume during some festive celebrations and on birthdays.

When I plan to make this kueh, I immediately contacted my baking 'kaki' (good friend), who's a Hainanese to get some advice on making the kueh. Hee ... hee... oh she replied that she didn't know how to make this kueh! Opps ... but she likes it too.


Oh ! Her birthday falls in March (shared the same birthdate with my girl), I definitely want to share with her ... my attempt in making Hainanese Coconut Kueh (E-Bua)

Recipe adapted from :
http://yummyhealthfood.blogspot.sg/2009/03/yummy-hainanese-coconut-kueh.html?m=1

Below my version with slight changes made:-
Hainanese Coconut Kueh - E-Bua
Yields about 23 - 25 pcs.
Fillings :
Ingredients A
Gula melaka : 125g (chopped small pieces)
Water : 25g
Pandan leaves : 5 pcs (washed clean, bundled and tie knots)
Ginger : 1 small pc (smashed and chopped finely)
Grounded peanuts : 50g
White sesame seeds : 30g
Grated white coconut : 200g
Plain flour : 1 tablespoon, mix in 2 tablespoonfuls of water.

Method:
1) In a cooking pot, mix water, gula melaka, ginger and pandan leaves cook over low flame till gula melaka dissolved.


2) Add in the grated white coconut and stir well about 4 - 5 minutes. Add in grounded peanuts and white sesame seeds, stir well. Add in the plain flour mixture to thicken the grated coconut. Bring to a boil and off the flame.


3) Dish up and cool before shaping into individual balls of about 25g each.

Dough :
Ingredients
Glutinous rice flour : 300g (sifted)
Coconut milk : 180g
Warm water :  100g
White sugar : 80g
Corn oil : 25g
A pinch of salt

#Some banana leaves cut into small pieces.
*Corn oil : 2 tablespoon for glazing.

Method:
1) Place glutinous rice flour into a mixing bowl.

2) Slowly add in the warm water (see my notes **) and mix well with a wooden or metal spoon.

3) Next, add in corn oil and coconut milk and knead by hand to form a soft and smooth dough (about 3 - 4 minutes).

4) Cover with cloth and rest for 20 minutes.
5) Divide dough into 30g each.


6) Slightly flatten each dough ball. Place the rolled filling ball in the centre of the dough. Seal the edges and shape it again in a round shape. Have some cut banana leaves. Put the wrapped dough on top of a piece of banana leaf. Flattened it slightly again.
 * oil your hands lightly with cooking oil if you find it too sticky to handle.

7) For individual's preference to make a red dot by dipping a tooth-pick with some permitted red food colouring.  Make a dot on the dough.


8) Heat up the steamer with water. Arrange the kuehs in the steamer (by batches), cover with lid and steam over medium flame for about 10 minutes.

9) Remove, brush the kueh with corn oil while it’s still hot.

** my notes:
To avoid the dough texture too runny, I added half the amount of warm water, then the coconut milk. Gradually add the remaining warm water to reach the smooth consistency texture.

Packed some and delivered to my friend with my birthday blessing ^-^! Glad that she liked the kuehs and given some good comments.


Here, having my afternoon break with yummy Hainanese Coconut Kueh ^-^!

~~~~~~♡♡♡~~~~~~


A Tribute To Our Founding Father Of Singapore 
THANK YOU

Today, 29 March 2015 is a very special day for me and for the people of Singapore. Today is my son's 19th birthday ... also the final farewell to the late Mr Lee Kuan Yew, Sinapore's first Prime Minister and the founding father of a nation. 

A small card penned down our gratitude presented when we were paying our respects to the late Mr Lee at the Parliament House.

Mr Lee will be sadly missed by all of us ... the whole nation ... but he will forever be remembered by all of us ... forever a legacy!


~~~~~~♡♡♡~~~~~~


I'm submitting this post to Best Recipes for Everyone March 2015 Event Theme: My Favourite Traditional Kueh organized by Fion of  XuanHom’s Mom and co-hosted by Joceline - Butter, Flour & Me.


Sunday 22 March 2015

Banana Hoon Kueh (Pisang Hoon Kueh)


Here's the close-up ...
see the bananas ... yummy
  
I remember when I was a kid, my late mom used to make lots of kuihs or kuehs. Usually steamed, cooked or fried types. It was much later, probably when I was a teenager, I got to enjoy her baked cakes when one of my older sisters bought her an oven. How could I forget ... my mom's signature pandan chiffon cake where she would pound the pandan leaves in mortar and pestel to make the pandan juice. And the Indonesia Lapis Legit. (BTW, both my late parents were Indonesian Chinese migrants settled in Singapore during World War II in the 1940s. They had a distant relative whom Peranakan, probably the influence of some Nyonya kuihs that my late mom had picked up in those years).

As a kid, all I knew was to eat and to enjoy whatever desserts or kuehs she'd made ... but these are the few names I could remember : Kuih Seri Muka, Kueh Jagung, Pisang Hoon Kueh, Tapioca Kueh, Kuih Dadar, Sweet Potato Ondeh Ondeh, Goreng Pisang, Kuih Lapis etc.
Savoury types : Steamed yam cake, traditional dumplings etc.

As these traditional kuehs are easily available, I hardly make them.  But recently I've made a few ... to reminisce about my late mom's cooking and some fond childhood memories :
Kueh Jagung
Kuih Seri Muka
Steamed Tapioca Kueh
Pumpkin ondeh-ondeh

A variation using the recipe of Kueh Jagung ... So here's some Pisang Hoon Kueh for the family.

Banana Hoon Kueh (Pisang Hoon Kueh)
Ingredients:
2 medium-sized ripe bananas, thinly sliced
50g Hoon Kueh Powder
100ml coconut milk
35g or 3 tablespoons white sugar (adjust the sweetness to your preference)
250ml water
Pinch of salt
2 pieces of pandan leaves (about 6 inch length)

Method :
1. In a pot, mix the Hoon Kueh powder, sugar, coconut milk, water and stir or whisk it lightly till dissolved and smooth.

2. Cook with low flame, add in the salt and pandan leaves and stir the mixture continuously till it is slightly thickened (about 3 minutes). Bring to a boil and add in the sliced bananas, off the flame. Give a few more stirring. The mixture should be thick, but still quite smooth and runny. Discard the pandan leaves.

3. Pour the mixture into a container and spread evenly with the back of a spoon.
*you could also wrap it with banana leaves.

4. Leave it to cool then chill in the fridge for a few hours. Served cold.

Having my Pisang Hoon Kueh with
a cup of freshly brew tea latte! 

Boy : Taste very nice. Like the Kuih Jagung you made. Like the texture. .. just right ... not too hard or soft, nice with bananas.

Mom : Yes, I reduced slightly on the Hoon Kueh powder and sugar.

Well, enjoying our weekend afternoon snack ^-^!

Have a sweet weekend :D


I'm submitting this post to Best Recipes for Everyone March 2015 Event Theme: My Favourite Traditional Kueh organized by Fion of  XuanHom’s Mom and co-hosted by Joceline - Butter, Flour & Me.

And


This post is linked to the event; Little Thumbs Up organised by Zoe from Bake for Happy Kids and Doreen from My Little Favourite DIY, hosted by
 Faeez from BitterSweetSpicy for March 2015 theme - BANANA


Friday 20 March 2015

Pandan Chiffon Cake

I've always wanted to bake a very fragrant pandan chiffon cake with the sides nicely golden brown ... Well? ....I knew it ! Haiz ! Again ! This chiffon cake of mine didn't like to wear 'sarong' :(


Over the last weekend, I bought 1 big bundle of pandan leaves (screwpine leaves) to make some Nyonya kuehs. Anticipated that I would not be able to use all, decided to make the concentrated pandan extract (click here for the details by Wendy) to bake a pandan chiffon cake.

Look ! My homemade concentrated pandan extract 


Here's using the recipe adapted from  Diana The Domestic Goddess Wannabe.
Below incorporated few steps that I'm used to in baking chiffon cake.

Pandan Chiffon Cake
(21cm tube pan)
Ingredients:
6 egg yolks
20g caster sugar
40ml vegetable oil
2 tablespoons homemade concentrated pandan extract
70ml coconut milk
80g cake flour

For the meringue:
6 egg whites
80g caster sugar
1/2 teaspoon cream of tartar

Instructions
1) Beat together egg yolks and caster sugar.

2) The mixture will turn a lighter shade after about 3-4 minutes of beating. Add vegetable oil and continue beating.
Once the oil has been incorporated, add coconut milk and pandan paste.

3) Add the sifted cake flour and mix until just combined. Set this aside.

4) In a dry clean mixing bowl, beat the cold egg whites and cream of tartar using electric mixer till foamy, add in caster sugar in 3 separate additions and beat till egg whites form a stiff peak.

5) Fold 1/3 of the meringue into the yolk mixture with a spatula. Gently fold the remaining meringue into the egg yolk mixture in 2 batches until no streaks remain.

6) Pour batter into 21cm un-greased chiffon tube pan. Spread and smooth the batter evenly with a spatula. Bang the pan gently on a work surface several times to release the air bubbles trapped in the batter.

7) Bake at preheated oven 180°C for 15 minutes, lower down to 160°C, continue to bake for 45 minutes or until the cake surface turns golden brown, and a skewer inserted into the centre comes out clean.

If the top of the cake cracks or becomes too brown, place a sheet of aluminium foil over it and continue baking.
*I placed the aluminium foil over it at 25 minutes into baking when I saw the top was rather browned. In that split moment, I was quite hesitant to open the oven door actually.

8) When the pan was removed from the oven, I used the suggested technique to drop the pan at a height of 20~30cm onto a table top. This action helps to keep the springy texture of the cake when it is left to cool.
Glad that there's no crack and it rose pretty high too!
9) Immediately invert the pan and place it on a raised wire rack (or any other raised device) to cool completely before unmoulding the cake from the pan.


After I've popped the pan into the oven for baking, it's the usual washing routine and cleaning the mess in the kitchen. Hmm... I could smell the sweet fragrances of pandan and coconut ... it filled the kitchen with the most wonderful aroma.


The colour of this chiffon is pale green but full of pandan fragrant. Very fluffy soft and springy ("doi doi" as I was holding a slice!). And here's a slice for my morning brekkie ^-^! My girl liked it too ! 

BTW, I brought the rest of the chiffon cake to my office to treat some of my colleagues. They commented  "very nice, moist and fluffy soft and pandan fragrant". 
Hee .. hee.. glad that they gave thumbs up to this pandan chiffon cake ^-^!

Happy baking and have a great weekend!

Tuesday 17 March 2015

Banana Oat Breakfast Cookies

Oh yes, totally agree with Cheri that these home-baked banana oat cookies are loaded with fiber and great for morning brekkie.
Depending what nuts you've got ... I just mixed whatever I can find ... adding the crunch to the chewy cookies !


Recipe adapted from Cheri of Mysavoryspoon
Slightly modified below replacing some ingredients not available.

Banana Oat Breakfast Cookies
Makes about 14 - 16 (depending on the size of the measuring cup/spoon used)

Ingredients:
3 medium-sized ripe bananas
40g rolls oats
50g peanut butter
1 tablespoon honey
1 teaspoon vanilla extract
1/2 teaspoon cinnamon
38g unsweetened dessicated coconut
40g slivered almonds, walnuts & sunflower seeds
50g raisins

Method:
Preheat the oven to 180°C.


In a large bowl mash bananas with the back of a wooden spoon, stir in the oats, peanut butter, honey, vanilla and cinnamon, stir well. Fold in coconut, nuts and raisins and let mixture sit for 10 minutes so oats can absorb moisture.


Using a 1/4 measuring cup fill with mixture and drop onto a parchment lined cookie sheet. (I used a big soup spoon instead, flatten the dough slightly)

Bake for 20 to 25 minutes until golden brown.

Crispy crust and soft chewy, nutty cookies with sweet banana fragrant .... Yummy !


This post is linked to the event; Little Thumbs Up organised by Zoe from Bake for Happy Kids and Doreen from My Little Favourite DIY, hosted by
 Faeez from BitterSweetSpicy for March 2015 theme - BANANA


Friday 13 March 2015

Apricot & Banana Compote

It's been quite a while since my last cooking/baking of sweet dessert recipes adapted from this cookbook.

What I like about this cookbook as there are many fuss-free, interesting and easy to make low-fat dessert recipes. A few herehere and here that I've shared in the past.


Here's sharing another super easy low-fat dessert Apricot & Banana Compote from the cookbook "Desserts All Around The Year" by Martha Day. Great after meal dessert which can be served warm or chilled.


I've halved the quantity as I've got only 100g of dried apricots (soon to be expired in a few weeks) in the fridge. Since I don't have any ground ginger, I substituted with a slice of fresh ginger.

Apricot & Banana Compote 
Ingredients  (serves 2)
100g ready-to-eat dried apricots
150ml unsweetened orange juice
75ml unsweetened apple juice
1 small slice of ginger
2 medium bananas, sliced
15g toasted flaked almonds

Method:
1. Put the apricots in a saucepan with the fruit juices and ginger and stir. Cover with lid and bring to the boil, simmer gently in low flame for 10 minutes. Keep stirring occasionally.


2. Set aside to cool, leaving the lid on. Once the compote is cool, stir in the sliced bananas.

3. Spoon the fruit and juices into a large serving bowl.

4. Serve immediately or cover and chill for several hours first. Sprinkle with flaked almonds just before serving.

As suggested, you may use other combinations of dried and fresh fruits such as prunes or figs and apples or peaches.


Tangy sweet softened apricots and bananas in fruity juice ... Simply refreshingly yummy!

Have a sweet and delightful weekend ^-^!

I'm sharing this post with Cook Your Books Event #21 [March 2015] hosted by Joyce of Kitchen Flavours

Cook-Your-Books


And


Also


This post is linked to the event; Little Thumbs Up organised by Zoe from Bake for Happy Kids and Doreen from My Little Favourite DIY, hosted by
 Faeez from BitterSweetSpicy for March 2015 theme - BANANA


Saturday 7 March 2015

Steamed Tapioca Kueh

I remembered my late mom used to make steamed tapioca. There were two kinds :
(1) Peeled tapioca and cut into small chunks. Sprinkled with some sugar and steam. Once cooked, sprinkled with grated coconut and served hot.

(2) Steamed tapioca kueh coated with grated white coconut.

I've made this steamed tapioca kueh a few times .... but that was many years ago .... probably when my kids were in kindergarten.

Here's sharing this traditional kueh which I've enjoyed so much during my childhood.

Steamed Tapioca Kueh
Ingredients :
200 grams of grated tapioca
150 ml freshly grated coconut milk
25 grams of granulated white sugar*
15 grams of brown sugar
*adjust the sweetness to your preference.

Method :
1) I used the food processor to blend the tapioca instead of using the traditional way to grate it. Cut the tapioca into small pieces, put into the food processor and blend about 30 - 45 seconds.

2) Lightly grease a baking tin or heat proof plate with cooking oil. I'm using a 750ml rectangle Pyrex dish. Line the dish with a big piece of banana leaf.

Blended tapioca, coconut milk and sugars
3) Put all ingredients in a big bowl and stir and mix well.

4) Pour the mixture to the lightly greased baking tin.

5) Steam under rapidly boiling water on high heat in a steamer for at least 25-30 minutes.
The steaming time depends on the size of the baking tin/plate used.  To check if the kueh is cooked, I used a fork to pierce the texture and see that it comes out clean.


6) Cool the steamed tapioca kueh completely before cutting into pieces with a greased sharp knife. Serve with white grated coconut.

I've also steamed some tapioca  (top plate).
The steamed tapioca kuehs are placed on the lower plate.


Simply love the texture and the sweetness (not too sweet) is just right for me.  Enjoy!


I'm submitting this post to Best Recipes for Everyone March 2015 Event Theme: My Favourite Traditional Kueh organized by Fion of  XuanHom’s Mom and co-hosted by Joceline - Butter, Flour & Me.


Wednesday 4 March 2015

Banana Chiffon Cake


I'd actually wanted to bake a nutty banana butter cake but realised that all the nuts (walnuts, hazelnuts) were used up in some of my previous bakes.  Bookmarked this recipe for a long time .... Well, with a few large ripened bananas, this saved me the hassle to crack my head of what flavour chiffon cake to bake.  Baked this on a weeknight for our morning brekkie.

Recipe adapted mostly from Happy Homebaking
Below my slightly modified version.

Banana Chiffon Cake
Ingredients (make one 16 ~ 18 cm cake)
3 egg yolks
25g caster sugar
1/8 teaspoon salt
30ml canola oil
90g banana puree
1/4 teaspoon vanilla extract
55g cake flour
1/8 teaspoon baking soda

3 egg whites
1/4 teaspoon cream of tartar
50g caster sugar

Method:
1) Preheat oven to 170°C. Sieve together flour and baking soda, set aside. Mash banana, set aside.

2) Separate egg yolks/whites. I kept the egg whites in the fridge till ready to use.

3) Whisk egg yolks and sugar in a mixing bowl until sugar just dissolved. Add in salt, oil, vanilla extract and mashed banana. Whisk till combined. Sieve over the flour mixture and fold gently with a spatula until flour is fully incorporated into the batter.

For Meringue:
1) In a dry clean bowl, beat the cold egg whites and cream of tartar using electric mixer till foamy, add in caster sugar in 3 separate additions and beat till egg whites turn stiff peak.

2) Fold meringue into flour mixture gently using a spatula in 3 batches till mixture is thoroughly mixed.

3) Pour batter into a 16cm or 18cm (6 inch or 7 inch) tube pan (do not grease the pan).

4) Spread and smooth the batter evenly with a spatula. Bang the pan gently on a work surface several times to release the air bubbles trapped in the batter.

5) Bake for 25 ~ 30mins or until the cake surface turns golden brown, and a skewer inserted into the centre comes out clean.

6) When the pan was removed from the oven, I used the suggested technique to drop the pan at a height of 20~30cm onto a table top. This action helps to keep the springy texture of the cake when it is left to cool.

7) Turn mould upside down to cool completely before unmoulding the cake from pan.

Note:
The eggs that I used is 60g each.
I preferred to use cold egg whites to make the meringue.
You may have to adjust the temperature and timing to suit your oven.


Yummy ! Love the fragrance of the banana ! Enjoy with a cup of tea instead of the usual coffee cos I'm saving some for the afternoon coffee break.

Have a great weekend and happy baking !


This post is linked to the event; Little Thumbs Up organised by Zoe from Bake for Happy Kids and Doreen from My Little Favourite DIY, hosted by
 Faeez from BitterSweetSpicy for March 2015 theme - BANANA