Monday 26 January 2015

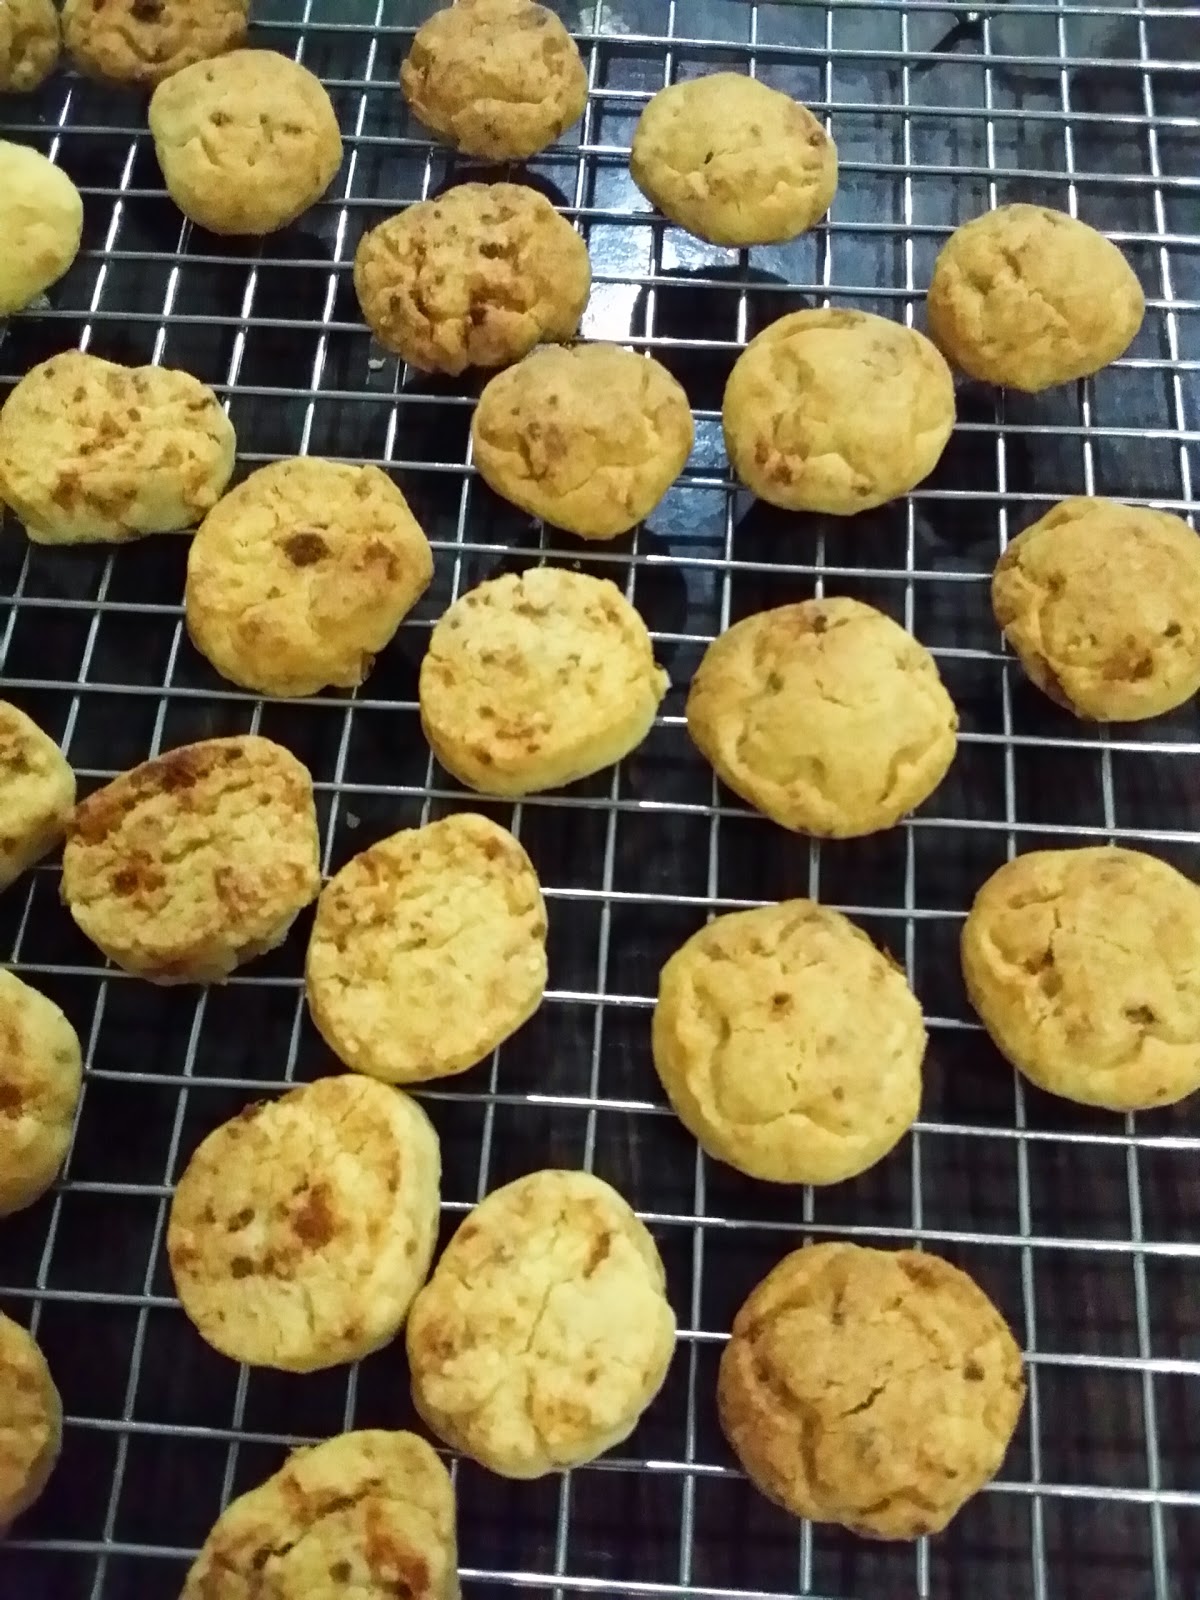
Sesame Peanut Butter Cookies (2015 CNY cookie #2)

When I saw this recipe posted by Cheah Sokehah of No-Frills Recipes , I immediately bookmarked it ... I like peanut cookies but too hassle for me to make ground peanuts.  Since I've got all the ingredients ... Yes ! GO ! GO ! GO bake it ! (actually I was quite tired after I've done the usual weekend household chores .... still, couldn't resist the temptation (^○^) because that tub of creamy peanut butter "kept staring (○▪○) at me" hee ... hee.. !)

My boy claimed "Oh ! It tasted like Subway's peanut butter cookie ! Chewy soft ... Make bigger, make more !"
My girl said "Nice!"


Recipe adapted from No Frills Recipes
Sesame Peanut Butter Cookies
Yield : about 55 - 58 cookies

Ingredients
113g unsalted butter (softened at room temperature)
60g brown sugar
60g caster sugar
113g creamy or chunky peanut butter
1 egg
140g plain flour
1/2 tsp baking powder
3/4 tsp bicarbonate of soda
a pinch of salt
2 teaspoons white sesame seeds, lightly toasted
1 teaspoon vanilla extract

Method
1) Sift flour with baking powder, bicarbonate of soda and salt.  Set aside.

2) In an electric mixer, cream butter with the brown and caster sugar till creamy.
Add in the peanut butter, followed by the egg and vanilla.

3) Fold in the sifted flour and sesame seeds, mix till just combined.
Cover with cling wrap and let rest in the fridge for 2  hours.

4) Roll out into 1.1/4 inch balls and place on a parchment lined baking sheet, about 1.1/2 inches apart.

Do space them widely apart as the dough will spread while baking in oven.
5) Bake in a preheated oven @ 180 degree C for about 10 to 12 mins.  Let cool for a while before removing them onto a wire rack to cool completely.  Store in an airtight cookie jar.

Indeed, I like the peanut fragrant and the chewy soft texture. Yeah ! Add to my CNY homemade cookies list ^-^!

Happy baking for CNY !

♡♡♡♡♡☆☆☆♡♡♡♡♡


I'm linking this post to Best Recipes for Everyone Jan & Feb 2015 Event:  Theme
My Homemade Cookies by Fion of  XuanHom's Mom and co-hosted by

and

'My Treasured Recipes #5 - Chinese New Year Goodies (Jan/Feb 2015)' hosted by
Miss B of  Everybody Eats Well in Flanders and co-hosted by
Charmaine of  Mimi Bakery House


Saturday 24 January 2015

Pork Floss Cookies (2015 CNY cookie #1)

I started baking some Chinese New Year (CNY) cookies last year. I remembered my 1st attempts in baking German Cookies, Melting Moment etc. Homemade cookies definitely tasted better as compared to some store bought. What I like is that I could adjust the sweetness or ingredients to suit my taste. Of course, my constraint is "not enough time" to bake all the desired recipes that I wanted. Could only add 2 to 3 types of homemade CNY cookies with few varieties of store bought cookies for our CNY celebration.

I have not tasted this savoury Pork Floss cookie and not sure if it would be well received by my family. So for this trial CNY cookie, I halved the recipe. Well, these savoury cookies are very crunchy, tasty and addictive. Will definitely be baking more cos for sure this batch will not last till Chinese New Year .... hee.. hee !


Recipe adapted from Cosybites

PORK FLOSS COOKIES
Makes about 50 bite-sized cookies
Ingredient:
113 gram unsalted butter (softened at room temperature)
40 gram caster sugar
1/2 an egg
1 teaspoon vanilla extract
150 gram all-purpose flour
Pinch of salt
50 gram pork floss - original soft type (can be replaced with chicken floss)

Method:
1) Line baking sheet/tray with parchment paper, set aside.

2) In a large mixing bowl, cream together the butter and sugar with the electric mixer on medium speed until light and fluffy (about 4 to 5 minutes).

3) Beat in the egg and vanilla extract. Combine the flour, salt and pork floss; stir into the sugar mixture with a spatula.

4) Divide dough into a 2 portions. Place each portion in cling wrap and roll into a log of approximately 2in diameter. Wrap tightly in cling wrap and chill for at least one hour. If you are going to use a cookie cutter, flatten the dough into a square or rectangle before chilling.


5) Preheat oven to 180°C. Position the rack in the center of the oven. Remove dough from cling wrap and cut into small pieces of 1 cm thick, make round balls and flattened slightly. Alternatively, cut out shapes with cookie cutter.
(I shaped the cookie dough in round balls, flattened slightly and pressed lightly with a cookie cutter imprint some shapes).


6) Place cookies on a baking sheet/tray, space them about 1apart. Bake for 15 minutes, or until lightly brown at the edges. Remove the cookies from baking tray to wire rack to cool completely. Store them in airtight container.

Oh dear me ! I was 'popping' one after another of these pork floss cookies while they were on the cooling rack ^-^!


This recipe is pretty easy to attempt. If you're looking for something savoury for CNY, perhaps try this recipe!

Happy Baking ^-^!


I'm linking this post to Best Recipes for Everyone Jan & Feb 2015 Event:  Theme
My Homemade Cookies by Fion of  XuanHom's Mom and co-hosted by

and

'My Treasured Recipes #5 - Chinese New Year Goodies (Jan/Feb 2015)' hosted by
Miss B of  Everybody Eats Well in Flanders and co-hosted by
Charmaine of  Mimi Bakery House


Thursday 22 January 2015

Hot Milk Cake with Cranberry Sauce and Cream

In this bake-along #74 session , I've learned something new ... pouring hot milk into the batter!


I've baked sponge cakes a few times ... but haven't tried pouring hot milk mixture into batter like this recipe hot milk cake. While I find that these small cakes do not taste fluffy soft or airy type, but my big kids like it.

Recipe adapted from bonappetit
Replicated below from Zoe of Bake for Happy Kids

Hot Milk Cake with Cranberry Sauce and Cream

Makes 4 cakes / servings
Ingredients :
1 large egg (65g)
65g caster sugar
1/4 tsp vanilla extract or paste
85g self-rising flour, sifted
80ml milk
40g unsalted butter

1/4 cup chilled whipped cream
Homemade cranberry sauce (may refer recipe here here)
Some blueberries

Method :
Preheat oven to 190°C. 4 cupcake liners.

Using electric mixer, beat egg in a mixing bowl at high speed until thick about 3 mins.

Gradually beat in sugar; beat until thick and pale yellow, about 4 mins.Beat in vanilla into the egg mixture. At this stage, decrease mixing speed to low. Add flour and beat 30 secs or until well combined.

Meanwhile, bring milk and butter just to boil in small saucepan, stirring until butter melts. Add hot milk mixture to batter; beat in low speed for 30 secs or until mixture is well blended and smooth. Divide batter among prepared cups. Place cups on a baking tray.


Bake cakes until tops rise (tall rounded peak will form in center of each), turn pale golden, and are firm to touch, about 14-16 mins (I baked mine for 16 mins). 《Lol, mine were flat-headed and didn't rise high》

Cool in cups at least 20 mins. Transfer cakes to a wire rack to cool completely at room temperature.

Place cakes into serving bowls. I served these little cakes with blueberries, whipped cream and cranberry sauce.

Happy Baking and enjoy your weekend ^-^!


Submitting this post to Bake-Along event organized by the hosts (JoyceLena or Zoe)


Wednesday 21 January 2015

Fried Egg Noodle with Prawns and Bak Kwa Topping

Actually my big boy fried this egg noodle for my birthday. Since he offered to cook the noodles for me, I would surely be glad too. But the moment he asked "mom, cook the prawns or bean sprouts first ... " (○~○) I better "supervise" him in the kitchen ... hee ..hee !

Ta dah! A big plate of fragrant egg noodle for our weekend lunch ^-^! But it looked very Chinese New Year dish too ... with big prawns and Bak Kwa (BBQ meat jerky)! Don't you think so ?! Hee ... hee !


Fried Egg Noodle with Prawns and Bak Kwa Topping.

Ingredients
200g dried egg noodles (1 pack)
200g large prawns (shelled, deveined)
100g bean sprouts
A few cloves of garlic, chopped
Half red onion - sliced
2 - 3 tablespoons vegetable cooking oil

2 eggs for omelette
3 - 4 pieces of square Bak Kwa (BBQ meat jerky) cut into strips

Sauce (mix in a bowl)
3 tablespoons oyster sauce
1/2 teaspoon salt
50 - 100ml water
Dash of Pepper & Sesame oil

Method :
1) Boil the egg noodle in a pot of boiling water for about 3 minutes (or refer to the cooking time stated on the packaging). Drain the water, pour noodles in the colander and rinse quickly with running water so that the noodles won't stick together. Drain and set aside.

2) To make egg omelette - beat eggs with dash of pepper and a pinch of salt in a bowl.

3) Heat the non-stick pan with low flame, grease the pan with a little vegetable cooking oil. Pour the eggs and gently tilting the pan let the liquid flow thinly covering the base like pancake. Cook for about 1 minute. Gently flip the egg pancake over, using the spatula. Cook for another 1 minute. Remove from the pan and cut into strips. Set aside.

4) Using the same frying pan, with medium flame, add vegetable cooking oil. Sauté the onions and garlic. Add in the prawns stir-fry about 1 minute. Pour in the sauce and continue to stir-fry about 1 minute. Add in the bean sprouts and boiled noodle into the sauce.

5) Use a pair of chopsticks to toss the noodles. Check that the noodles are well coated with sauce. Continue tossing/cooking for another 2 -3 minutes till the sauce is soaked up by the noodles.


6) Off the flame and ready to serve. Top with some Bak Kwa and egg omelette.

Do adjust the taste and ingredients to your preference.


According to some sources :
Certain dishes are eaten during the Chinese New Year for their symbolic meaning. Lucky food is served during the 16-day festival season, especially New Year’s Eve, which is believed to bring good luck for the coming year. The auspicious symbolism of these foods is based on their pronunciations or appearances.

Noodles (面): When served during the Lunar New Year period, noodles are usually not cut so as to ensure that they are kept as long as possible. As they representing longevity, the longer the noodles, the longer our lives!

Bak kwa (肉干) is immensely popular in Singapore and Malaysia where it is usually eaten during Chinese New Year. The red colour is considered auspicious.

Shrimp / prawns (虾) - symbolize happiness and good fortune.

Enjoy and have a great weekend!


Sunday 18 January 2015

Japanese Dark Pearl Chiffon Cake


Baked this birthday cake for myself …. It’s my 2nd homemade birthday cake since I started baking (cakes & pastries) a few years ago.  Coincidentally, my blog turns 1 year old in January.

Time really flies ….  Looking back, 2014 had been an exciting and fulfilling year for me in my baking journey. I started this blog mainly to record the recipes ... like an E-recipe book with pictures (hee.. hee..)! Flip back to see what I’ve baked and how it turned out etc.

I’m really so blessed to know so many blogger pals through the organized blog-hop theme events like Little Thumbs Up, Bake Along, Cook-Your-Books, Best Recipes For Everyone etc. I’m so inspired by their bakes, recipes, creations and knowledge sharing.
♡ Through their selfless sharing, I've acquired new knowledge and baking skills. ♡ Through their passion, I was inspired to try recipes I've never tried before.

With the encouragements given by some of them, I dared to make my 1st attempts in :
Chiffon Cakes
Mooncakes (baked and snowskin)
Japanese Condensed Milk Bread

Thank you ♡^-^!

My “bake-along” cum gathering sessions with my baking kakis (friends) had also spiced up my baking journey too ♡!

I've chosen to bake this Japanese Dark Pearl Chiffon Cake on my birthday as I was inspired by some blogger pals whom had baked this cake perfectly :
Ann
Esther
Lena
Eileen
Jeannie

Also, I remembered chiffon cake was the only cake that has really "drove me crazy" in the "Bake-Along #64 : Theme - Chiffon Cake" blog-hop event ... hee hee ^-^!

Japanese Dark Pearl Chiffon Cake
日式黑珍珠戚风
(I used a 17 cm chiffon pan)

Ingredients
3 egg yolks
35g corn oil
60g milk
80g chocolate, chopped
35g cake flour
15g cocoa powder
1/4 tsp baking soda
1/4 tsp baking powder

Meringue:
3 egg whites
45g caster sugar
1/2 tsp cream of tartar

Directions
First melt chocolate over double boiler or microwave. Stir until smooth and set aside to cool.

Stir the egg yolks and oil together, then stir in the milk and the slightly warm melted chocolate. Combine flour, cocoa powder, baking powder and baking soda together and sift into the egg yolk mixture, mix till to a smooth batter.

In the mixer, beat egg whites and cream of tartar till foamy and add in the sugar, beat till stiff peaks. Fold in the meringue to the egg yolks batter in 3 batches till no traces of egg whites can be seen.

Pour into chiffon pan, gently knock the pan on the table to release air bubbles.

Bake in a preheated oven at 170°C for about 40 minutes.
*note: I reduced the oven temperature to 150°C in the last 20 minutes into baking.

I used the suggested technique to drop the pan at a height of 20~30cm onto a table top. This action helps to keep the springy texture of the cake when it is left to cool.

When baked, turn mould upside down to cool before unmoulding the cake from pan.
I slipped the knife while unmoulding, hence, resulted a slight piece chipped-off :(

So, what's up for me in Y2015 ?
Eat well, sleep well, work well and live well ! Healthy eating .... healthy living !
Yes, I've a long list of recipes that I’ve bookmarked ... will definitely find time to try as much as I could.  Continue my baking & learning journey.
Happy birthday to me ^-^!
Happy 1st anniversary to my blog :D


♡♡♡♡☆☆♡☆☆♡♡♡♡
Every blessing You pour out 
I'll turn back to praise
When the darkness closes in, Lord
Still I will say

Blessed be the name of the Lord
Blessed be Your name
Blessed be the name of the Lord
Blessed be Your glorious name
♡☆☆♡☆☆♡

Sunday 11 January 2015

Mille-Feuille with Cranberry sauce

Occasionally I would baked some fruity pastry using store bought puff pastry for a quick fix for dessert or tea snacks. But I've not attempted Mille Feuille, most commonly referred as Napoleans. The puff pastry dough which when baked, rises into thousands upon thousands of layers of flaky, buttery pastry. Once cooled the layers are then spread with Pastry Cream. Some people may use Whipped Cream or Jam, or a combination of the two with some fresh fruits (according to some info provided in the website)

So, here's my first attempt in this French pastry together with all the pretty ladies in this 'Bake-Along theme Mille Feuille'


Mille Feuille with Homemade Cranberry Sauce (Bake-Along #73)

Ingredient:
Puff Pastry Sheets (1 sheet)
Refer to source : m.puffpastry
Below my slightly modified version.

Directions:
Heat the oven to 180°C.
Unfold the pastry sheet on a lightly floured surface.
Cut the pastry sheet into cookie cutter of your choice.
Place the cut out pastry onto a baking sheet.
*Note:
I didn't thaw the pastry sheet. About 1 - 2 minutes after taken out from the freezer, I cut the pastry sheet with cookie cutter as I find it easier to handle. I used a 9cm diameter cookie cutter, made 5 rounds in 1 pastry sheet.

Bake for 15 minutes or until the pastries are golden brown.  Remove the pastries from the baking sheet and let cool on a wire rack for 10 minutes.  Split the pastries into 2 layers.

I've left with half the pack of fresh cranberries from last Christmas. Decided to make some cranberry sauce for these pastry filling and other tarts.

Recipe source : My Baking Addiction
Below my slight modification made.
Cranberry sauce 
Ingredients:
50g granulated sugar
50g light brown sugar
90ml water
90ml orange juice
250g fresh cranberries
1 tablespoon Grand Marnier

Directions:
In a medium saucepan over medium heat, combine the sugars, water and orange juice.
Stir continuously until sugars are dissolved. Add in the cranberries.
Cook until the cranberries start to pop (about 10 minutes), stir constantly. Remove from heat, stir in Grand Marnier and place sauce in a bowl. Cranberry sauce will thicken as it cools.

Whipped cream 
250ml heavy cream
1.5 tablespoons caster sugar

Directions:
Whisk the heavy cream and caster sugar with an electric mixer till stiff peak.

To assemble :
Some strawberries - thinly sliced

Top 1 layer with a heaped teaspoon of cranberry sauce, then a teaspoon of whipped cream.

Cover with another puff pastry layer. Spread 1.5 teaspoon of whipped cream. Place some sliced strawberries on the whipped cream.

Cover with the 3rd puff pastry and gently press it.
To serve, dust with some icing sugar and serve with some strawberries ^-^!

Enjoying my afternoon break
... this delicate French pastry

Yummy .. ! Love this tangy creamy
sweet pastry !

Ha ha ! .. I gave this plate of Mille Feuille a good 2 minutes of hard stare ... cos I don't know if I should use a pair of knife and fork to eat this.  Ha ha ! ... use my fingers, of course ! Very flaky. .. and the fillings oozed out with every bite ! Yummy-licious ^-^!


I'm submitting this post to
Bake-Along #73 - Theme : Mille Feuille
Hosted by LenaJoyce and Zoe


Saturday 10 January 2015

Swedish Meatballs with Pasta

I often whipped up pasta meal for my family as my big kids loved cheesy pasta. I usually used store bought ready pasta sauce ... quick, easy and hassle free ^-^! Most of the time, I'll see what ingredients I could salvage in the fridge to mix and match an edible pasta meal .. hee .. hee !

Previously I had also tried out a few "new" pasta recipes added to my pasta cooking list :
Pasta with pumpkin sage brown butter
Baked Pasta with cooking cream and thyme
Baked chicken teriyaki pasta

We liked the famous Swedish Meatballs at IKEA. Sometimes we would travel to IKEA just to have a plate of its signature meatballs and some fried chicken wings ... without doing any furniture shopping.

So, for our weekend lunch, what has the Swedish meatballs got to do with pasta ? Aiyoh! I've made "the taste almost like" the famous Swedish meatballs with pasta instead of serving with potatoes and lingonberry jelly ... hee .. hee!


Recipe adapted mostly from: Simply Recipes swedish_meatballs

Below my slightly modified version as I've omitted certain spices, used cooking cream instead of sour cream as I forgotten to buy it, used panko breadcrumbs, reduced the recipe quantity served for 2.

Swedish Meatballs with Pasta
Yield about 25 meatballs
INGREDIENTS
Meatballs:
1 Tbsp butter
50g of large yellow or white onion, peeled, grated

50ml fresh milk
30g panko breadcrumbs
1 small egg
120g ground pork
300g ground beef
1 teaspoon  salt
1/2 teaspoon all spice powder
1/2 teaspoon black pepper

Sauce:
2 Tbsp butter
2 Tbsp plain flour
400ml beef stock
100 ml cooking cream
Pinch of Salt

Pasta:
Vegeroni Pasta Shapes about 70g

METHOD
1) Melt the butter (1 Tbsp) in a sauté pan on medium-high heat. Stir in the grated onion and cook until translucent and softened, 3-4 minutes. Set aside to cool.

2) Place panko breadcrumbs in a bowl and mix with the milk. Let sit for 10 minutes for the bread to absorb all of the milk.

3) Stir the cooled onions into the milk bread mixture. Add the egg, ground pork and beef, salt and pepper. Use your (clean) hands to mix everything together until well combined.

4) Use your hands to form the meatballs about an inch-thick and place them on a plate or sheet pan.

5) Heat 2 Tbsp of butter in a large sauté pan on medium heat. When the butter is melted and foamy, start adding some meatballs to the pan. Working in batches as to not crowd the pan, slowly brown the meatballs on all sides. Handle the meatballs gently so they do not break apart as you turn them.

Sizzling browning meatballs in pan
6) Once the meatballs have browned on all sides (about 3 - 4 mins), remove them from the pan and set aside. You do not need to cook the meatballs all the way through at this point, you only need to brown them. You'll finish cooking the meatballs in the sauce later.

Once you have removed the meatballs from the pan, keep the remaining butter in the pan. You'll use this butter to make the sauce. If the butter in the pan has become burnt through the browning of the meatballs, remove and discard it, and add 2 Tbsp of fresh butter to the pan. Otherwise use the existing pan butter. Add more if needed.
Bought a pack of beef stock
7) To make the sauce, first make the *roux.
*Roux (pronounced "roo") is a mixture of fat (especially butter) and flour used in making sauces.
Heat the butter in the pan on medium heat. Slowly whisk in the flour. Stir until smooth. Continue to stir, allowing the flour mixture to cook, several minutes, until the roux is the color of coffee-with-cream.

When the roux has cooked to a lovely shade of light brown, slowly add the stock to the roux, stirring as you add the stock. The stock will sputter at first and the roux may seize up, but keep adding the stock slowly and keep stirring. Eventually the sauce will loosen and become silky. Add in the cooking cream.

8) Return the meatballs to the pan with the sauce and lower the heat to low. Cover the pot and cook on low heat for 8 - 10 minutes. You may need to work in batches.

9) Transfer the meatballs to a serving dish to serve or together with pasta.

In a separate cooking pan, boil some water and cook the pasta according to the packaging instructions. Drain the water and served with meatballs and sauce immediately.

My girl commented these meatballs tasted like IKEA's signature meatballs ^-^! She liked them served with pasta too !

Happy cooking & hope you have a great weekend too ^-^!


I'm linking this post to event Little Thumbs Up January 2015 : Pasta / Noodles hosted AnneRegalado - My Bare Cupboard & organised by Zoe of Bake for Happy Kids and Doreen of My Little Favourite DIY .

Sunday 4 January 2015

Coconut Chicken Salad with Warm Honey Mustard Vinaigrette

With some leftover panko bread crumbs, made some warm chicken salad for our weekend lunch. Yes, a perfect light meal for us as we have been snacking/munching alot lately ... hee.. hee!


Recipe source: skinnytaste.com
My slightly modified version below :

Coconut Chicken Salad with Warm Honey Mustard Vinaigrette
Ingredients:
6 pieces chicken tenderloins
6 tbsp dessicated coconut
1/4 cup panko crumbs
2 tbsp crushed cornflake crumbs
1 egg white
pinch salt
olive oil

Your preferred mixed greens eg. Lettuce, Romania, Butterhead etc.
1 large tomato, sliced
1 small cucumber, sliced

For the Vinaigrette:
1 tablespoon fresh lemon juice
1 tablespoon honey
1 tablespoon extra virgin olive oil
2 teaspoons wholegrain mustard

Directions:
Whisk all vinaigrette ingredients; set aside.

Preheat oven to 180°C.

Combine dessicated coconut, panko, cornflake crumbs and salt in a bowl. In another bowl, lightly beat the egg white with a fork.

Lightly season chicken with salt. Dip the chicken in the egg, then in the coconut crumb mixture. Place chicken on a cookie sheet lined with parchment for easy cleanup. Lightly grease with olive oil and bake for 25 - 30 minutes turning halfway, or until chicken is cooked through.

Place some lettuce, cucumber and tomato on each plate. When chicken is ready, slice on the diagonal and place on top of greens. Heat dressing in the microwave a few seconds and divide equally between each salad; a little over 1 tablespoon each.
(Do adjust the taste to your preference)

Served with a small bowl of cream of chicken soup.

Enjoy the warm light & refreshing salad.
Hope you'll have a great week ahead !

Thursday 1 January 2015

Rose Tea Chiffon Cake

When my girl gave me a set of rose tea leaves, I've used it to make some mousse here. And I've also thought of using it to bake a cake and I remembered seeing a rose tea chiffon cake recipe in Bake King website.

Well, here's my 1st baked cake of Year 2015 ... A Rose Tea Chiffon Cake.
While baking this cake, I've got these phrases that flashed across my mind :
Life may not always be a bed of roses, hope that I'll overcome whatever the challenges I may have in the new year !


Drizzled some melted white chocolate 

Recipe adapted from : Bake King
Below my slightly modified version

ROSE TEA CHIFFON CAKE
17cm chiffon pan
Ingredients A
8g of rose black tea leaves
80ml hot water
Soak about 6 - 8 dried rose buds in some hot boiling water for about 10 mins and drained. Set aside.

Ingredients B
3 egg yolks
30g caster sugar
40ml vegetable oil
80g cake flour
3g dried rose buds, roughly crushed

Ingredients C
4 egg whites
40g caster sugar
1/4 teaspoon cream of tartar

Directions:
1) Add hot water to the rose black tea leaves and leave mixture to cool. Strain 60ml of the rose tea and set aside.

2) Using electric mixer, combine egg yolks and caster sugar together well till mixture become pale. In sequence whisk in vegetable oil and rose tea. Fold in the sieved flour mixture with a spatula.

3) Next stir in the roughly crushed dried rose buds, mix well and set aside.

For Meringue:
1) Beat egg whites and cream of tartar using electric mixer till foamy, gradually add in caster sugar and beat till egg whites turn stiff peak.

2) Fold meringue into flour mixture gently using a spatula in 3 batches till mixture is thoroughly mixed.

3) Place the soaked dried rose buds on the base of the chiffon pan. Pour batter evenly into the ungreased chiffon pan and gently give the pan a bang on the table top to release air bubbles.

4) Bake chiffon cake at 180°C oven for 30 minutes, or until the cake surface turns golden brown, and a skewer inserted into the centre comes out clean.
*note : I used the lowest rack, total bake time is 35 minutes. I adjusted the oven temperature to 160°C in the last 10 mins of baking. You may have to adjust the temperature and timing to suit your oven.

5) When the pan was removed from the oven, I used the suggested technique to drop the pan at a height of 20~30cm onto a table top.
This action helps to keep the springy texture of the cake when it is left to cool.

6) When baked, turn mould upside down to cool before unmoulding the cake from pan.


Lastly drizzle cake with some icing or melted white chocolate and garnish with extra rose petals/rose buds.


The texture is so fluffy soft. Love the rose fragrance too. Enjoy my quiet afternoon tea!
Happy baking and hope you have a great start of the year ^-^!