Tuesday, 7 October 2014

Cranberry Hazelnuts Biscotti

Do you like Biscotti?  I do.
Biscotti, also known as cantuccini (coffee bread), are twice‑baked cookies originating in the Italian city of Prato. They are long, thick, brittle cookies designed to be dipped in coffee, cocoa, or wine.

Glad to also know that the traditional biscotti do not contain butter and oil.  As I do not have pistachio nuts (cos could hardly find shelled unsalted pistachio in supermarkets), hence, substituted with hazelnuts and made these Cranberry Hazelnuts Biscotti !


Recipe adapted from : Joy of Baking, with slight changes made in blue.

Cranberry Hazelnuts Biscotti
Ingredients:
135 gram granulated white sugar (I reduced to 90 gram caster sugar)
2 large eggs
1 teaspoon pure vanilla extract
1 teaspoon baking powder
1/4 teaspoon salt
230 grams all-purpose flour
60 grams *hazelnuts coarsely chopped
75 grams dried cranberries or cherries

Method:
1) Preheat oven to 350 degrees F (177 degrees C) and place the oven rack in the center of the oven. Line a baking sheet with parchment paper.
*toast hazelnuts: spread on a baking sheet and bake @ 177 °C for about 10 minutes or until lightly browned and fragrant.

Some prepared ingredients
2) In the bowl of your electric mixer (or with a hand mixer), beat the sugar and eggs on high speed until thick, pale, and fluffy (about 3-5 minutes). At this point beat in the vanilla extract. In a separate bowl, whisk together the flour, baking powder and salt. Add to the egg mixture and beat until combined. Fold in the chopped hazelnuts and cranberries.

3) Transfer the dough to a well floured counter and roll into a log shape, about 12 inches (30 cm) long and 3 1/2 inches (9 cm) wide. You may have to flour your hands to form the log as the dough is quite sticky. Place the log on the baking sheet and bake for about 25 minutes or until firm to the touch. Remove from oven and let cool on a wire rack for about 10 minutes.

I roughly divided into 2 logs instead of 1

4) Reduce oven temperature to 325 degrees F (165 degrees C). Transfer the log to a cutting board and cut into about 1/2 inch (1.25 cm) slices, on the diagonal. Place the biscotti, cut side down, on the baking sheet. Bake for about 8-10 minutes, turn slices over, and bake for another 8-10 minutes or until golden brown. Remove from oven and let cool. Can be stored in an airtight container for several weeks.

Makes about 20 - 24 biscotti.
(On my next attempt, I shall slice them slightly thinner to double the quantity)

Cooling on rack

I love the nice crisp and crunchy texture ... makes them perfect for dunking in my coffee and munch munch ... very addictive !
Simply enjoy the dipping and munching ... on a lazy sunny weekend ^-^!

Happy baking and have a nice day :D

I'm submitting this post to "My Treasured Recipes #3 - Taste of Autumn (Oct/Nov 2014)" hosted by Miss B of Everybody Eats Well in Flanders and co-hosted by Charmaine of Mimi Bakery House

Monday, 6 October 2014

Pasta with pumpkin & sage brown butter

I chance upon this pasta recipe from Donna Hay uses sage leaves and pumpkin.  Just nice to try it for LTU theme pumpkin.


Recipe adapted from Donna Hay
With slight modification in blue adjusted to our taste for 2 persons.

Pasta with pumpkin and sage brown butter
Ingredients:
1kg pumpkin, peeled and diced (about 300g)
Olive oil
400g pappardelle or fettuccine (I used Penne pasta about 70g) 
75g butter (40g)
3 tablespoons whole sage leaves (about 1 - 2 tablespoons)
1 cup finely grated parmesan (I used some grated cheddar cheese)
sea salt and cracked black pepper

Method:
Preheat oven to 190°C (375°F). Place the pumpkin in a baking dish and sprinkle with a little olive oil. Bake for 30 minutes or until golden and soft.

Just before the pumpkin is ready, cook the pasta in a large saucepan of lightly salted boiling water (refer to the cooking time stated on the packaging). Drain and set aside.

While the pasta is cooking, place the butter and sage in a saucepan over low to medium heat and allow the butter to simmer until a golden brown colour.


To serve, place the pasta in serving plates and top with the pumpkin and parmesan. Spoon over the brown butter and sage leaves and season with salt and pepper.

I find that the pasta is abit dry which I preferred to have some sauce.  Overall, the sweet pumpkin and fragrant sage leaves complement the dry pasta quite well.

Happy cooking and a blessed week ahead !


This post is linked to the event Little Thumbs Up (Oct 2014 Event: PUMPKIN

Photobucket


Saturday, 4 October 2014

Easy Baked Monte Cristo Sandwiches

A Monte Cristo is a fried ham and cheese sandwich, a variation of the French croque-monsieur.

For a change from using bread to make Monte Cristo sandwiches, I baked them using ready puff pastry sheet. 


Recipe source : Puff Pastry

Baked Monte Cristo Sandwiches
Ingredients:
1 - 2 tablespoons all-purpose flour
1 Puff Pastry Sheet, thawed
4 slices ham
4 slices cheese
1 teaspoon confectioners' sugar or ice snow powder.
Maple syrup

Method:
Preheat the oven to 180°C.
Prepare the baking sheet with lightly greased parchment paper.

Sprinkle the flour on the work suface.
Place the pastry sheet on the work surface.
Cut into 4 squares.

With a corner of 1 pastry facing you, place 1 slice ham and 1 slice cheese on the bottom half of the pastry.

Fold the pastry over the filling to form a triangle and press the edges to seal.  Crimp the edges with a fork.

Place the pastries onto the baking sheet.
Bake for 20 minutes or until the pastries are golden brown.

Dust the pastries with the confectioners' sugar.  Serve with the maple syrup.

Pretty quick and easy to bake these sandwiches ... yum yum !
Enjoyed these flaky pastry freshly baked from the oven. Served with hot or cold beverage ... that's our morning brekkie ... on a lazy weekend ^-^!

Happy baking ! Have a blessed weekend!


Wednesday, 1 October 2014

Pumpkin and Baby Spring Mix Salad


While my girl enjoyed so much and happily 'polished clean' a dish of fragrance crunchy toppings Lemon and Almond baked Salmon, I have this big tub of nutty pumpkin salad to enjoy ^-^!

I like pumpkin ... very often, I would just throw some into the rice cooker to cook with the rice and make 'pumpkin rice'.
Or make fried rice with pumpkin and raisins.
Or make some pumpkin soups/desserts be it savoury or sweet.

Pumpkin salad ? Nope!
Roasted or baked pumpkin ? Nope, and this is my first attempt in making pumpkin salad with a medley of baby lettuces.
Recipe adapted mostly  from Taste.com by Sarah Hobbs


Pumpkin and Baby Spring Mix Salad
600g pumpkin, deseeded, peeled, cut into wedges
2 teaspoons extra virgin olive oil
2 teaspoons honey
2 teaspoons sesame seeds

For the salad dressing:
1 tablespoon fresh lemon juice
1 tablespoon honey, extra
2 tablespoons extra virgin olive oil
2 teaspoons wholegrain mustard

142g Baby Spring mix (a medley of baby lettuces)
75g toasted pine nuts

Method:
Step 1 
Preheat oven to 220°C. Line a baking tray with non-stick baking paper. Place the pumpkin in a large bowl. Drizzle with oil and honey. Season with salt and pepper. Gently toss until the pumpkin is well coated.

Place in a single layer on the lined tray. Bake, turning once during cooking, for 25 minutes or until golden brown. Remove from oven and sprinkle evenly with the sesame seeds. Return to oven and bake for 5 minutes or until the seeds are lightly toasted. Remove from oven and set aside for 30 minutes to cool.

Step 2 
Combine the lemon juice, extra virgin olive oil, mustard and extra honey in a screw-top jar and shake until well combined. Season with salt and pepper.

Step 3 
Place the pumpkin, spinach (or mix baby lettuces) and pine nuts in a large bowl. Drizzle with the dressing and gently toss until just combined. Serve immediately.

Well, here's a bowl of refreshing healthy salad to munch munch! Really loved the sweet pumpkin tossed in a bed of crunchy baby mix and pine nuts ^-^! Enjoy!

Have a pleasant week !


This post is linked to the event Little Thumbs Up (Oct 2014 Event: PUMPKIN

Photobucket

Saturday, 27 September 2014

Chocolate Chip Buttermilk Pancakes

Bought a pack of buttermilk but did not bake the cake that I had planned to. Need to use before it expires soon. Craving for some pancakes for our breakfast ... and this recipe calls for buttermilk. Bingo! 
But ... Oh NO! 
Chocolate indulgence ... again ?! 
Hee hee ... ok ok in moderation ... 
Choco-licious Chocolate Chip Buttermilk Pancakes for our weekend brekkie.


The recipe yields 4 servings but I halved it to 2 servings. Recipe source : Annies eats

Chocolate Chip Buttermilk Pancakes
2 servings (about 10 pieces) enough for 2 - 3 persons.
Ingredients:
1 egg
240ml buttermilk
2 tbsps butter (melted and cooled)
1/4 tsp vanilla extract
125 grams all-purpose flour
1 tbsp sugar
1 tsp baking powder
1/2 tsp baking soda
1/2 tsp salt
105 grams chocolate chips

Method:
1) In a large bowl, lightly beat the eggs.  Whisk in the buttermilk, butter and vanilla extract and mix until well combined.  Add in the flour, sugar, baking powder, baking soda and salt.  Mix just until incorporated. Add in the chocolate chips and stir just until combined.

2) Preheat the oven to 90°C (to keep the cooked pancakes warm).
Heat a griddle or skillet over medium heat. Melt a thin pat of butter in the pan and spread it around.  Once the bottom of the pan has been covered, wipe the butter out gently with a paper towel so that only a very thin film remains.

3) Drop scoops of batter of your desired size (I used ice cream scoop) into the pan. Cook the first side until bubbles form on the surface and begin to pop, and the bottom is golden brown.  Flip gently with a spatula and cook again until cooked through and golden brown on both sides.  Transfer the cooked pancakes to an oven-safe dish in the warmed oven and repeat the process with the remaining batter.  Serve immediately.

Fluffy soft pancakes with chocolate chips. To serve, sprinkle some chocolate chips and drizzle maple syrup over the warm pancakes. As usual, my girl loved to spread with her favourite Nutella.
Yummy ! Choco-licious !
Have a nice weekend ^-^!


This post in joining Best Recipes for Everyone September Event : Chocolate Wonderland


Thursday, 25 September 2014

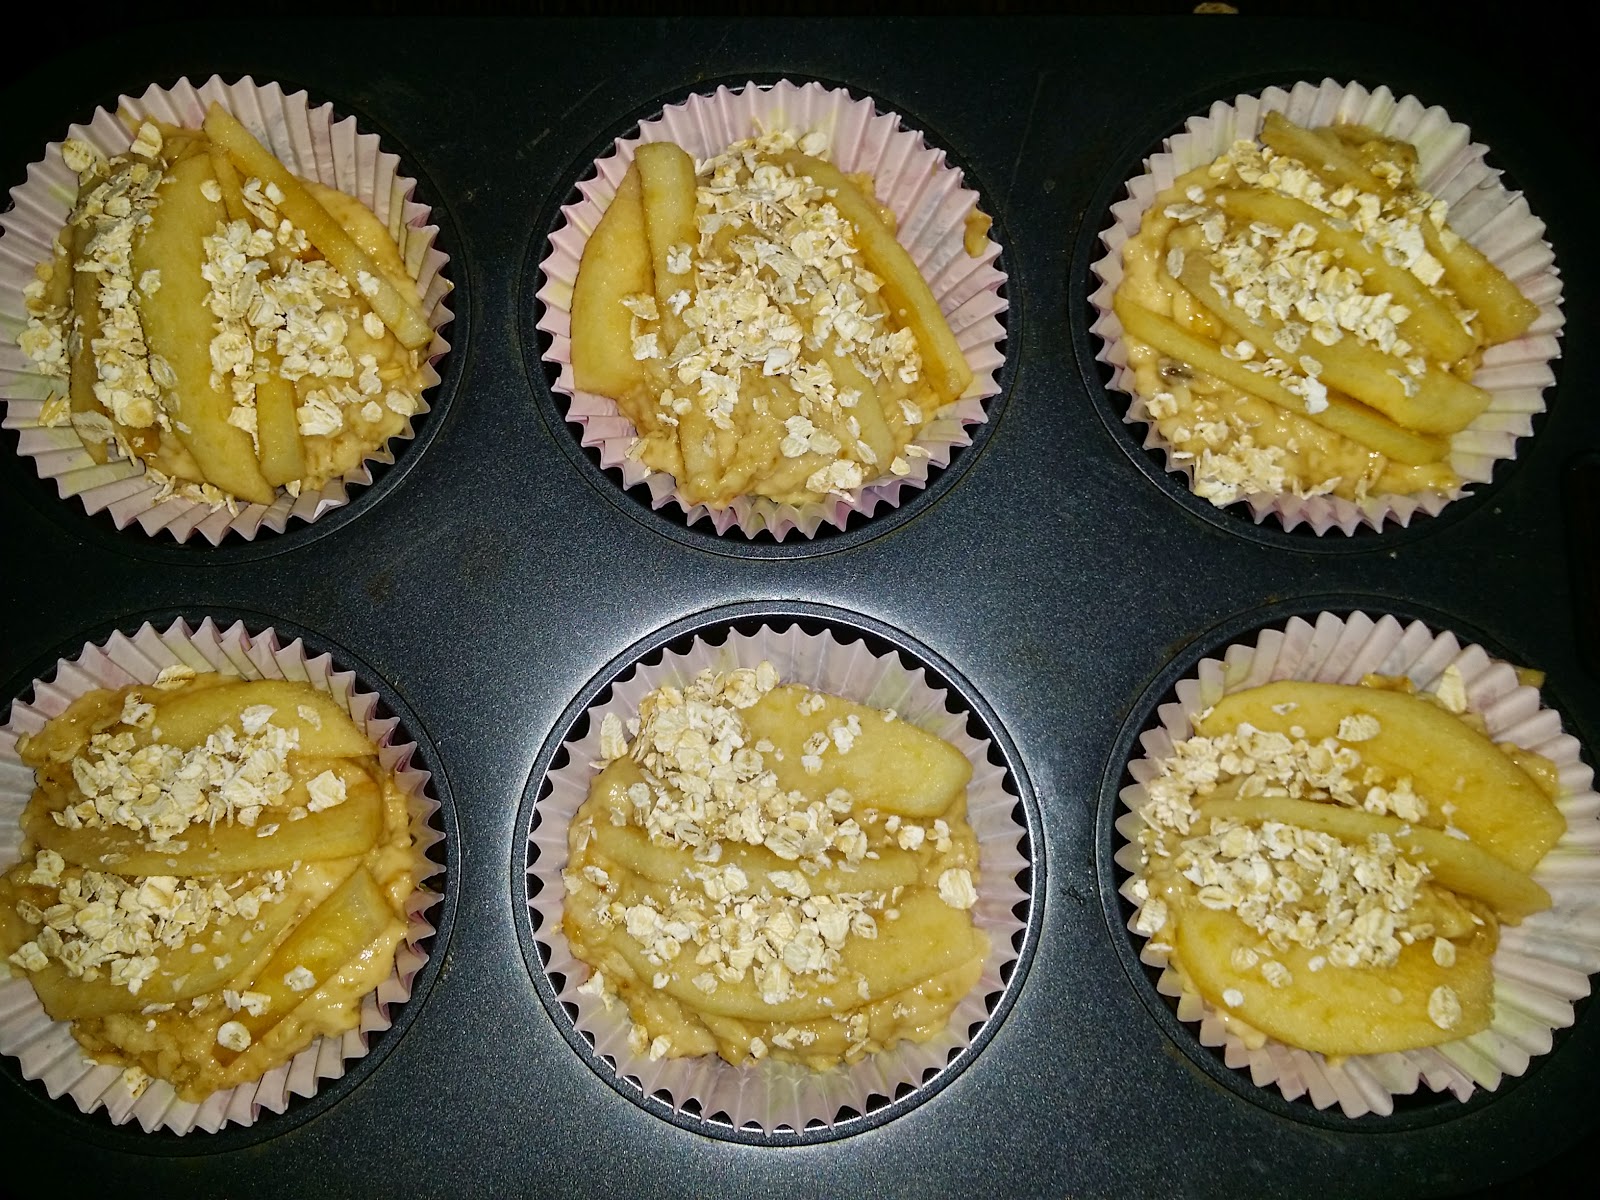
Apple & Oat muffins

I like to bake some healthy oatmeal muffins ... I want to add some fruits to the muffins too .... Ah ha! Apple + Oat ! That's because I've got a new pack of rolled oats and some apples 'idling' in the fruit basket ... lol !


Recipe source from Taste.com  I halved the recipe and made few slight modifications to suit our taste. Please visit Taste.com for the full recipe.

Apple & Oat Muffins (makes 6)
Ingredients:
70g self-raising flour
70 plain flour
1 teaspoon baking powder
60g light muscovado sugar
20g rolled oats, plus 1 tablespoon extra
100ml natural yogurt, at room temperature
1 egg, lightly beaten
50ml light olive oil
1 red or green apple, peeled, cored and thinly sliced

Method :
Step 1
Preheat oven to 180°C. Grease a 6 cups muffin pan with cooking spray or line with muffin cases.

Step 2
Sift flours and baking powder together. Stir in sugar and rolled oats.
Whisk yogurt, egg and oil together. Add to flour, mix until just combined. Do not over-mix.

Step 3
Divide mixture evenly into muffin pans until three-quarters full. Gently push slices of apple into mixture until covered and sprinkle with extra rolled oats.


Step 4
Bake for 25 minutes or until golden in colour and cooked when tested (insert a toothpick and it comes out clean). Cool for 5 minutes in pan before transferring to a wire rack to cool. Serve warm.

Yum yum .... tasted fluffy soft with some apple crisp.  Complete with a glass of juice/milk or your preferred hot beverage. Wholesome goodness healthy breakfast to start the day !

Enjoy & happy baking! ^-^!
Hope you'll have a great day too !


Photobucket

This post is linked to the event, Little Thumbs Up (September 2014 Event: Apple) organized by Zoe (Bake for Happy Kids), Doreen (My Little Favourite DIY) and hosted by Kit (I-Lost in Austen).

Monday, 22 September 2014

Lemon and Almond baked Salmon

As shared previously,  the complimentary Savour magazine from Cold Storage has a few interesting recipes that I'm keen to try.

My teens loved salmon. But seriously ... I don't like fish and could take only very selective ones. Needless to say ... I hardly cook with fish at home. Very occasionally I will make pasta with fish fillet, pan fried fillet (frozen non fishy smell), steamed Grouper fillet loaded with lots of ginger etc. The fishy smell and the sight of the fish bones really gets the nerves on me. But I do encourage them to have fish in their menu whenever we eat out.

Looking at some recipes from Savour, I know my girl would love to have this 'Lemon and Almond baked Salmon'! She keeps asking if I'm seriously going to cook salmon as I have never cooked salmon before.


And ta da ... Lemon & Almond Baked Salmon specially for her ^-^


I reduced the amount of ingredients just for 1 serving, omitted the green onions as she didn't like it.
Press bread mixture over the salmon
Here's the recipe adapted from the magazine Savour. The preparation and cooking time takes less than 45 minutes for me to whip up this dish.


I could smell that herbs fragrant.  She squeezed the lemon juice on the toppings. She said the crunchy toppings tasted refreshingly yummy with the salmon.
She gave big thumbs up and exclaimed 'very nice' !

If you like salmon, do give a try on this fragrant Lemon & Almond Baked Salmon.

I'm linking this post with 

Cook-Your-Books